Normal view

Coconut Chocolate Macaroon Recipe

By: David
20 April 2024 at 03:34

Chocolate coconut macaroons

Many people tell me this is one of their favorite recipes from my cookbook, Ready For Dessert. In addition to these fantastic Coconut-Dipped Chocolate Macaroons in it, you’ll find the much-loved recipe for Fresh Ginger Cake, which makes a fantastic dessert served with sliced, juicy peaches or flavorful strawberries and raspberries in the summer, or tangy lemon cream in the winter, as well as my other most frequently requested recipes.

I’m often asked about the different between Parisian macarons and American-style macaroons, like these. Both are egg white-based, however the European version (which was invented in Italy) uses almonds whereas the American ones use coconut. There’s some dispute about how the American ones came to be made of coconut; one theory is that European immigrants who came to the United States couldn’t get almonds, or they were too expensive, so they used coconut.

Another theory is that European companies wanted to ship their macarons over longer distances, so swapped out coconut for the spoilage-prone nuts. Others credit Franklin Baker, an American flour miller, who found the then-exotic shredded coconut more interesting (and less-expensive) to use than nuts. Either way, I like all kinds of macaroons…or macarons.

Coconut macaroon recipe

The French do make coconut cookies, which are called Congolais or Rochers à la noix de coco, usually shortened to Rochers coco, or coconut “rocks.” I’ve not seen them dipped in chocolate in any French bakery – but why not?

Chocolate coconut macaroons

I’ve tweaked this recipe over the years and tested them with flour alternatives, which I’ve noted in the headnote in the recipe, and they come out great. You can even skip swiping the bottoms in bittersweet chocolate if you wish. No matter how you make them, I hope they become one of your favorite cookies, too.

Print

Coconut and Chocolate Macaroons

From Ready for Dessert
I invariably make these cookies when I have extra egg whites on hand. The dough freezes beautifully if I don't plan to make the macaroons right away. These coconut macaroons can be made without the flour by substituting 2 1/2 tablespoons of cornstarch or potato starch for the flour. Readers have told me the recipe works well with 1/4 cup matzoh meal substituted in place of the flour.
Course Dessert
Cuisine American
Keyword coconut, cookie, macarooon
Servings 30 Cookies

Ingredients

  • 4 large egg whites
  • 1 1/4 cups (250g) sugar
  • 1/4 teaspoon salt
  • 1 tablespoon honey
  • 2 1/2 cups (200g) unsweetened shredded coconut (see note)
  • 1/4 cup (35g) flour
  • 1/2 teaspoon vanilla extract or vanilla bean paste
  • 3 ounces (90g) bittersweet or semisweet chocolate chopped

Instructions

  • In a large skillet or wide saucepan, mix together the egg whites, sugar, salt, and honey.
  • Over low heat on the stovetop, stir the egg whites and sugar together until the mixture is tepid, but not warm or hot. You don't want to cook them; just warmed slightly so they are looser.
  • Add the coconut, flour, and vanilla. Continue to stir the mixture over medium heat for a few minutes until it thickens to a cohesive mass. (It'll be like very thick oatmeal and the bottom will very slightly start to scorch.) Remove from heat. Transfer to a bowl to cool to room temperature.
  • When ready to bake, line a baking sheet with parchment paper or silicone baking mat and preheat the oven to 350º F (180ºC).
  • Form the dough into 1 1/2-inch (4cm) rounds in your hands, squeezing the dough to coax them into rough rounds (remember, the French call them "rocks," so they can be a uneven - for smoother rounds, dampen your hands), then place them evenly spaced on the baking sheet. Bake the macaroons until deep golden brown, about 18 to 20 minutes. Cool completely.
  • To dip the macaroons in chocolate, melt the chocolate in a clean, dry bowl set over a pan of simmering water (or in a microwave.) Line a baking sheet with plastic wrap or parchment paper. Dip the bottoms of each cookie in the chocolate and set the cookies on the baking sheet. Refrigerate 5-10 minutes, until the chocolate is set.

Notes

Unsweetened shredded coconut is available in most natural food shops or you can purchase it online. Flaked coconut is larger and I haven't tried these macaroons with the flakes but if that's all you have, I would pulse the flakes in a food processor a few times until they're finely shredded.
Storage: The baked macaroons will keep for up to three or four days if stored in an airtight container. If dipped in chocolate, store the cookies in a cool place. The dough can be refrigerated for up to one week or frozen for at least two months.

Strawberry Spritz

By: David
4 April 2024 at 14:47

Recently I started reaching for my bottle of Vermouth Blanc more and more. I had opened it to make an El Presidente cocktail, but during an interview on my IG Live channel with Pierre-Olivier Rousseaux, owner of Dolin distillery in France, he remarked that their Chambéryzette apéritif, made in the French alps, could be made at home, anywhere, with fresh strawberries and white vermouth. So I took the plunge and made a batch myself.

It’s very easy to make. Just slice or quarter a few fresh strawberries and within 24 hours, you can be enjoying your very own batch of strawberry apéritif!

White vermouth (vermouth blanc) is different than dry vermouth. For one thing, the botanicals used are different. Dry vermouth leans into its bitterness with wormwood, quinine, or other flavorings that keep it decidedly dry. White vermouth celebrates its sparkling-clear color with floral aromas, which can include elderflowers and citrus. While you could make this with dry vermouth, I do prefer it with the white vermouth, which in Italy is referred to as vermouth bianco.

When I took a sip of the strawberry-infused vermouth the next day, it seemed like it’d be a perfect candidate for a summery Spritz. So I mixed it with a splash of tonic water, and found it was just perfect as-is, with a handful of ice and some berries and maybe a slice of citrus in it. If you want to go full-on summer, you could replace the citrus with a slice of peach or nectarine, or maybe a few other types of berries.

Tonic water has become more of a topic of conversation lately. Brands like Schweppes are popular and readily available (and you can make your own tonic water, too), but some like to fine-tune their cocktails and apéritifs with a premium brand of tonic water. Fever-Tree, Q, and Fentimen’s are popular, but I kept mine French using Archibald, which uses gentian in place of quinine, to keep it resolutely Made in France. (Quinine doesn’t grow in France, but gentian does.) As far as I know, it’s not available outside of the country but feel free to find your own favorite where you live, and use that.

Print

Strawberry Spritz

For this spritz, I use white vermouth to infuse the strawberries which is more aromatic, and more floral than dry vermouth. In French, it's called vermouth blanc and in Italy, it's referred to as bianc. If you buy a bottle, you can also use it to make yourself an El Presidente cocktail.
You can toggle the flavors of this lively spritz in a different direction by using a flavored tonic water, such as one aromatized with pink grapefruit, pink peppercorn, or elderflowers.
Course Drinks
Keyword cocktail, spritz,
Servings 1 drink

Ingredients

For the strawberry-infused vermouth

  • 1 1/2 cups (375ml) vermouth blanc or dry vermouth
  • 8 medium-sized strawberries sliced or quartered

For the strawberry spritz

  • 2 ounces strawberry-infused vermouth
  • 2 ounces tonic water
  • quartered or sliced strawberries for garnish
  • slice of orange, lemon, lime wheel, or slices of nectarines or peaches for garnish

Instructions

  • To make the strawberry-infused vermouth, pour the vermouth in a clean jar. Add the strawberries, cover, and shake gently to encourage the strawberries to lend their flavor to the vermouth. Let stand 24 hours at room temperature out of direct sunlight, giving it a shake every so often.
  • To make the spritz, measure the infused-vermouth and tonic water into a footed goblet. Add a handful of ice and stir gently. Garnish with berries and citrus.

Notes

Storage: The strawberry-infused vermouth will keep for a few days at room temperature. After you can store it in the refrigerator where it'll keep for a few weeks. I left the strawberries in since I used mine within a few days, but if planning on storing it longer, you can remove them. (They're delicious to eat!)

Caramelized Peanut Coffee Cake

By: David
20 January 2024 at 15:27

Whenever I’m looking through a new cookbook, what never fails to make me bookmark a recipe is when I come across something that has caramelized nuts on it, or in it. Whether it be Honey-Almond Squares or Swedish Almond Cake, you can be sure you’ll find me in my kitchen within the next 24 hours, and baking it. This Caramelized Peanut Cake that takes very little effort to make, but yields big rewards. Big, crunchy, peanutty ones, with a bonus of moist, buttery cake underneath, holding it all together.

The good thing about this cake (aside from it being covered with a generous pile of caramelized salted peanuts, as if it can get any better than that) is that you likely have most of the ingredients already on hand. That was my case, so I was able to make it right away. The only ‘technique’ you need to master is boiling butter, honey, cream and sugar, then stirring in the roasted peanuts. The topping couldn’t be easier.

This recipe is adapted from The Joys of Baking, an unabashedly sweet ode to baking by Samantha Seneviratne that riffs off stories and situations in her life, ones that inspired the recipes. Gingered Cashew Nut Brittle showered with sesame seeds, a Roasted Plum Cloud Cake topped with swirls of snowy meringue, bittersweet Amaro Stracciatella Ice Cream, and Salted Chocolate-Covered Chocolate Caramels are the kinds of things that I’d agree are a joy to bake, and to eat.

So how could I resist cake topped with SALTED CARAMELIZED PEANUTS? Sorry for shouting, but this cake is something to shout about. I mean, just look at it…

The only difficulty you might encounter is getting the cake neatly out of the pan. Mine got a little dark around the edges (why, oh why, wasn’t I born a food stylist, to make mine as neat as the one in the photo in the book?) I found that letting the cake rest for about 5 to 10 minutes after it comes out to the oven, then using a sharp paring or utility knife that’s either sprayed with a bit of non-stick spray, or lightly greased, to separate the sides from the cake pan while it’s still warm, is your best bet for easy (or easier) removal of the ring of the springform pan. Any pieces that fall off can be reaffixed to the cake.

Or let them cool…and eat them yourself.

Which is what I did with the missing chunk in the photo, above. (Why, oh why, wasn’t I born with photo editing skills?) But honesty is the best policy, and I hope you’ll trust me when I say this cake is as good as it looks. And if a few pieces go missing, here and there, well – you only have yourself to blame. But unlike me, you don’t have to tell anyone about it.

Print

Caramelized Peanut Coffee Cake

Adapted from The Joys of Baking: Recipes and Stories for a Sweet Life by Samantha Seneviratne
One tip: If you have low-fat milk on hand, you don't need to go out and buy whole milk just to make this cake. Since the topping only calls for 1/4 cup (60ml) of cream, you'll likely have some leftover cream if you've gone out and bought a carton or bottle. So you can mix some of that cream in 50:50 proportions with low-fat milk to approximate whole milk. Another tip from a reader, who used a silicone cake mold (which I don't own) and said the cake slipped out of the mold easily and the sides didn't get too dark.
Servings 8 servings

Ingredients

For the peanut topping

  • 6 tablespoons (3 ounces, 85g) unsalted butter cubed
  • 1/3 cup (65g) sugar
  • 3 tablespoons (60g) honey
  • 1/4 cup (60ml) heavy cream
  • 1 1/2 cups (7 ounces, 195g) roasted, salted peanuts

For the cake

  • 6 tablespoons (3 ounces, 85g) unsalted butter cubed, at room temperature
  • 2 cups (280g) flour
  • 2 teaspoons baking powder preferably aluminum-free
  • 1/2 teaspoon kosher or sea salt
  • 1 cup (200g) sugar
  • 1 large egg at room temperature
  • 2 teaspoons vanilla extract
  • 3/4 cup (180ml) whole milk at room temperature

Instructions

  • Butter the sides and bottom of a 9-inch (23cm) springform pan very well. Preheat the oven to 350ºF (180ºC).
  • To make the peanut topping, warm the unsalted butter, sugar, honey, and heavy cream in a small saucepan, stirring occasionally until the butter is melted. Bring the mixture to a boil and let it cook at a low, but steady boil, for 3 minutes. Remove from heat and stir in the peanuts. Set aside, stirring every once in a while to cool it down, while you make the cake batter.
  • In a small bowl, sift or whisk together the flour, baking powder, and salt.
  • In the bowl of a stand mixer fitted with the paddle attachment, or in a large bowl mixing by hand with a spatula or wooden spoon, beat the butter and sugar until light and creamy, about 3 minutes. Reduce the speed to low and add the egg and vanilla extract, stirring to combine. (You may want to stop the mixer during the step, and scrape down the sides if using a stand mixer, to make sure all the ingredients are well incorporated.)
  • Stir half of the flour mixture into creamed butter (with the stand mixer set on low speed), then add the milk, then mix in the rest of the dry ingredients.
  • Scrape the batter into the prepared pan and smooth the top. Spoon the peanut mixture over the top of the cake. It will have thickened up but do your best to make sure it's relatively even, and avoid pushing it right up to the sides of the pan, as it'll stick to the pan and make it a little difficult to release later.
  • Bake the cake for 50 to 55 minutes, until a toothpick inserted into the center of the cake comes out clean. Do not touch the top of the cake to check for doneness as the caramel is hot and sticky, and it can burn. (Trust me...) Let the cake stand 5 to 10 minutes, then lightly grease a paring or utility knife and run it around the outside of the cake to release it from the sides of the pan. Then remove the outside ring of the springform pan. If any bits of caramelized peanuts stick or come off when removing the outside ring, either reunite them with the cake, or let them cool and eat them yourself.

Notes

Serving: Serve the cake just as it is, or with lightly whipped cream or a favorite flavor of ice cream.
Storage: The cake is best the day it's made but can be kept at room temperature for up to three days either well-wrapped or under a cake dome.

Far From the Tree: Apple-Pear Cocktail

By: David
19 December 2023 at 16:50

The other day I was thinking of cocktails that were fall and winter-friendly. Calvados (apple brandy) of course is always in season, but I also had a bottle of spiced pear liqueur from St. George Spirits in California on hand that has a lovely pear flavor mingled with a bouquet of spices, that I’ve been meaning to incorporate into a cocktail.

I had a hunch that it would be well-paired with French apple brandy, and that hunch proved correct in this Far From the Tree cocktail, a nod to the expression that “the apple doesn’t fall far from the tree” as the apple brandy – and the sparkling apple cider – fell into my kitchen, which are quite far from any trees. But happily, they all made it into my glass.

(And I’m hoping that all made sense. I’ve been trying to translate some American expressions for my French partner, especially “They drank the Kool-Aid,” which I’ve decided just isn’t translatable.)

The Spiced Pear Liqueur is made by St. George spirits, a distiller in my old stomping grounds of Alameda, California. I knew the founder, Jörg Rupf,  who started distilling European-style spirits in the San Francisco Bay Area in 1982. At the time, few knew what eau-de vie was.

Jörg was a wealth of knowledge and I always learned something when I spent time with him, and was surprised when he told me one day that it took around 50 pounds (23kg) of Bartlett pears to make just one bottle of pear eau-de-vie, and he laughed that his biggest restaurant account sold only a half bottle of eau-de-vie every two months. He reveled in the bounty of excellent produce in California, making eau-de-vie from everything, including kiwifruit, apples, raspberries, pears, and even holly berries.

One day while at the distillery he gave me a sip of apple brandy which he’d made but promptly forgot about, which was similar to Calvados, but without the terroir. (To be called “Calvados” the apple brandy has to be made in Normandy with only certain varieties of local apples, with a few pears added for their aroma, and must be aged in wooden barrels for at least two years.) His apple brandy had been sitting in a barrel for ten years and when he discovered it, it was delicious.

Jörg eventually retired from distilling and sold the company, which is still going strong, and St. George Spirits under master distiller Lance Winters, continues to make excellent liqueurs that include gin and other distillations (they now call their eau-de vie “brandy”), absinthe, vodka (including a green chile one), shochu and Bruto Americano, a botanically-rich alternative to Campari that I particularly enjoy, with no artificial colorant, made with an expressive blend of local botanicals and other ingredients.

But even if you’re not in Normandy, or Northern California, and far from an apple (or pear) tree, you can still enjoy these fall and winter flavors in a cocktail.

Print

Far From the Tree

If you can't get the spiced pear liqueur, you could use a good-quality triple sec, orange liqueur (such as Grand Marnier) or another good fruit-based liqueur. Allspice Dram (homemade or store-bought) is another possible liqueur to use, which has spicy notes.
Be sure to use a slightly larger coupe glass if you have it, since depending on the size of your ice cube, you want there to be enough room for the sparkling cider on top.
Course Drinks
Servings 0

Ingredients

  • 2 ounces Calvados
  • 1/2 ounce sweet vermouth
  • 1/2 ounce St. George spiced pear liqueur
  • sparkling hard cider or sparkling wine

Instructions

  • Add the Calvados, sweet vermouth, and pear liqueur to a cocktail mixing glass.
  • Fill the glass two-thirds full of ice and stir briskly until well-chilled, about 15 seconds. Strain into a chilled coupe glass. Add an ice cube and a splash of sparking cider.

Cranberry Chutney

By: David
13 December 2023 at 15:17

Have you ever gone away for a few weeks and found out that you’d left the freezer door ajar? Well, I did. And let me tell you, it wasn’t pretty.

Before traveling, since I’m anti-gaspillage (against food waste), I jammed whatever I could into my already-stuffed freezer, including a half-eaten tomato tart, which I thought would be nice to have ready-and-waiting upon my arrival home, partially-used blocks of butter, and the miscellaneous leftover ends of bread that one collects when one constantly buys too much bread. When I returned, I realized that one of those bread pieces had been caught in the door and kept it from sealing closed.

Oddly, the fridge doors have an alarm, which beeps if they’re not completely shut, but the freezer door doesn’t. Coming home to an array of items that were half-frozen, half-defrosted (with gloopy liquid oozing out of them), possibly defrosted and then refrozen, and a few that were unidentifiable, was a bummer.

Some things I knew had to go – like sausages, stock, and a rather moldy half-eaten tomato tart, that I was sure could be reheated when I returned from my travels. (I won’t share a picture of that, but it looked like it needed a good shave.) But I also had several precious bags of cranberries that I’d stashed away for Thanksgiving and while they weren’t completely defrosted, I didn’t want to (or know if I could) refreeze them, so I decided to make chutney…and a whole lotta it.

Fortunately, all my candied and dried fruits were in fine condition and since I was cleaning my freezer, I also did a little purge of my drawers of things that weren’t sparking joy in my kitchen, and cooked them all up with some spices, some honey, orange juice, and vinegar, to make this tangy-tangy condiment.

(Just a note that dried fruits always spark joy in me. But a drawerful of little crinkled up cellophane bags with thirteen raisins or two dried apricots in them, don’t.)

To share my joy with you, I whittled my catastrophe-size recipe down to a reasonable recipe, but you’re welcome to double, triple, or quadruple it. Although it’ll keep for a few weeks in the refrigerator, I had so much that tightly sealed the overload into freezer bags and placed them back in the congélateur. However next time I’m headed out of town, I’m going to make sure my freezer is tightly sealed, because I’d be a bummer to lose those.

Print

Cranberry Chutney

Feel free to use any type, or combination, of dried fruit. Dates, figs, raisins, apricots, candied ginger, dried cherries, cranberries, pineapples, or other favorites, work well. (Of course, there's no need to chop the raisins or dried cranberries or cherries, if using.) You could also include chopped candied orange or lemon peel in the mix. Any tart apple is fine to use, but if using Golden Delicious apples, make sure to chop them very fine (unless you like chunks of apples in your chutney) as they don't break down as other apples do. If using frozen cranberries, no need to thaw them in advance. Just add them frozen and cook as directed. An interesting addition is to cook the chutney with a very small branch of rosemary. It'll lend an herbaceous note to the chutney. Remove it after the chutney is cooked. Or a tipple of whiskey (or an anise-based spirit, such as pastis) added right before the end of cooking could also be nice.
Course Side Dish
Keyword chutney, cranberry, sauce
Servings 3 cups (750ml)

Ingredients

  • 12 ounces (340g) cranberries fresh or frozen (if using frozen, no need to defrost before using)
  • 1 cup (125g) diced dried fruit (see headnote)
  • 1 tart apple cored, and finely diced (peeled or unpeeled)
  • 2/3 cup firmly-packed (140g) light brown sugar
  • 1/2 cup (125ml) orange or apple juice
  • 6 tablespoons (90ml) apple cider vinegar plus more if desired
  • 1 tablespoon honey
  • 1/4 teaspoon ground cinnamon
  • 1/4 teaspoon ground dried ginger
  • 1/8 teaspoon ground cloves
  • pinch red chile flakes
  • pinch salt

Instructions

  • Mix all the ingredients together in a large saucepan.
  • Cook over medium-high heat, stirring frequently, until the cranberries pop and begin to break down and release their juices, and the apple pieces are cooked through. Time will vary but it'll take about 10 minutes or so.
  • Remove from heat and when the chutney is cool enough, taste and add 1 (or 2) tablespoons additional vinegar, if desired.

Notes

Serving: Serve with turkey (at Thanksgiving or another holiday), or with poultry, pork, roasted vegetables, or even cheese.
Storage: Store in jars in the refrigerator until ready to use. The chutney should keep for at least a month. It can also be frozen for up to six months. If you wish to can it, you can find guidelines at the National Center for Home Food Preservation website.
 

Coffee Caramel Panna Cotta

By: David
30 November 2023 at 15:08

Two of my favorite flavors come together right here, in this Coffee Caramel Panna Cotta, which offers up the rich flavor of caramel with a few strong shots of espresso. I seem to have good caramel karma and when I baked professionally, the executive pastry chef at one restaurant told me that I was the one she wanted to make the caramel desserts since I had a knack for getting caramel just right.

While I was flattered, in reality, caramel isn’t that hard to make. Like riding a bike, or when you wake up one morning and they upgrade the software on your phone for whatever reason, there’s a learning curve. (However, I still haven’t figured out how to use my photo editing software. Someone recommended a book that’s a whopping 533 pages long, but honestly, can’t they just make these things more intuitive?)

Unlike unintuitive tech, once you get the hang of making caramel, you know the pitfalls and issues that can arise, and you’ll feel like a pro when you take a taste of the finished caramel dessert and realize – whether a chef tells you so or not – that you’ve done a good job. You are a good person, and I know you can do it, too!

Here I use a dry caramel with no liquid added; it’s just sugar. The picture above may look scary, as in “What do I do wrong?” But dry caramel is pretty foolproof. I’ve given tips on making caramel here, but the basic action starts with spreading the sugar in a wide pan or deep saucepan (use a good-quality one for best results as thin pots and pans don’t heat evenly), heating it until it starts to liquify, then stirring it gently as you go, until it’s completely liquified.

Once it’s liquified, keep gently stirring it, and start watching carefully as things will now move quickly and you want to pay close attention to what’s going on in the pan. Don’t let anything distract you as a few seconds can make all the difference. Make sure the warm cream ready to go.

The caramel quickly goes from what it looks like above, to what it looks like below. When the caramel is bubbly, amber-colored (the color of an old penny), and smells just slightly smoky – as in, if you let it go a few more seconds, it’ll burn – turn off the heat and immediately add the warm cream to stop the cooking.

You want to get it to just the right color, aroma, and flavor where it’s cooked enough so it’s in the middle ground between being not sugary sweet, but not burned either. (I recently did a caramel video tutorial on Instagram that you might find interesting where I explain and demonstrate it in detail.)

Once the caramel is done, and the cream has been added, it’s hard not to want to pour the caramel below in a bowl and spoon the whole thing up. Right?

I made this Coffee Caramel Panna Cotta recipe a few times the past week, playing around with different amounts of espresso and caramel. The caramel made with 3/4 cup (150g) sugar is more caramel-forward and made the coffee flavor a little less-prominent in the finished panna cotta. So I gave you a range to choose from in the recipe.

Panna cotta is different than its custardy counterparts as it’s made with gelatin rather than eggs. There’s no water bath or constant checking in the oven to check for doneness. Although the name in Italian means “cooked cream,” the dessert has a relatively light profile since whole milk is used, rather than all cream. Here I use just enough cream to ‘stop’ the caramel (whole milk can curdle in caramel) then I add whole milk later, although lowfat will work, too. I’m not against lowfat milk. Nor am I against decaf if you want to use that.

When I had to give up coffee for a while, I turned to an instant roasted grain-based substitute, which can fill in for coffee in baking, too. Just make it as strong as espresso. Most natural food stores and well-stocked supermarkets carry different brands of them. If anyone gives you a hard time for not drinking coffee, which happened to me when I had to give it up, many espresso bars in Italy offer caffè d’orzo made with roasted barley. And anyone who wants to argue with Italians about anything coffee-related, let me tell you, it will not end in your favor.

Once you’ve mastered caramel, chocolate curls are always fun to try, which you can make by either scraping a chef’s knife down a bar of milk or dark chocolate. If using dark, use one that’s not too cold or the curls will shatter. Pastry chefs will sometimes rub a chocolate bar briskly up and down with their (clean and dry) hands to warm it up a bit before trying to make curls.

Place the block longwise at the edge of the counter you’re standing at and, holding the bar in place against you with your waist, holding the handle and the top of the blade, scrape curls toward you with the knife at a near 90º angle, angling the blade just a bit away from you as you drag it down. You don’t have to press down very hard and after few tries, you’ll find the angle and pressure that works best for you. Of course, be careful dragging the knife toward you and make sure the blade is facing away from you. You can also use a sharp swivel-bladed vegetable peeler and make shorter curls by running it down the long side of a chocolate bar. Once again, milk chocolate is softer and easier to use than dark if you want more cohesive curls. But there’s no shame in shards, either.

As mentioned, I made a few batches of this Coffee Caramel Panna Cotta before settling on the proportions here. I know some of you may have questions about using gelatin and gelatin substitutes, which I answered here. In Europe, sheet gelatin is more prevalent but sheets vary in size and in strength, ranging between five different strengths. The best approximation here would be to use two sheets of gelatin: a general rule is 3 sheets of gelatin equals one 1/4 ounce (7g) envelope gelatin. To use sheets here, soften them in a bowl of cold water for a few minutes then wring them out and add them to the warm (not boiling hot) caramel mixture after you’ve added the cream.

Print

Coffee Caramel Panna Cotta

If you want a fuller caramel flavor, use the 3/4 cup (150g) of sugar to caramelize in step 2. The caramel flavor will be a bit more pronounced than the coffee flavor but I tried it both ways and like it, for different reasons. And you can use lowfat milk rather than whole milk, although it'll be less-smooth, but I wouldn't call this an overly rich dessert.
It goes without saying that the stronger the espresso, the more forceful the coffee flavor will be. I tried it with a few long (allongé or lungo) shots of espresso as well as espresso made in a moka pot, and both were good. If you don't have an espresso maker, use good-quality instant espresso powder dissolved in hot water. Taste and make sure it's quite strong as it'll be diluted later with the other ingredients. I've mentioned some coffee alternatives in the post.
I've not had experience using agar-agar, but fish-based gelatin is available and is said to work the same as standard gelatin. For more on gelatin, including using sheet gelatin, check my post on how to use gelatin. If you do try sheet gelatin, or another type, feel free to share how they work out in the comments.
When done, because these aren't baked, you can simply pour the finished mixture into coffee or espresso cups or other decorative glasses. The number of servings will depend on how large or small you make them. The recipe plug-in I use to write up recipes so they're printable doesn't allow me to add a range of serving sizes (which I learned when they kept disappearing after I added them...) but this recipe will make 4 to 6 servings.
Course Dessert
Servings 4 servings

Ingredients

  • 1 cup (250ml) whole milk (lowfat can be used)
  • 1 1/2 teaspoons unflavored powdered gelatin
  • 2/3 - 3/4 cup (130-150g) sugar (see headnote)
  • 3/4 cup (180ml) heavy cream warmed
  • 1/3 cup (80ml) liquid espresso
  • 1/2 teaspoon vanilla extract
  • pinch of salt

Instructions

  • Pour 1/2 cup (125ml) of cold milk in a small bowl and sprinkle the gelatin granules over it in an even layer. Set aside for at least 5 minutes to allow the gelatin to soften.
  • Spread the sugar in an even layer in a medium skillet or wide, deep saucepan. Warm the sugar over medium heat until it starts to liquify. (Generally it'll start to liquify in certain spots, depending on your pan.) When it starts to melt, gently stir the sugar with a heatproof utensil so it liquifies evenly. It will get grainy as you stir it, but as you continue to cook it, it should smooth out as it begins to take on a light amber color.
  • Continue to cook the sugar, swirling the pan more than stirring it, until the caramel starts to smoke and is a deep amber color. Smell the caramel and when it just starts to smell smoky, turn off the heat and add the warm cream gradually, stirring, until it's incorporated into the caramel. If there are any lumps, continue to stir the mixture until the lumps are melted. (You may need to rewarm the mixture over very low heat to get them all melted.)
  • When the mixture is cooled down a bit, until it's the temperature of a very warm cup of coffee, add the softened gelatin and stir until dissolved, then stir in the remaining 1/2 cup (125ml) of milk, espresso, vanilla, and salt.
  • Transfer the mixture to a large measuring cup so it's easier to pour, and divide it into custard cups or glasses. Depending on the size of servings you want, choose whatever cups or glasses you'd like to use. Chill until firm, about 6 to 8 hours, or overnight.

Notes

Serving: Serve the custards cold, on their own or with a dollop of whipped cream. They can be decorated with chocolate shavings, a sprinkle of cocoa powder, or toasted sliced almonds.
Storage: The custards will keep for up to five days in the refrigerator. 

Bourbon-Ginger Pecan Pie

By: David
22 October 2023 at 13:49

Pecan Pie with Bourbon and Ginger

I wasn’t planning on beginning this post for a pie recipe with anything other than a story about how much I liked it, encouraging you to make it. (Which I’ll get to later.) But after I had started writing it, several neighborhoods in Paris came under attack, including mine, and I put everything on hold.

Pecan Pie with Bourbon and Ginger

Cafés and restaurants that I knew, and areas that I frequent, were targets, as was the area around the theatre where my outdoor market is, which suffered the worst of it. Everyone I know is okay, but others were not so fortunate. It’s a crazy world we are living in and often we just see it on television and switch the channels to something more entertaining, so we don’t have to think about it. But when it happens right outside your door, or in a city that you love so much (whether you live there or are just an occasional visitor), you can’t avoid the shock and the grief. In addition to some introspection, my hope is that this will bring a conversation and dialogue that will somehow address why – and how – this happened, and where to go from here.

I couldn’t think of a very good transition from the heartbreaking tragedy, to pie, and I’m not used to being short on words, so I’ll just say that I was happy to have this pie sitting on the counter after all that happened this weekend. It made us feel a little better.

Pecan Pie with Bourbon and Ginger

Some say baking heals and while I’m not much for catch-phrases and slogans, it did feel nice to be rolling out some dough to have a pie around. And a new one to me, at that. A few years ago I gave pecan pie a makeover using dark chocolate chunks, which came out so well that it became my go-to pecan pie.

Pecan Pie with Bourbon and Ginger

But with the upcoming holidays arriving, I was perusing First Prize Pies from Allison Kave of Butter & Scotch, looking for another pie to make for the fêtes, and landed on her Bourbon ginger-pecan pie.

As luck would have it, in addition to a bag of beautiful pecans, I also had a bottle of Knob Creek smoked maple bourbon that was so good that it was freaking me out. It was a gift from my bourbon-loving friend Elizabeth Karmel and I was looking for an opportunity to crack it open. Recent events make me realize that you don’t necessarily need to squirrel everything away until another time or save it until later. Maybe now it that time.

Pecan Pie with Bourbon and Ginger

This dialed-up pecan pie won first prize at the Brooklyn Pie Bake-Off, and if you’ve visited Brooklyn in the last few years, you’ll know that there’s some heavy competition out there in the cooking and baking categories. So that’s saying something. Allison noted that a heavy hand with the bourbon is always appreciated. (And I agree.) But it’s also special because of the triple-whammy of ginger, courtesy of a handful of candied ginger, a spoonful of dried ginger, and a dose of freshly grated ginger in the nutty filling.

Pecan Pie with Bourbon and Ginger

It was hard to interrupt him while he was eating the pie so ravenously. But when he came up for air, Romain said it was the best thing he’d ever eaten. And that’s coming from someone who’s often looked at me quizzically when served some of the foods associated with Thanksgiving that perplex the French: Gravy? Pepperidge Farm stuffing mix? A one-week obsession with cranberries? Marshmallows? Sweet potatoes? Marshmallows and sweet potatoes together?

Pecan Pie with Bourbon and Ginger

It helps that he, like any sane person, loves maple syrup, as well as fresh and candied ginger, which the French call gingembre confit. I gotta say, I loved this pie as much as he did. The zing of ginger really took it up beaucoup de notches, not just one notch, and the shots of bourbon helped temper what is traditionally a rather sweet dessert, which this pie isn’t. Or wasn’t, I should say. Because it’s now long-gone.

Pecan Pie with Bourbon and Ginger

Whipped cream is always the classic to serve with pecan pie. If you’re looking for an ice cream to pair with it, I recommend white chocolate-fresh ginger ice cream, or it might also be nice with milk chocolate ice cream instead, if you’re someone – like me – that has a hard time imagining dessert without chocolate. And if that’s the case, bourbon always plays a good second fiddle to chocolate. The pecans and maple syrup-rich filling are an added bonus.

Print

Pecan Pie with Bourbon and Ginger

Adapted from First Prize Pies by Allison Kave I loved the idea of adding three kinds of ginger to pecan pie and using maple syrup as a sweetener. If you don’t have maple syrup, you can go with golden syrup, which is available in well-stocked supermarkets (depending on where you live), or online. I’ve not used it, but some recommend sorghum syrup as another substitute. Because I’m like that, I veered from the original proportions a bit. One was that I added a few more pecans, and toasted them first, adding an additional handful to the baking sheet to make up for the ones that I nibbled on. ; ) I also added some melted butter to the filling to give it a little extra silky richness. If you don’t want to use bourbon, dark rum would be a nice substitution, as would Cognac or rye whiskey. If you want to leave out the liquor, just add 2 teaspoons of vanilla extract and a few drops of lemon juice to counterbalance the brown sugar and maple syrup. Although I didn’t do it, you could brush the rim with an egg wash – one egg yolks mixed with 1-2 teaspoons of milk, and brush it over the rim before baking the pie. If glazing the rim, it may need to be covered during baking if it gets too dark before the filling is done. You can fashion strips of aluminum foil to cover the rim of the pie if that happens.

Ingredients

For the dough

  • 1 1/4 cups (175g) flour
  • 2 teaspoons sugar
  • 1/4 teaspoon salt
  • 4 ounces (115g) chilled unsalted butter cubed
  • 3-4 tablespoons ice water

For the pecan pie filling

  • 1 cup (215g) packed dark brown sugar
  • 1/2 cup (125ml) dark amber maple syrup
  • 3 large eggs at room temperature
  • 4 tablespoons melted butter salted or unsalted
  • 3 tablespoons bourbon
  • 2 teaspoons grated fresh ginger
  • 1 teaspoon ground (dried) ginger
  • 1/2 teaspoon vanilla extract
  • 1/4 teaspoon salt
  • 2 cups (225g) pecans lightly toasted, very coarsely chopped
  • 1/4 cup (50g) candied ginger finely chopped

Instructions

  • To make the dough, mix the flour, sugar, and salt in the bowl of a food processor, or in a stand mixer fitted with the paddle attachment. (The dough can also be made by hand, in a bowl with a pastry blender, or using your hands.) Add the chilled butter and mix or pulse the dough until the butter is broken up into small pieces about the size of peas.
  • Add 3 tablespoons of ice water and mix until the dough begins to come together. If necessary, add 1 more tablespoon of water if the dough needs it to come together. Turn the dough out on a work surface and give it a few turns with your hands. Shape the dough into a disk, wrap in plastic wrap, and refrigerate for at least 1 hour.
  • Roll the dough on a lightly floured surface, or between two pieces of parchment paper until it’s about 13-inches (33cm) in diameter. Brush off any excess flour and transfer it to a 9-inch (23cm) pie plate or pan. Tuck the overhanging edges under, between the rim of the pie plate and the dough, and crimp the edge of the dough. Chill the dough in the refrigerator until firm.
  • To bake the pie dough, preheat the oven to 375ºF (190ºC). Prick the pie dough a few times with a fork. Line the pie dough with aluminum foil and fill halfway with beans, rice, or pie weights. Bake until the dough is set and starting to get lightly golden brown, about 15 to 20 minutes. Lift out the foil with the weights and bake until the dough is well-browned, about 5 to 8 minutes more. Turn the oven down to 350ºF (180ºC).
  • To make the filling, in a large bowl, whisk together the brown sugar, maple syrup, eggs, melted butter, bourbon, fresh ginger, ground ginger, vanilla, and salt. Stir in the pecans and candied ginger.
  • Pour the filling into the prebaked tart shell and bake until the center of the pie is seems just about set. It should still jiggle a little. Begin checking it at the 40 minute mark, but it may take 45 to 50 minutes to reach that point of doneness. Remove it from the oven and let cool on a wire rack.

Notes

Serving and storage: Pecan pie is best served at room temperature and it’s easier to cut when it’s cooled completely. Although it’s no slouch if slightly warm, as long as you don’t mind the pieces looking a little sloppy. Ice cream or whipped cream are fine accompaniments.
The dough can be made up to two days in advance and refrigerated, or frozen for up to two months, either unrolled, or rolled out and fitted into the pan.
The baked pie can be kept at room temperature for up to four days. I’ve not frozen pecan pie but it can probably be done, if well wrapped.

Related Recipes

Cranberry Raisin Pie

How to make candied ginger

Chocolate Pecan Pie

Apple Harvest Tart

French Apple Cake

Pasta Bolognese

By: David
27 September 2023 at 10:25

During the current lockdown in Paris, you can still get most things at the supermarket. True, there’s less of a selection as some items are more popular than others; butter, of course, is popular, and so is flour. Fortunately I always have a good stock of both on hand, lockdown or not, but I did neglect to replenish my chocolate supply. But the pasta and rice aisles have suffered the most damage, and the selection of what’s available has been sparse.

Since I’m limiting my time going out, and food shopping, the other day I went to the frozen food store, Picard. Everyone in France loves Picard, although I’m usually happy to dice an onion and don’t need to buy frozen pre-diced onions, nor do I need to buy ice cream. (Theirs is rather good, but I’ve usually got several batches of my own in the freezer.) But I was craving pizza and they have a frozen one with arugula and speck that’s pas mal, as they say in French, which actually means “not bad.” However frozen pizza seems to be as popular as rice and pasta, so I had to get another kind that wasn’t so great (pas terrible.) But I did pick up a bag of those onions and some ground beef because I’ve also been craving Pasta Bolognese, and they were there, and so was I. So I caved.

Continue Reading Pasta Bolognese...

Salted Butter Chocolate Sauce

By: David
18 September 2023 at 14:19

salted butter chocolate sauce recipe

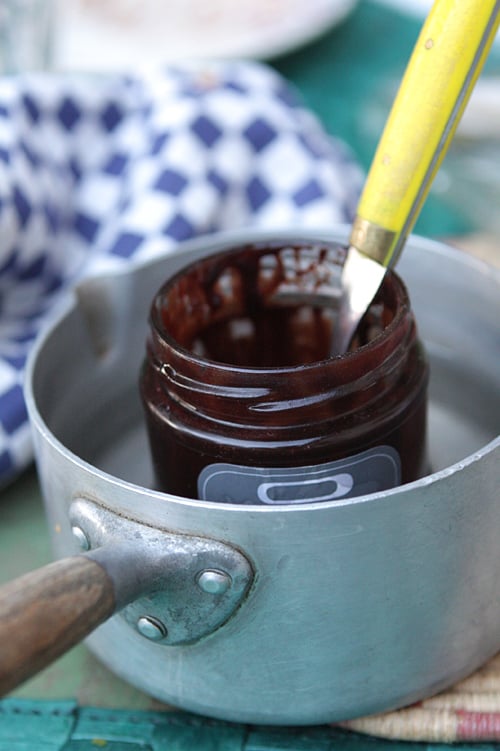
When it comes to baking and desserts, one doesn’t necessarily think of salt as a flavor. But more and more, I keep considering, and reconsidering, the role that salt plays in just about everything I bake. And because I keep both salted and unsalted butter on hand – I can’t imagine my morning toast without a little salted butter spread over the top – I’ll sometimes reach for the salted variety when tackling a baking project or making dessert.

salted butter chocolate sauce

I wasn’t the first person to put salt on dessert; people from various cultures have been sprinkling salt on fresh fruit for ages. And many pastry chefs, as well as some big chocolate companies, have gotten in on the “salt in chocolate” act as well.

fleur de sel chocolate

But I’ve gotten so used to sprinkling it on sweets that sometimes if I’m having my last course in a restaurant and I think the dessert needs a little perking up, you’ll find me looking around the table for a little bowl of flaky sea salt. Salt is so important to me that I’ll sometimes carry a little wooden box of fleur de sel, which when I’d bring out in restaurants, my co-diners would give me a look as if I was being pretentious. (Then – of course – they’d ask if they could have a pinch too.)

Continue Reading Salted Butter Chocolate Sauce...

❌