There are many iterations of chocolate cake, and I love each and every one of them. You could hand me a flourless chocolate cake, a chocolate mug cake, or a no-bake cheesecake, and I’d be thrilled to dig into each and every one of them. There’s one, however, that I don’t get to enjoy very often: Guinness-chocolate cake. I almost never think of making it unless St. Patrick’s Day is around the corner, and I don’t come across it frequently in bakeries or restaurants. The cake is incredibly moist and rich, with a deep chocolate flavor that’s complemented by the beer’s malty, tangy undertones.
The stout-infused chocolate cake recipe below comes from my Birmingham, Alabama-based test kitchen colleague Jasmine Smith. Her sheet cake is balanced, with plenty of flavor from both the chocolate and beer, and a malted vanilla frosting adds just enough sweetness—plus the creamy frosting visually evokes the thick, creamy head on a properly poured stout. Here’s how to make it.
4 Tips for Making a Delicious Guinness-Chocolate Sheet Cake
Use Guinness Extra Stout, if possible. Guinness sells several kinds of beers; their extra stout, which is sold in bottles in the US, has a smooth, creamy finish with toasty coffee notes that complement the chocolate in the cake. Here, we use bottled Guinness Extra Stout, which has less water, more concentrated roasted barley flavor, and residual sugar than the Guinness Draft Stout sold in cans. If you can’t find any Guinness Extra Stout, Dragon Stout or Left Hand Brewery Milk Stout both have a similar flavor profile and would be good substitutes.
Warm up your beer. Some chocolate cake recipes, like devil’s food cake, call for stirring cocoa powder and chocolate into hot water or coffee. Here, we use beer that’s just been brought to a simmer, which helps dissolve the cocoa powder.
Brush the cake with a Guinness syrup. To keep the cake moist, make a simple syrup by whisking Guinness, sugar, and instant espresso powder together in a saucepan over heat on the stovetop, then brush the cake with it. This not only helps the cake stay softer for longer, but also gives the cake additional stout flavor (most of the alcohol will cook off).
Top it with a malted vanilla frosting. Cream cheese helps stabilize the frosting and gives it its rich, creamy texture. Incorporating malted milk powder gives it a delicious nuttiness and savory depth; the ingredient is made from barley that’s been malted—the process of soaking, germinating, and drying grains—which gives it a distinct earthiness. Malted grains are often used to brew beer, and because much of Guinness’ flavor comes from malted barley, the frosting pairs wonderfully with the cake and enhances the bittersweet flavors of the hops and chocolate. If you love malted milk powder as much as I do, then you’ll probably want to eat the frosting all on its own. Just remember to leave some for the cake.
For the Cake: Adjust oven rack to middle position and preheat to 350°F (175°C). Grease a 10- by 15-inch rimmed baking sheet or 9- by 13-inch baking pan with butter and dust with cocoa powder, shaking out excess. (See notes.)
Serious Eats / Hannah Huffman
In a small saucepan, bring beer to a simmer over medium heat; remove from heat and set aside. Meanwhile, in a large bowl, whisk flour, sugar, cocoa powder, baking powder, baking soda, and salt together to combine.
Serious Eats / Hannah Huffman
Add eggs, milk, oil, and vanilla to flour mixture; whisk until well combined and no streaks remain. Gradually pour warmed beer into batter and whisk to combine. (Batter will be thin.) Pour batter into prepared pan.
Serious Eats / Hannah Huffman
Bake until a toothpick or cake tester inserted into the center comes out clean and cake springs back when gently touched, 25 to 30 minutes. Remove from oven and cool completely in pan on a wire rack, about 1 hour.
Serious Eats / Hannah Huffman
While the cake cools, prepare the Guinness Syrup: In a small saucepan, whisk beer, sugar, and espresso granules to combine. Bring to a simmer over medium heat; cook, stirring often, until sugar is dissolved, about 2 minutes. Remove from heat.
Serious Eats / Hannah Huffman
Using a fork, poke the cooled cake all over. Using a pastry brush, brush cake with syrup until all the liquid is absorbed. (It may look like a lot of liquid, but the cake will soak it all up.)
Serious Eats / Hannah Huffman
For the Malted Vanilla Frosting: In the bowl of a stand mixer fitted with the paddle attachment, beat cream cheese, sugar, malted milk powder, vanilla, and salt on medium speed until smooth, using a flexible spatula to scrape down bowl and beater as needed, about 1 minute. Increase the speed to high, then gradually add heavy cream until mixture is smooth and medium-stiff peaks form, 5 to 6 minutes. (Alternatively, frosting can be prepared in a large bowl with an electric hand mixer.)
Serious Eats / Hannah Huffman
Using a flexible spatula or offset spatula, spread frosting over cooled cake. Refrigerate until chilled and set, about 1 hour.
Serious Eats / Hannah Huffman
Special Equipment
10- by 15-inch rimmed baking sheet, small saucepan, whisk, toothpick or cake tester, pastry brush, stand mixer or electric hand mixer, flexible spatula or offset spatula
Notes
Be sure to use bottled Guinness Extra Stout Beer, which has less water, more concentrated roasted barley flavor, and residual sugar than the Guinness Draft Stout sold in cans. If you can’t find any Guinness Extra Stout, Dragon Stout or Left Hand Brewery Milk Stout both have a similar flavor profile and would be good substitutes.
If using a 9- by 13-inch baking pan, you may have to increase baking time by 3 to 5 minutes.
Dark brown sugar can be substituted for granulated sugar in both the cake and syrup, which will give the dessert deeper caramel notes.
Make-Ahead and Storage
The cake can be baked up to 1 day in advance;once cooled, wrap cake in plastic and store at room temperature. The syrup can be made up to 3 days in advance and refrigerated in an airtight container. The frosting can be made up to 3 days in advance and refrigerated in an airtight container; re-whip in the bowl of a stand mixer fitted with a paddle attachment or in a large bowl using an electric mixer before spreading over cake.
The frosted cake can be loosely covered with plastic wrap and refrigerated for 2 to 3 days.
Across the world, the spirit of Ramadan is not only marked by fasting, but also comforting rituals involving food: shared, savored, and steeped in tradition. This can be observed in simple universal practices like breaking fast at sundown with a sweet date before tucking into the Iftar meal with loved ones. In Jordan, we enjoy sipping “amar el deen,” a thick apricot juice garnished with nuts and dried fruits. Fattoush salad is nearly obligatory in Jordan, gracing the table almost every evening. For me, though, one Ramadan dish stands above the rest: qatayef (pronounced atayef in my colloquial Arabic).
These yeasted pancakes are cooked on a flattop griddle or in a skillet until golden on one side, with light air pockets throughout. They are most commonly served two ways. The first is qatayef asafiri, a non-fried version filled with a clotted cream called qishta. The second version, which this recipe is for, is referred to simply as qatayef. After being cooked on the griddle or skillet, they're filled with cheese or spiced walnuts and raisins, folded into a crescent shape, and fried until crispy and golden. The little crescents—a symbol of the lunar phase marking the start of Ramadan—are then immediately dipped in orange blossom syrup right before serving.
Serious Eats / Mai Kakish
Both versions are beloved and consumed all across the Levant, and in Jordan, qatayef is even more popular than qatayef asafiri. The fried version of qatayef is rich with subtle floral notes. The first bite into the crunchy exterior releases a gush of syrup, exposing a luscious cheese or nut filling.
During Ramadan, bakeries hum with activity, churning out qatayef nonstop for customers. Traditionally you purchase the griddled pancakes from the bakery, then fill and fry them yourself at home. The sweet, heady, and slightly woodsy aromas of those lightly fermented pancakes fill the streets surrounding the bakeries. Some bakeries, due to high demand and restricted by small kitchens, will drag a giant flattop to the storefront (where there’s more space) so that two or more bakers can dedicate entire shifts to cooking and packaging the little pancakes in tightly sealed containers.
The Qatayef
Before diving into the testing process for this recipe, I did what I always do for Levantine dishes—I ran to Mom. I left her a voice note on WhatsApp, filled with excitement about finally getting to work on a recipe that I’ve wanted to develop for a long time. I was expecting her to match my excitement, but she instead replied, “Don’t bother—only professional bakers can perfect qatayef.” She went on about a recent tiff with my aunt, who dared to make qatayef from scratch, claiming hers were superior to the store-bought ones. My mom’s response to my aunt’s finished qatayef? A lackluster shrug.
After a brief pause to process the unexpected—though perhaps slightly expected—response, I quickly fired back, explaining that qatayef in bakeries are made with the same simple ingredients you’ll find in every household. Aside from a flattop griddle and a saucer to pour the batter—easily replicated with a nonstick skillet and any measuring cup—no special equipment is required.
Serious Eats / Mai Kakish
Unless these professional bakers have some higher powers, there’s no reason I couldn’t perfect making them at home. Suddenly, what started as an exciting assignment turned into an exercise in gaining my mother’s approval. Mom kept insisting: “Where are the tight pockets? Homemade qatayef don’t have those tiny pockets!” The pockets, as she called them, are the very small holes that bubble to the surface of qatayef. So, I had no choice but to get those damn pockets right.
In my mother’s defense, chasing the revered pockets was indeed a challenge. Properly made qatayef are meant to be spongy and covered in many tiny holes on one side, and feature what is known as the "zunnar"—meaning "belt" in Arabic—a pale ring encircling the golden qatayef on the other side. When poured onto a sufficiently hot flattop griddle or skillet, the batter naturally spreads outward. The thinner edges lose moisture rapidly, drying out and lifting slightly from the pan, which keeps them from browning. Meanwhile, the center remains thicker and retains moisture longer, staying in contact with the heat and turning a golden color—this is the zunnar effect.
Serious Eats / Mai Kakish
Unlike American pancakes, qatayef don’t get flipped; they cook on one side, allowing the surface to set while the bottom gently turns golden. For this to happen, the batter needs to rest properly, allowing the flour and semolina to fully absorb the water and loosen into a smoother mixture that spreads evenly and is fluid enough to cook through quickly. Resting also gives the yeast time to produce gas, aerating the batter and creating those signature teeny-tiny "pockets" as the batter cooks.
After determining the correct ratio of water to flour to achieve a batter that wasn’t too thin or too thick, I settled on the right balance of flour to semolina to achieve a slightly firm, chewy, and moist texture. Semolina, being coarser than all-purpose flour, excels at absorbing liquid due to its larger granules, helping to retain moisture and create a more substantial texture.
Now the quest for the little pockets could begin. Batch after batch yielded qatayef with too few and overly large perforations, making them feel more like regular pancakes and less spongy than they should be. After countless voice notes and photos sent to my mom in Jordan, I finally got a clue about what might be going wrong. Most recipes suggest letting the batter rest at room temperature for about 30 minutes until it becomes bubbly, as this is when the magic happens. However, after rounds of testing I realized that the yeast needs more time to fully rise and create the proper airy texture. Letting the batter rest for one to two hours (depending on your kitchen’s temperature) allows the yeast to ferment gradually and create a spongy texture with the right amount of air pockets and fine perforations. Nevertheless, my qatayef were still not exactly where I wanted them to be.
Serious Eats / Mai Kakish
In an attempt to further enhance the texture, I blended the batter a second time briefly right before cooking to incorporate even more air into it, creating even more tiny holes. Baking soda, added after the lengthy rest and right before reblending the batter, ensures that more gas is released as soon as the qatayef start cooking, contributing to a perfect rise and a spongy texture.
After pouring the first portion into my hot skillet—making sure to pour all the batter at once to avoid uneven cooking—I watched, eyes locked, as little bubbles slowly emerged. They began forming at the edges and crept toward the center, little by little, until no wet batter remained. I lifted the pancake, staring, wondering if I was seeing things. I couldn’t believe it—but here they finally were, the coveted tight and tiny pockets.
The Fillings
The two most common qatayef fillings are cheese, and walnuts with raisins and cinnamon. Usually, both variations are served together on a platter, with people guessing which is which based on subtle color differences (walnut-filled qatayef take on a slightly darker hue). This recipe includes both filling options, with each filling recipe yielding enough for eight qatayef. If you’d like to make both, simply halve each filling recipe to prepare four of each. Alternately, you can double the batter and syrup recipes and make a full batch with each filling.
Serious Eats / Mai Kakish
The walnut-raisin filling is a comforting, cinnamon-forward mixture with a small splash of orange blossom water added for a delicate aromatic note. The cheese filling is traditionally made with Nabulsi cheese, a slightly chewy and rubbery mild cheese, typically studded with nigella seeds.
Serious Eats / Mai Kakish
Since it's often sold in a salty brine, it must be is soaked in multiple changes of water to remove excess salt before being used. I prefer to remove the nigella seeds before chopping the cheese, but a few stragglers are fine. It is sometimes flavored with a touch of mastic gum, a tree resin with a piney, woodsy flavor commonly used in Arabic desserts. Nabulsi cheese is available at many Middle Eastern markets, but if it's unavailable, fresh mozzarella cheese (the kind that’s sold packed in water) works well as a substitute—and it doesn’t require the lengthy soak.
The Syrup
Arabic desserts often include ingredients that seem to come from enchanted gardens—resin from mastic trees, orange blossom water, rose water, and flour made from orchid tubers, to name a few. Fantastical as they may sound, these ingredients are essential to many signature desserts.
Serious Eats / Mai Kakish
The syrup for qatayef is thick and flavored with orange blossom water, which lends a floral aroma and subtle citrusy notes reminiscent of orange rinds. Some versions include rose water, but I find its perfume-y quality polarizing and prefer the delicate touch of orange blossom water instead. A very small splash of lemon juice adds a welcome brightness to the syrup.
Adding the lemon juice and orange blossom water too early can cause their delicate aromas to evaporate, but adding them after the syrup is finished cooking can cause crystallization by adding the cooler liquids to the hot syrup, creating a temperature shock and disturbing the sugar’s structure. The best approach is to stir them in near the end and let the syrup simmer for about 30 seconds. The syrup should be warm before the fried qatayef are dunked into it to ensure better absorption.
Finding Qatayef Success
Serious Eats / Mai Kakish
After my final tests were complete, I proudly sent a new batch of photos of my qatayef to my mom, who responded with such delight and grand excitement. There was simply no denying it: She confessed they looked exactly like the ones she buys at the store, and the photos made her crave qatayef so badly that she rushed to a bakery to buy some. The classic mother-daughter food story often leans into the melodramatic trope of maternal wisdom—where the mother gently takes her daughter’s hand, guiding her through multi-generational recipes, etc, etc... But sometimes, it’s not all that romantic. While we certainly shared sweet moments over food, sometimes it was simply a quest for approval—one pocket at a time.
For the Cheese Filling: If using Nabulsi cheese, rinse and drain cheese: In a large bowl, submerge Nabulsi cheese with 1 inch boiling water. Let soak for 1 1/2 hours, changing with fresh boiling water once halfway through soaking. Alternatively, place cheese in large bowl, cover with room temperature water by 1 inch, and let soak for at least 8 hours or up to 14 hours, changing water once every two hours for the first 8 hours. Using fine-mesh strainer, drain cheese well, squeezing out excess water, and finely chop it. If using fresh mozzarella cheese, omit soaking and draining and just finely chop cheese. In a bowl, combine cheese with mastic gum, if using.
Serious Eats / Mai Kakish
For the Walnut-Raisin Filling: In a small bowl, combine walnuts, raisins, sugar, cinnamon, orange blossom water, and salt.
Serious Eats / Mai Kakish
For the Qatayef Batter: In a large bowl, whisk flour, semolina, sugar, yeast, salt, and water. Cover with plastic wrap and allow batter to sit at room temperature until mixture is bubbly and foamy with a watery ring appearing around edges, 1 1/2 to 2 hours (depending on kitchen’s temperature).
Serious Eats / Mai Kakish
For the Syrup: While qatayef batter sits,in a small saucepan, combine sugar and water, and bring to a simmer over medium heat. Cook, adjusting heat as needed to maintain a simmer and stirring occasionally, until syrup reduces to about 3/4 cup and thickens until it coats back of a spoon, about 8 minutes. Stir in orange blossom water and lemon juice and continue tosimmer for 30 more seconds; set aside.
Serious Eats / Mai Kakish
For Cooking the Qatayef: Line a rimmed baking sheet with parchment paper and set aside. When ready to cook, in a blender or using an immersion blender, add baking soda to rested batter and blend until combined. Heat a large nonstick skillet over medium-high heat until a splash of water beads and sizzles on contact, about 3 minutes. Wipe off any remaining water, then reduce heat to medium-low. Using a 2 tablespoon (1/8 cup) measuring cup filled to the top or a 1/4 cup measuring cup filled halfway, pour three 2 tablespoon portions of batter into skillet, letting each portion spread into a circle approximately 4 inches in diameter, leaving space between each pancake to prevent them from sticking. Cook until batter is dry on top and undersides are golden (small holes will start forming around the edges almost immediately and will gradually spread across the qatayef), 1 to 2 minutes. Do not flip qatayef during cooking. Transfer qatayef to prepared baking sheet. Cover with clean kitchen towel to prevent qatayef from drying. Repeat with remaining batter, lowering heat if qatayef start to get too dark. You should have 8 qatayef total. If not using right away, let cool, then cover qatayef tightly with plastic wrap and set aside at room temperature for up to 3 hours.
Serious Eats / Mai Kakish
To Fill Qatayef: Place about 1 tablespoon plus 1 teaspoon of either cheese or walnut-raisin filling in center of the bubbly side of each qatayef. Fold qatayef over itself and pinch the top middle edges together to seal, then continue pinching along the edges to close completely to form a half-moon shape. Use fingers to keep the filling from spilling out. Ensure edges are thoroughly sealed. Return to prepared baking sheet when filled.
Serious Eats / Mai Kakish
For Frying the Qatayef: Set a wire rack inside a rimmed baking sheet and line rack with a double layer of paper towels. In a large Dutch oven, fill with oil to measure 1 1/2 inches deep and heat over medium-high heat to 350°F (177°C). Meanwhile, gently reheat syrup over medium-low heat until warm to the touch; place in medium bowl and set aside.
Serious Eats / Mai Kakish
Once oil reaches temperature, carefully add qatayef to hot oil, and fry, using a spider skimmer or slotted spoon to flip qatayef halfway through, until golden brown on both sides, about 2 minutes total. Transfer qatayef to prepared wire rack and use a slotted spoon to immediately dunk them into the syrup until they're soaked through, about 30 seconds, flipping qatayef midway through. Transfer dipped qatayef to serving platter and top with pistachios, if using. Serve.
Serious Eats / Mai Kakish
Special Equipment
Kitchen scale, fine-mesh strainer, rimmed baking sheet, small saucepan, large nonstick skillet, wire rack, Dutch oven, Spider skimmer or slotted spoon
Notes
This recipe can easily be doubled.
The two most common qatayef fillings are cheese, and walnuts with raisins and cinnamon. Usually, both variations are served together on a platter. This recipe includes both filling options, with each filling recipe written to make enough for 8 qatayef. If you’d like to make both, halve each filling recipe to prepare 4 of each, or double the number of qatayef and the amount of syrup.
For the cheese filling,make sure to taste the Nabulsi cheese after soaking, as its salt content can vary. A hint of remaining salt in the cheese is desirable, but if it’s still too salty after soaking, change the water again and soak it longer. I prefer to remove the nigella seeds before chopping the cheese, but a few stragglers are fine.
Orange blossom water can be purchased from Middle Eastern grocery stores or ordered online. It also can be found at some American grocery stores.
Mastic gum is often sold as crystals and can be purchased from Middle Eastern grocery stores or ordered online. The small crystals can be chopped into a powder with a chef's knife. I recommend adding a pinch of sugar while chopping the crystals to prevent sticking. You can also grind the crystals in a spice grinder or with a mortar and pestle, but be sure to add a pinch of sugar to keep it from turning into a gummy paste.
Make-Ahead and Storage
Qatayef can be filled and shaped, then frozen for up to 2 months. Spread on a parchment paper–lined baking sheet and freeze until solid, then transfer to a zip-top bag or airtight container. To cook, thaw in the refrigerator for at least 2 and up to 4 hours, then fry according to the recipe’ instructions. They can also be fried directly from frozen, but you’ll need to increase frying time by about 1 minute.
We jokingly call these meaty, greeny, cheesy, beany, spicy baked chickpeas because, well, internet recipe naming conventions make us laugh but I really think of them as Pizza Beans 2.0. I introduced Pizza Beans 1.0 in my second cookbook, Smitten Kitchen Every Day, where I dreamed of a mash-up of Greek gigante beans in tomato sauce and an American baked ziti, with beans instead of noodles. I called them “pizza” beans to try to convince my then-kindergartener to try them with clever marketing. We still adore the recipe and all of the truly unexpected places it’s landed.
I headed to Namhae, my father's hometown and where I had spent a lot of time when I was young. I was visited by my old friend Ms. Im for a seaside fresh fish lunch.
Large grocery store with a variety of Asian and international products. Has a nice food court including Tour Le Jour bakeries in Maryland. Opened June 2023.
Dinner in Paris generally starts at 8 pm, especially in restaurants, and I get ravenously hungry between lunch and dinner.
Parisians do dine rather late – often not until 9:30 pm or later, and that’s an awfully long stretch. So French people visit their local pâtisserie for an afternoon snack, known as le goûter, although nowadays Parisians often call it le snack.
Le snack is often nothing more than a buttery financier or a tender madeleine. At home, French children at home are often given a split piece of baguette with a bar of dark chocolate tucked inside to keep them happy until dinner.
But my snack of choice is invariably les chouquettes: Cream puffs covered with crunchy nuggets of sugar, then baked until golden-brown. The eggy, pillowy puffs are piled uneventfully behind the counter and sold in crisp little paper sacks, each one holding about 100 grams, or about 10. I found that engaging the counter person in a few words of niceties will often mean that before the ends of the bag are twisted shut, an extra puff will be tossed in as a little gift for l’américain.
Nothing is easier to make than chouquettes and you can bake them right with ingredients you likely already have on hand. The only thing you’ll need to find is pearl sugar, which gives the puffs their signature crunch. Some tell me you can buy it at Ikea stores, or you can find it at King Arthur or on Amazon. If you have sugar cubes, you can crush those up into rough chunks and use those, although they’re not quite the same. And if you’re like me, and like chocolate, you could press some chocolate chips into a few of the puffs before baking.
This is one of my favorite of all French snacks and I can polish away a whole bag, or tray, in no time. These are best made and eaten right away, or later the same day – if they last that long!
From The Sweet Life in ParisShaping the mounds of dough is easiest to do with a pastry bag, although you can use two spoons or a spring-loaded ice cream scoop.Pearl sugar is available in the U.S .from King Arthur and at G. Detou in Paris, and is also available from French companies such as Daddy (called perles de sucre) and Vahiné (sucre chouquettes). You can approximate pearl sugar by crushing sugar cubes in a sturdy zip-top freezer bag with a rolling pin or hammer.
Course Dessert
Cuisine French
Servings 6servings
Ingredients
1cup (250ml)water
1/2teaspoonsalt
2teaspoonssugar
6tablespoons (90g)unsalted buttercut into small chunks
1cup (140g)flour
4large eggsat room temperature
Glaze:1egg yolkmixed with 1 teaspoon milk
Pearl sugar
Instructions
Preheat the oven to 425 degrees (220 C.) Line a baking sheet with parchment paper or a silicone baking mat. (Depending on the size of your baking sheets, it may take two.)
Heat the water, salt, sugar, and butter in a small saucepan, stirring, until the butter is melted. Remove from heat and dump all the flour in at once. Put the pan back on the heat and stir rapidly until the mixture is smooth and pulls away from the sides of the pan.
Allow dough to cool for two minutes, then briskly beat in the eggs, one at a time, until smooth and shiny.
Using two spoons, scoop up a mound of dough with one spoon roughly the size of an unshelled walnut, and scrape it off with the other spoon onto the baking sheet. You can also use a pastry bag fitted with a plain 1/2-inch tip and pipe them.
Place the mounds evenly-spaced apart on the baking sheet(s). Brush the top of each mound with some of the egg glaze then press the pearl sugar over the top and sides of each mound. Use a lot. Once the puffs expand rise, you’ll appreciate the extra effort (and sugar.)
Bake the cream puffs until puffed and well-browned, about 25 to 30 minutes. If they get too dark midway through baking, lower the heat of the oven to 375ºF (190ºC) and continue baking. (If you want to make them crispier, you can poke a hole in the side with a knife after you take them out of the oven to let the steam escape.)
Notes
Storage: The cream puffs are best eaten the same day they’re made. Once cooled, they can be frozen in a zip-top freezer bag for up to one month. Defrost at room temperature, then warm briefly on a baking sheet in a moderate oven, until crisp.
In some places, eggs are in short supply. For bakers, that may present a problem for us. But the folks at King Arthur Baking have provided an excellent guidelines to using egg substitutes, with tips for using everything from seltzer and flax seeds, to chickpea liquid and fruit puree, so you can keep on baking.
You might be asking yourself, Deb, why are you publishing a lemon tart recipe when the greatest lemon tart of all time already exists on your site? Okay, I’m embellishing a little, but I do really love the whole lemon tart and its sister recipe, the whole lemon bars in The Smitten Kitchen Cookbook every bit as much as you — the simplicity, the complexity, the surprise of it all.
An independent local grocery that has been serving the community since 1977 in Revelstoke, BC. We’re a full-service grocery with a focus on local and global: fresh meats and produce from BC, and international specialties from Korean kimchi to South Asian spices.
My Auntie in Yeosu taught me so many things about cooking and has been my role model for many years. She's always been there for me and my family so when I visited Yeosu I wanted to make her a special meal using local seafood.
I’ve been on a marmalade bender lately. Well, it’s actually been for the last few weeks. Winter, of course, is marmalade season and the markets in Paris are heaped with citrus: Corsican clementines, pretty yellow bergamots, hefty pink grapefruits from Florida (although some infer appellations from elsewhere – namely, the Louvre), leafy lemons from Nice, and lots and lots of oranges.
The stands are so piled up that it’s not uncommon to be walking down the aisle and have an orange roll off of the piles and land on your foot. (Which is why it is a good idea to wash any fruit before you use it.) This means I’ve got so many jars of marmalade, that when my friend Luisa stopped by and saw the jars piled on top of a shelf in my bedroom, she said “I’ve doing the same thing ” at her apartment in Berlin. Sometimes I think jam-making could be classified as an epidemic and if so, there’s ample evidence that I’m ready for an intervention.
While kumquats were once classified with their look-alike citrus brethren and sistern (admittedly, it can be hard to tell as it’s difficult to get a look under their navels), they are now placed in another genus category (Fortunella), even though they share many characteristics of citrus fruits.
One of those characteristics is that they are winter fruits. And another is that they are très bon pour la santé (good for your health), containing lots of vitamin C. And they also make you feel happier, since not only does their tangy-bitter flavor brighten up even the darkest of winter day, nothing makes me happier than to wake up in the morning and gaze at my shelf of marmalade first thing in the morning.
I was especially happy when I was doing my shopping at the outdoor market and came across a big bin of kumquats. I scooped up a nice-sized bag of them and brought them home, where they patiently waited in the refrigerator until I decided what to do with them.
Originally I’d considered giving them a quick-candying and strewing them over poached prunes with a scoop of ice cream. But I ended up sticking my fingers into the bowl of prunes a few too many times during the week and ended up with a small puddle of cinnamon-spiced dark syrup pooled in the bottom of a container in my refrigerator, which I didn’t think would go with anything.
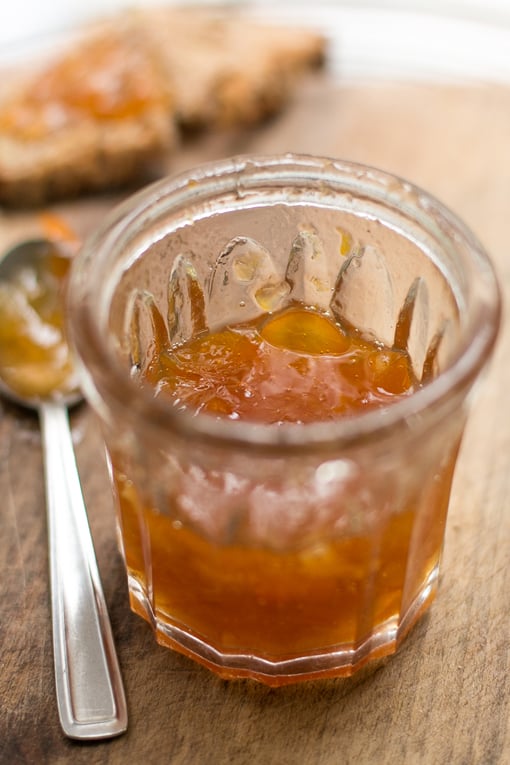
So I decided to get out my little serrated knife, slice up my Fortunella fruits, and make marmalade. I added a couple of lemons not just to bulk it up, but because I thought with the added sugar, the marmalade would benefit from some extra acidity.
I normally spoon my marmalades on morning toast, but after I made this batch, I had cleaned up the kitchen and was going to reward myself to a nice bowl of split pea soup for lunch with some Comté cheese and – like most good ideas (and a few of the bad ones) – it suddenly occurred to me that the tart marmalade might be nice with the nutty cheese I was cutting into batons.
And sure enough, it was. Fortunately I have three nice jars of marmalade to add to my collection. So far this year I’ve made Seville orange marmalade (eight jars) and four jars of mixed marmalade, using the bergamots and citron that were plucked off a tree in Sicily. After all that slicing, seeding, and simmering, the last pot of marmalade has been jarred and stored; they’ll last me through the winter. And if I am prudent, a number of spring and summer mornings as well.
Many of the little rings of kumquats will, unfortunately, come apart as you cook the marmalade. The reward, however, is gorgeous jars of tangy marmalade that you’ll be happy to spread on your morning toast or serve with a bit of cheese after dinner. I served mine with Comté, but a nice goat cheese or another nutty mountain cheese, like Gruyère, would pair nicely with it.
It takes a bit of patience to slice and pluck out all the seeds from the kumquats, but you can get 2 to 3 jars of marmalade for your efforts. I use a small serrated knife to slice off the stem end, then start slicing the kumquats crosswise, until I get close to the center. Finally, I stick the tip of the knife into the area where the seeds are and slip them into a small bowl. Because the seeds are rather large, any that you miss you can usually find just by doing a little scanning of your pile of sliced kumquats.
I use oval Nagami kumquats, which are more puckery than the round Meiwi kumquats, which you sometimes come across. Do try to get organic or unsprayed fruit from your local market or natural food store. The kirsch is optional, but it does nicely round out the flavor of the marmalade. You can substitute another liquor, such as gin, Grand Marnier or Cointreau, light rum, or a dash of brandy. Or it can be omitted, if you wish.
Ingredients
2lemonsstemmed, halved lengthwise, seeded, and very thinly sliced
1pound (450g)kumquatsstemmed, seeded, and sliced
Reserve the seeds from the lemon and kumquats
5 1/2cups (1.3L)water
2cups (400g)sugar
pinchof salt
Optional: 1/2teaspoonkirsch or other liquor
Instructions
Put the lemon slices in a large non-reactive pot. Cover with cold water and bring to a boil. Reduce the heat and simmer until the lemons are translucent, about 5 minutes. Drain. (Discard the water.)
Put the blanched lemons back in the pot. Tie the seeds from the lemons and kumquats securely in a piece of cheesecloth and add the seed sack to the pot along with the sliced kumquats and water. Bring to a boil; remove from heat, cover, and let stand 24 hours.
The next day, put a small plate in the freezer.
Add the sugar and salt to the pot, and cook the marmalade for 30 to 45 minutes over medium heat. Remove the bag of seeds and when it’s cool enough to handle, squeeze the seeds in the cheesecloth using your hands or place it in a ladle and press it with the back of a soup spoon (being careful not to break the fabric and release the seeds) over the jam pot to so the pectin goes directly into the marmalade mixture.
Continue cooking until it has reached the jelling point, about 220ºF (104ºC) degrees, if using a candy thermometer. To test the marmalade, turn off the heat and put a small amount on the plate that has been chilled in the freezer and briefly return it to the freezer. Check it in a few minutes; it should be slightly jelled and will wrinkle a bit when you slide your finger through it. If not, continue to cook until it wrinkles slightly on the chilled plate when you nudge it.
Remove from heat, then stir in the kirsch (if using), and ladle the mixture into clean jars.
Notes
Note: I store my jams and marmalades in a cool place, often the refrigerator if not planning to use them within a few weeks. if you wish to can or preserve them, you can check out these canning tips.
Eighteen years is long enough for a website to go without a potato leek soup recipe, don’t you think? I’ve always been a bit torn about it — it’s thick, pale, and can be a little sleepy. And yet if there is any time of year that’s going to bring out my cravings for filling and uncomplicated soup, if there’s any time of year when my nostalgia kicks in for the thick, hearty vegetable porridges I had in Ireland with brown bread and ale, if there’s any time of year when I’d happily act and eat like a slumbering bear in a childhood fairytale, it’s January. January is biting cold and generally irredeemable unless your only commitments are to comfort and coziness. I’ll do my best to keep us covered.
Whenever I mention “Chocolate Chip Cookies,” this recipe seems to come up in the conversation. I’ve been making chocolate chip cookies all of my life, and am always happy to add new ones to my repertoire. I’ve made them with various kinds of flours, different types (and sizes) of chocolate, some with nuts (or cocoa nibs), and others without. In some cases, the salt in the chocolate chip cookies may be in the butter, or sprinkled on top. Or there might be a double-dose of chocolate in them.
But I haven’t done too much tinkering with the butter, because to me, that’s one thing that’s non-negotiable in chocolate chip cookies. But when I heard about tahini, my loyalty to butter was put into question.
You (and I) can relax, because these chocolate chip cookies do use butter, but get an underlying richness from sesame paste, a common ingredient in Middle Eastern cooking that I always keep on hand. So although I thought I’d done everything possible that a man could do to a chocolate chip cookie, and then some, I was finally ready to tackle a batch of these chocolate chip cookies.
The recipe is adapted from Modern Israeli Cooking by Danielle Oron, that also was in the New York Times. In addition to having everything on hand, they were easy to mix up, and the soft sesame paste made a dough that was hard not to snack on before the cookies went into the oven.
I prefer to chop chocolate for chocolate chip cookies, rather than use conventional chocolate chips. I have nothing against chocolate chips, but most are made of what’s called baking-resistant chocolate, which is designed to hold their shape once baked. I like big, oozing chunks of chocolate in my chocolate chip cookies, and I don’t care so much what they look like, so much as how they taste.
So I took a knife to a block of chocolate and made my own. Some makers are now producing what are called chocolate “chunks” which may or may not have similar qualities, but chopping a block of chocolate, while a bit messy, puts me in one of my happy places. And I’m happy to make my own chips, or chunks, I should say.
These cookies were some of the best chocolate chip cookies that have ever come out of my oven, and I don’t say that lightly. The tahini gives them a gentle savory taste, with a faint musky flavor that pairs remarkably well with dark chocolate and a touch of salt, so don’t be afraid to use a very strongly flavored chocolate. I futzed with the original recipe a little, to make them chewier, and couldn’t resist adding even more chocolate. But can you blame me?
Adapted from Modern Israeli Cooking: 100 New Recipes for Traditional Classicsby Danielle OronI used chopped chocolate, rather than chocolate chips, for these cookies since I wanted large chunks of oozing chocolate rather than little bits of chocolate here and there. (But feel free to use chips if you'd like.) Normally when I chop chocolate for cookies, I add any small bits and pieces on the cutting board along with the bigger chunks. But for these, I wanted distinct, more assertive pieces of chocolate, so I sorted through and just used large chunks, saving the smaller bits for another baking project. I baked these cookies in a larger size, then tried them in smaller portions, and give baking times for each. Whichever size you bake them in, since everyone's oven is different, it's important to use visual clues rather than rely on precise minutes and numbers to tell when they're done. Keep an eye on them during the final minutes of baking; the cookies are done when quite pale in the center and browned around the edges. Note that the dough is best when it rests in the refrigerator overnight. You could bake them sooner, if you just can't wait.
Servings 18
Ingredients
8 tablespoons(115g, 4 ounces)unsalted butterat room temperature
1/2 cup (120ml)tahiniwell stirred
1/2 cup (100g)granulated sugar
1/2 cup (90g)packed light brown sugar
1largeeggat room temperature
1largeegg yolk
1teaspoonvanilla extract
1 cup plus 2 tablespoons (150g)flour
3/4teaspoonbaking soda
1 teaspoonkosher or sea salt
2cups (280g)bittersweet or semisweet chocolate chunksor chocolate chips
In the bowl of a stand mixer, beat the butter, tahini, granulated sugar and brown sugar on medium speed for 2 to 3 minutes, until fluffy. (The dough can also be made in a large mixing bowl, stirred with a spatula.)
Stop the mixer and scrape down the sides. Add the egg, the yolk, and vanilla, and continue to mix for another minute, stopping the mixer to scrape down the sides of the bowl during mixing, to make sure the eggs are getting incorporated.
In a small bowl, whisk together the flour, baking soda, and kosher or sea salt. With the mixer on low speed, add the dry ingredients until just combined, then add the chocolate chips. Do not overmix. Cover the dough and refrigerate overnight.
Preheat the oven to 325ºF (160ºC). Line two baking sheets with parchment paper or silicone baking mats.
Form the cookies into rounds using an ice cream scoop, or your hands. For small cookies make each 1 1/2-inch (3,5cm), for larger cookies, make them 2-inches (5cm) round. Place them evenly spaced on the baking sheets, 3-inches (8cm) apart). Bake one sheet at a time, so you can keep an eye on them, in the middle rack of the oven.
Bake the cookies, turning the baking sheet in the oven midway during baking, until the cookies are golden brown around the edges but still pale in the center. For small cookies, about 12 minutes, for larger cookies, about 14 to 15 minutes. Remove from the oven, sprinkle cookies with a bit of flaky sea salt, and let the cookies cool on the baking sheet. Bake the remaining cookies the same way.
Notes
Storage: These cookies will keep for two or three days at room temperature, but are definitely better the same day they're baked. The unbaked dough can be refrigerated for up to one week, and frozen for up to two months.Notes: Nut and seeds butters, such as peanut and almond, have different oil content than tahini, and I don't think they could be swapped out. (If you do try it with another nut or seed butter, let us know how they come out in the comments.) For those looking for a chocolate chip cookie without tahini, check out these Salted Butter Chocolate Chip Cookies or my recipe for Chocolate Chip Cookies in Ready for Dessert.
After being away for years I revisited my hometown of Yeosu in South Korea. So much of what I love and remember is still there, including some of my family's favorite restaurants. And of course the traditional markets are all still there too!
A dozen years ago I shared my mother-in-law’s recipe for apple sharlotka (which family just calls “apple thing”), a lightly sweetened apple dessert that’s as much a thick crêpe as it is a cake. It’s got a short ingredient list and is the kind of thing you make on a whim. It’s so rustic and simple, I honestly didn’t expect it to cause a ruckus — it’s not apple pie, crumb cake, or even my mom’s doorstop of an apple cake — but you surprised me. It has over 1000 comments and I’ve seen variations on it all over the internet. So where does this come in? I think of this as Sharlotka 2.0: Fancy Pants Edition.
Making chicken noodle soup should be simple — in fact, we’ve got a new podcast episode out about just this. Choosing a chicken noodle soup to make should be simple too, thus I hadn’t intended to add a third chicken noodle soup recipe to this site. But, I’m kind of restless. I fidget. I always wonder if something could be better. And it’s from this place that I’ve come clean with myself to admit that quite often, my least favorite part of chicken noodle soup is the chicken. It easily overcooks in the broth, ending up dry and hard to chew. Do you know what’s not? Buoyant, tender chicken meatballs. Read more »

 Login
Login