Normal view

Cherry Jam

By: David
31 July 2026 at 11:01

One of the first “recipes” on this blog was No-Recipe Cherry Jam, posted in 2005, which wasn’t quite a recipe. Nevertheless, a lot of people successfully used those guidelines to make cherry jam over the last fifteen years. The basis for it was how I’ve been making jam forever, using 3 parts sugar to 4 parts fruit puree. The standard ratio is to use equal parts sugar to fruit puree but I like to use less.

I often make cherry jam with sweet cherries, which are what one usually finds at the market. But if you can find sour cherries, those are wonderful in the mix, but when fresh, they have a short shelf life so should be used, pronto.

So feel free to mix things up, cherry-wise!

Unlike other recipes, making jam can require a bit of using your instincts, rather than relying on set times and temperatures. Checking the jam texture on a chilled plate is the best way to tell you when it’s done. (As an example, jam usually sets between 218-220ºF,103-104ºC, but this one set a few degrees higher.) Because cherries are low in pectin, this one often “sets” a few degrees higher, although don’t expect cherry jam to be as stiff as other jams that you might be used to, or buy. It’ll be a bit runny, which is just how it should be.

One tool I do recommend is a cherry pitter. Not everyone has one, and they do fall into the “single use” category, but come cherry season, mine gets a good workout. I wrote more about why you should get a cherry pitter here.

The biggest question I get about jam recipes is people asking about reducing the amount of sugar in them. Sugar in jam does a couple of things. One, it helps the mixture jell, along with any natural pectin in the fruit. And two, it preserves it. If you use less, the jam will be runnier and won’t last as long.

Europeans tend to like their jams runnier than their American counterparts, so in the morning, you can have a European experience when you spoon some of this jam on your morning toast, as we do.

Unlike other jams that wrinkle when you do the wrinkle test (putting a spoonful of jam on a frozen plate, returning the plate to the freezer and when the jam wrinkles with you nudge it, it’s done), this one will be more like thickened syrup. It’s done when it’s thick and sticky and holds its shape for a few moments after you drag a spoon through it (below.) The cherries will be shiny and glossy, like beautiful ruby-colored jewels.

Print

Cherry Jam

If you only have 1 pound (450g) of cherries, feel free to cut the recipe in half. The liqueur is optional but heightens the flavors of the jam. Use only enough so it complements the fruit – you don't want to overwhelm it. As mentioned, this jam will be a bit on the runny side when "set." Sour cherries will produce a softer-set jam than sweet cherries.
Course Breakfast
Cuisine American
Keyword cherries, cherry, jam

Ingredients

  • 2 pounds (900g) sweet or sour cherries or a mix
  • 2 1/2 cups (500g) sugar
  • freshly squeezed juice of one medium lemon plus additional juice if desired
  • 1-2 drops of almond extract or 1-2 teaspoons of kirsch or another liqueur, such as amaretto or vodka

Instructions

  • Remove the stems and pit the cherries. Put them in a large non-reactive pot. If using only sweet cherries, add 2-3 tablespoons of water to the pot. (Sour cherries will exude enough liquid on their own so no need to add additional water.) Put a small plate or saucer in the freezer.
  • Cover the pot and cook over medium heat, stirring occasionally, until the cherries are wilted and cooked through, about 10 minutes.
  • Remove the lid and stir in the sugar and lemon juice. Increase the heat to medium-high and cook, stirring frequently until the mixture thickens. It's hard to say how long it will take, but when the mixture resembles the sixth picture in the post, the one in the pot with the bubbles, turn off the heat and test the jam by putting a small spoonful on the frozen dish. Return the dish to the freezer for a few minutes until the jam on it is cool. Run a spoon through it and if the liquid is very thick and leaves a clear patch, as shown in the photo in the post, it's done. If not, return the plate to the freezer and continue to cook the jam, testing it at various intervals, until it's done. (If you want to use a thermometer to check the jam, it should be ready somewhere between 220º and 225ºF, 104º-107ºC.)
  • When ready, turn off the heat and stir in the almond extract or liqueur (or both, if you wish). If desired, you could add an extra squeeze of lemon juice to balance the sweetness. Ladle into clean jars.

Notes
Storage: This jam will last several weeks in the refrigerator. If you wish to can it, you can find instructions here.
 

Strawberry Jam

By: David
17 June 2026 at 08:22

Strawberry Jam recipe

I was recently gifted an overload of strawberries: I bought four baskets from a vendor at the market, whose booth I shop at often, and he threw in two extra baskets for free, the equivalent of a carte de fidelité (loyalty card) in Paris. So I’ve spent the past few days washing, hulling, cutting and cooking my unexpected bounty.

I’ve been making a number of things with the gorgeous strawberries. But I also realized that while I have a Strawberry-Rhubarb Jam recipe on the site, I didn’t have a strawberry jam. So here it is.

Strawberry Jam recipe

Although I’m giving you a recipe for the amount of strawberries that I used, you can use the same proportions if you have just a basket…or a bushel. You’ll just need to do a slight amount of math. Only the cooking time will change, so keep an eye on things.

Jam-making is not something you walk away from and you need to rely more on look and feel, rather than exact times. Another thing about jam-making is that fruit and berry jams are always better made in small batches; the shorter the cooking time, the better the flavor. So if you have more than 2-pounds (900g) of strawberries, consider making jam in a couple of batches rather than one big one.

Frozen zabaglione recipe

Print

Strawberry Jam

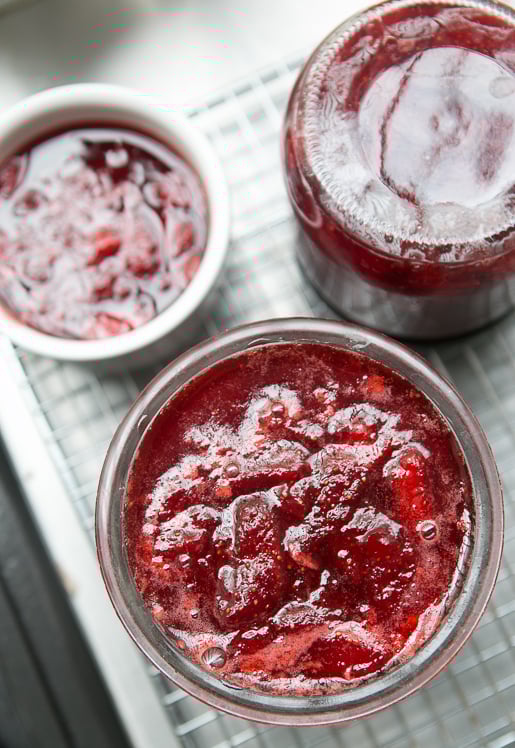
Many traditional recipes use an equal amount of sugar to fruit, by weight, but I find it’s okay to decrease it to these proportions. Sugar is both a thickener and a preservation agent. If you reduce it too much more, your jam may not thicken and won’t keep for a long time. (Which is okay if you want thinner jam, you keep it in the refrigerator, and eat it relatively quickly.) This recipe can be scaled up or down, depending on how many strawberries you have. But if you want to make a lot more, best to make it in a couple of batches. To prepare the jars, pour boiling water into them, as well as into the lids. Let them sit 5-10 minutes, then carefully pour out the hot water and set them upside down on a cooling rack until ready to fill. Since I keep my jams in the refrigerator, I don’t put them up them in a traditional sense. I usually just overturn the jars and let them cool, which provides a reasonable seal, then refrigerate them. I find my jams keep well this way for up to one year. Check the National Center for Home Food Preservation website for instructions on how to can fruit jams. Note: Last season strawberries tend to have less natural pectin than ones that arrive earlier. So your jam may be less jelled. One strategy is the finely grate a green apple into the strawberries before cooking them, which adds pectin. (There are guidelines here for using liquid and powdered pectin.) I don’t mind the slightly runnier jam and it’s terrific on yogurt or served with fresh goat cheese for dessert.

Ingredients

  • 2 pounds (900g) strawberries
  • 1 1/4 pounds (2 2/3 cups, 580g) sugar
  • one lemon organic or unsprayed
  • optional: kirsch (or eau-de-vie, or crème de cassis)

Instructions

  • Wash and hull the strawberries and cut them into quarters. If some are larger or smaller, just make sure the pieces all about the same size.
  • 2. Toss them in a large pot, such as a Dutch oven casserole made of a nonreactive material, with the sugar. Cut the lemon in half, squeeze the juice into the pot, and add the lemon halves to the berries. Stir well, cover, and let sit a couple of hours (up to 8 hours) at room temperature, stirring one or two times while they marinate.
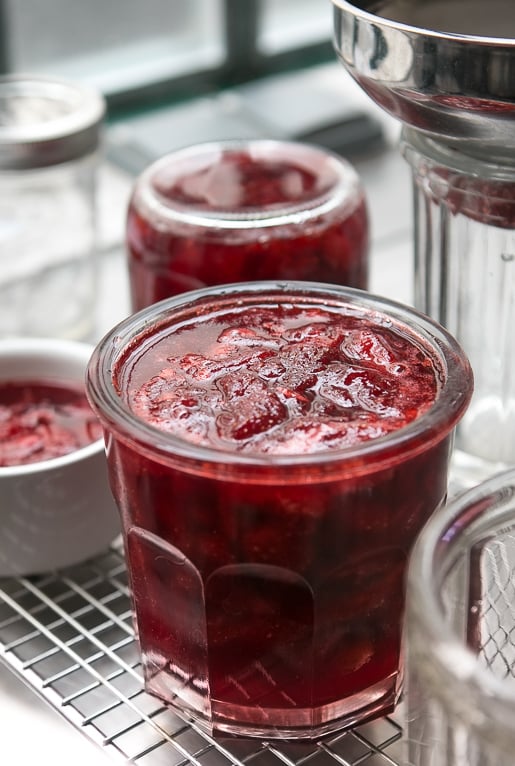
  • Put a small plate in the freezer. Turn the heat on under the strawberries to medium-high and cook the strawberries, stirring occasionally, as they reduce and the juices thicken. If a lot of foam rises to the surface, skim it away. When the syrup is the consistency of warm maple syrup – it will take about 10 to 15 minutes or so, depending on the pot and berries, turn off the heat and put a spoonful of the jam on the frozen plate and return the plate to the freezer. Check it in a few minutes; if it wrinkles when you nudge it, it’s done. If not, return the plate to the freezer and cook the jam a little more, testing it again. It may take a few times before you get it to the right consistency.
  • When the strawberry jam is done, remove the lemon and stir in a few drops of kirsch, if using, then ladle the jam into the prepared jars.

Related Recipes and Links

Apricot Jam

No-Recipe Cherry Jam

Pickled Strawberries

Easy Jam Tart

Eggplant Jam

Baking Ingredients and Substitutions

Vegan Nutella Ice Cream

16 June 2026 at 10:00
Vegan Nutella Ice Cream

Friends! The fluffiest, most satisfying, Nutella lover’s dream dessert is here: vegan ice cream made with chocolate and hazelnuts. It’s creamy, dreamy, oh-so delicious, and kind of perfect! Especially when craving a sweet treat on a warm summer day.

Just 6 ingredients required for this (dare we say) MASTERPIECE. It’s going to be on repeat in our ice cream maker all season long. Grab your cones. Let’s make Nutella ice cream!

Vegan Nutella Ice Cream from Minimalist Baker →

Vegan Gluten-Free Morning Glory Muffins

20 January 2026 at 10:00
Vegan Gluten-Free Morning Glory Muffins

Say hello to morning glory muffins, made vegan + gluten-free! A classic treat originally created by Pam McKinstry in 1978 at her Nantucket restaurant, Morning Glory Cafe, these muffins are lightly sweet, subtly spiced, and packed with fruits, veggies, AND nuts. OH yeah! 

Our gluten-free twist uses oat flour and potato starch (no almond flour!) to create a tender muffin that’s wholesome and satisfying.

Vegan Gluten-Free Morning Glory Muffins from Minimalist Baker →

Cranberry Orange Cookie Bars (Vegan + Gluten-Free)

11 November 2025 at 10:00
Cranberry Orange Cookie Bars (Vegan + Gluten-Free)

The texture and flavor of a cookie with the ease of a bar? Talk about the perfect dessert! Introducing: cranberry orange cookie bars! 

These chewy, buttery cookie bars are packed with zesty orange flavor and pops of tart cranberries. Your new go-to treat awaits with just 1 bowl and 8 ingredients required! Did we mention they’re vegan and gluten-free? No one else has to know.

Cranberry Orange Cookie Bars (Vegan + Gluten-Free) from Minimalist Baker →

Instant Chai Latte Mix (Dairy-Free)

30 September 2025 at 10:00
Instant Chai Latte Mix (Dairy-Free)

Making chai lattes has never been easier! This Instant Chai Latte Mix makes comforting chai lattes possible instantly. Just add water and your favorite sweetener and enjoy!

This convenient mix makes it easy to have your favorite spice-filled beverage on busy mornings, at the office, when traveling, and beyond! It also makes a great gift for the dairy-free chai-lovers in your life! Just 5 minutes and 6 ingredients required, friends.

Instant Chai Latte Mix (Dairy-Free) from Minimalist Baker →

Apple Jelly

By: David
25 September 2025 at 21:49

I was recently reunited with something I miss very much – a loaded apple tree! Friends of mine who had a house in the French countryside had a tree that, come fall, had so many apples, the limbs threatened to break off. Not wanting to be an accomplice in apple-cide, I decided to do my part to save the tree, and the apples, and make Apple Jelly.

Ten years later, my friends sold their house, which ended my bounty of apples (and medlars.) So how happy was I when some other friends bought a house in Brittany, which had not one, not two…but four apple trees. Score!

The varieties were Reine de Reinette, Canada, and Boskop, which I found out when a concerned neighbor saw someone (me) swiping apples off the trees, and the ground, loading up sacks of them. I think he figured I was pilfering the pommes, but was reassured when I told him I was friends with the owner of the mini-orchard.

After talking with him a few minutes, I realized he was an expert on the apples and not only knew about the varieties of apples, but also what to do with them and nodded in approval when I told him I was going to make Apple Jelly. He was happy to help me fill some bags, which included green varieties, which are high in pectin and help the jelly set, and are more acidic than other apples, which make the jelly well-balanced and delicious. (Calvados, the famed apple brandy from Normany, use very acidic apples since the flavor is more pronounced once cooked.)

To make Apple Jelly, it’s probably a good idea to either a friend with an apple tree (with an explanation ready in case a neighbor comes by…) or get apples from a source where they might sell you apples that are dented or dinged, which are called pommes à cuire (cooking apples) in France, and are quite popular. At the markets, those apples are usually the first to get sold as people use the bargain beauties to make compotes and tarts with. And French bakers like to use a variety of apples in dessert, like Apple Cake, as the flavor is more interesting than if using just one variety.

In the end, I came home with over 50 pounds (23kg) of apples in all shapes, colors, and conditions. And all went to a good cause. This recipe uses a good deal of apples but makes a half-dozen jars, which is good if you’re anything like me and need to reward your friends, and perhaps a local apple expert, with a jar of jelly.

Print

Apple Jelly

While some sources say to National Center for Food Preservation cook the apple jelly to 220ºF (104ºC), every time I've made this, it jelled at around 230ºF (110ºC). So it’s best to use a thermometer but also to test your jelly by dropping a dab on a chilled plate, putting it in the freezer for a few minutes, then checking to see if the mixture has jelled by nudging it and seeing if it mounds and wrinkles, as shown in the post. If you don’t have a candy thermometer, you can use the "nudge" method to test your jelly. One pound (450g) of apples cooked will yield about 1 cup (250ml) strained juice from the cooked apples. So if you have fewer apples, or you get a different yield (since all apples are different), you can use that as a guideline and add 3/4 cup (150g) sugar and 1 1/2 teaspoons of lemon juice per cup of strained apple juice. You can easily halve this recipe, too. Note that in step #3 depending on the size of your strainer or colander, you may need to use two, as I do. One tip is when putting the apples in the strainers if you can't get them all in, after filling them up, let the mixture sit 5 to 10 minutes; it'll settle down and compress, and you should be able to add the rest after that.
Servings 6 jars, 1 cup (250ml) each

Ingredients

  • 8 pounds (3.75kg) apples
  • 10 cups (2.25L) water
  • 6 cups (1,2kg) sugar
  • 1/4 cup (60ml) freshly squeezed lemon juice
  • 2 teaspoons Calvados brandy, or Cognac

Instructions

  • Rinse the apples and cut them coarsely into chunks, then put them and the cores and seeds, into a very large stockpot.
  • Add the water, cover, and bring to a boil. When bubbling, reduce the heat a bit, leave the lid askew, and cook for 20 to 30 minutes, until the apples are tender and cooked through.
  • Line a mesh colander with a piece of muslin cloth or a few folds of cheesecloth (or use a jelly bag and stand) and set it over a deep bowl, then ladle the apples and the liquid into the colanders. (I use two lined colanders since it was quite a bit of apples.)
  • Let stand or at least 3 hours (but you'll get more juice if you let the apples drain around ~8 hours), and during that time, no matter how tempting it looks,
    do not press down
    at any time on the apples to extract more juice or the jelly will get cloudy.
  • The next day, measure out the juice. You should have about 8 cups (2L) but may get a little more. Pour the juice into a large, non-reactive pot fitted with a candy thermometer, add the sugar and lemon juice, and bring to a boil. During cooking, as any white foam forms on the surface while the jelly is cooking, gently skim it off with a ladle. (See Note at the end of the recipe for some idea about repurposing the apples and the foam.)
  • Cook until the temperature reaches 220ºF (104ºC). At that point, turn off the heat and begin testing the jelly on a chilled plate in the freezer, using the method mentioned in the headnote. When it wrinkles and holds its shape, it’s done. If not, continue to cook and re-test it at intervals. This batch set at 230ºF (110ºC).
  • Remove from heat, stir in the liquor, and ladle into clean jars, then cap tightly.

Notes

Storage: I don’t preserve my jelly or jams in heat-treated jars because I eat them quickly, but store mine in the refrigerator where they’ll keep for several months. If you wish to preserve them, you can find instructions for canning at the University of Georgia website.
Notes: The cooked apples can be passed through a food mill and used as applesauce, or for Chewy Oatmeal Raisin Cookies, Nonfat Gingersnaps, or my favorite Granola recipe.
Any foam scraped off the top of the jelly while cooking can be refrigerated or frozen, and added to your next batch of jam. It's especially great used in jams made with low-pectin fruit, such as strawberries, apricots, peaches, pineapple, or cherries.

apple jelly

Related Recipes and Links

Les Jars

Apricot Jam

Seville Orange Marmalade

Easy Jam Tart

Bergamot Marmalade

No-Recipe Cherry Jam

Rhubarb-Berry Jam

Beer, Shallot, and Cocoa Nib Marmalade

Pillowy Gluten-Free Pita (from Aran Goyoaga’s Cookbook)

23 September 2025 at 10:00
Pillowy Gluten-Free Pita (from Aran Goyoaga’s Cookbook)

We’ve long admired the super talented gluten-free chef and baker Aran Goyoaga. But our status went from fans to super fans last year when she posted a video of the fluffiest gluten-free dinner rolls we had ever seen. They looked like fluffy, dreamy clouds — how could they possibly be gluten-free?! We wanted to reach through the screen to make sure they were real (translation: eat the whole pan 🤤).

Then earlier this year, Aran announced she was writing a new cookbook(!!) and we nearly started doing cartwheels.

Pillowy Gluten-Free Pita (from Aran Goyoaga’s Cookbook) from Minimalist Baker →

The BEST Gluten-Free Pumpkin Bread (1 Bowl!)

16 September 2025 at 10:00
The BEST Gluten-Free Pumpkin Bread (1 Bowl!)

Fall has three essentials: cozy sweaters, warming soups, and PUMPKIN BREAD! Whether your fond memories of this spice-filled treat are from Starbucks, Grandma’s house, or your favorite box mix, we’re bringing you alllll the nostalgia! This homemade gluten-free + dairy-free pumpkin bread is FLUFFY, tender, spice-filled, and has the perfect balance of sweetness and pumpkin flavor!

Just 1 bowl and simple ingredients required for this fall classic.

The BEST Gluten-Free Pumpkin Bread (1 Bowl!) from Minimalist Baker →

Gluten-Free Funfetti Cupcakes (1 Bowl!)

24 June 2025 at 10:00
Gluten-Free Funfetti Cupcakes (1 Bowl!)

Hold onto your sprinkles, folks! This recipe takes the cake, literally. We’ve taken our crowd-favorite funfetti cupcakes and made them undetectably gluten-free! Your friends and family will be begging for the recipe for these soft, fluffy, perfectly moist, incredibly delicious gems!

The catch? There is no catch. They’re made in 1 bowl with just 10 ingredients! What are you waiting for? Let’s bake some cupcakes!

Gluten-Free Funfetti Cupcakes (1 Bowl!) from Minimalist Baker →

Jerk Tofu & Roasted Plantain Bowls

14 May 2025 at 10:00
Jerk Tofu & Roasted Plantain Bowls

Why choose between spicy, savory, and sweet when you can have them ALL? All the taste buds light up with this Caribbean-inspired bowl featuring roasted plantains and tofu coated in the magic of jerk seasoning and paired with a sweet, crunchy mango cucumber salad and creamy sauce. It’s a big bowl of YUM!

We can’t wait for you to try this satisfying, protein-packed, plant-based meal. Let us show you how it’s done!

Jerk Tofu & Roasted Plantain Bowls from Minimalist Baker →

Gluten-Free Lemon Poppy Seed Muffins (Vegan)

25 February 2025 at 10:00
Gluten-Free Lemon Poppy Seed Muffins (Vegan)

Friends, prepare to level up your muffin game with these undetectably vegan and gluten-free lemon poppy seed muffins! They’re perfectly sweet, tender, FLUFFY, and bursting with bright, lemony goodness. 

Made in just 1 bowl, they’re just as fun to make as they are to eat! Let’s get baking!

How to Make Vegan Gluten-Free Lemon Poppy Seed Muffins

These super FLUFFY muffins begin with using an electric mixer to cream together the vegan butter, cane sugar, and lemon zest.

Gluten-Free Lemon Poppy Seed Muffins (Vegan) from Minimalist Baker →

Chouquettes: French Cream Puff Recipe

By: David
17 February 2025 at 17:01
chouquettes - French cream puffs recipe-5

Dinner in Paris generally starts at 8 pm, especially in restaurants, and I get ravenously hungry between lunch and dinner.

chouquettes - French cream puffs dough

Parisians do dine rather late – often not until 9:30 pm or later, and that’s an awfully long stretch. So French people visit their local pâtisserie for an afternoon snack, known as le goûter, although nowadays Parisians often call it le snack.

chouquettes - French cream puffs

Le snack is often nothing more than a buttery financier or a tender madeleine. At home, French children at home are often given a split piece of baguette with a bar of dark chocolate tucked inside to keep them happy until dinner.

But my snack of choice is invariably les chouquettes: Cream puffs covered with crunchy nuggets of sugar, then baked until golden-brown. The eggy, pillowy puffs are piled uneventfully behind the counter and sold in crisp little paper sacks, each one holding about 100 grams, or about 10. I found that engaging the counter person in a few words of niceties will often mean that before the ends of the bag are twisted shut, an extra puff will be tossed in as a little gift for l’américain.

chouquettes - French cream puffs dough

Nothing is easier to make than chouquettes and you can bake them right with ingredients you likely already have on hand. The only thing you’ll need to find is pearl sugar, which gives the puffs their signature crunch. Some tell me you can buy it at Ikea stores, or you can find it at King Arthur or on Amazon. If you have sugar cubes, you can crush those up into rough chunks and use those, although they’re not quite the same. And if you’re like me, and like chocolate, you could press some chocolate chips into a few of the puffs before baking.

This is one of my favorite of all French snacks and I can polish away a whole bag, or tray, in no time. These are best made and eaten right away, or later the same day – if they last that long!

chouquettes - French cream puffs

Print

Chouquettes

From The Sweet Life in Paris
Shaping the mounds of dough is easiest to do with a pastry bag, although you can use two spoons or a spring-loaded ice cream scoop.
Pearl sugar is available in the U.S .from King Arthur and at G. Detou in Paris, and is also available from French companies such as Daddy (called perles de sucre) and Vahiné (sucre chouquettes). You can approximate pearl sugar by crushing sugar cubes in a sturdy zip-top freezer bag with a rolling pin or hammer.
Course Dessert
Cuisine French
Servings 6 servings

Ingredients

  • 1 cup (250ml) water
  • 1/2 teaspoon salt
  • 2 teaspoons sugar
  • 6 tablespoons (90g) unsalted butter cut into small chunks
  • 1 cup (140g) flour
  • 4 large eggs at room temperature
  • Glaze: 1 egg yolk mixed with 1 teaspoon milk
  • Pearl sugar

Instructions

  • Preheat the oven to 425 degrees (220 C.) Line a baking sheet with parchment paper or a silicone baking mat. (Depending on the size of your baking sheets, it may take two.)
  • Heat the water, salt, sugar, and butter in a small saucepan, stirring, until the butter is melted. Remove from heat and dump all the flour in at once. Put the pan back on the heat and stir rapidly until the mixture is smooth and pulls away from the sides of the pan.
  • Allow dough to cool for two minutes, then briskly beat in the eggs, one at a time, until smooth and shiny.
  • Using two spoons, scoop up a mound of dough with one spoon roughly the size of an unshelled walnut, and scrape it off with the other spoon onto the baking sheet. You can also use a pastry bag fitted with a plain 1/2-inch tip and pipe them.
  • Place the mounds evenly-spaced apart on the baking sheet(s). Brush the top of each mound with some of the egg glaze then press the pearl sugar over the top and sides of each mound. Use a lot. Once the puffs expand rise, you’ll appreciate the extra effort (and sugar.)
  • Bake the cream puffs until puffed and well-browned, about 25 to 30 minutes. If they get too dark midway through baking, lower the heat of the oven to 375ºF (190ºC) and continue baking. (If you want to make them crispier, you can poke a hole in the side with a knife after you take them out of the oven to let the steam escape.)

Notes

Storage: The cream puffs are best eaten the same day they’re made. Once cooled, they can be frozen in a zip-top freezer bag for up to one month. Defrost at room temperature, then warm briefly on a baking sheet in a moderate oven, until crisp.

Chocolate Pecan Shortbread Cookies (Vegan + GF)

3 December 2024 at 10:00
Chocolate Pecan Shortbread Cookies (Vegan + GF)

Say hello to crispy, buttery shortbread cookies studded with pecans and dark chocolate (swoon!). These cookies are our vegan and gluten-free twist on Alison Roman’s legendary Salted Chocolate Chunk Shortbread Cookies and (just like Alison’s), they’re too good to eat just one!

Just 7 ingredients and simple methods stand in your way. Grab your mixing bowl and let’s bake, friends!

Chocolate Pecan Shortbread Cookies (Vegan + GF) from Minimalist Baker →

Pumpkin Cheesecake with Pecan Praline Sauce

By: David
16 November 2024 at 21:56

It’s that time of year again. And that only means one thing: time to start thinking about the holiday baking. In Paris, bakery windows fill up with Bûches de Noël (Yule log cakes) and bourriches (wooden crates) of oysters are piled up at the markets. The chocolate shops are crammed with people, buying multiple boxes as gifts, and people splurge on caviar and Champagne, one of the few things that go on sale in France during the holidays.

One thing you don’t see is the use of pumpkin in desserts. A tart or pie (or ice cream) made of squash might sound funny, especially to non-Americans, but helps to remember that pumpkins, and other squash, are technically fruit. One could also point out the classic Swiss Chard Tart from Provence (which is in a whole other category), and Melanzane al cioccolato, eggplant with chocolate sauce, which I like. (Which one could argue is good because it’s smothered in dark chocolate.) But I don’t think everything goes with chocolate: A friend tried the hot chocolate with oysters at a famed chocolate shop in Paris, and after her description, I wasn’t rushing over there to try a cup.

To get that last image out of your mind, I present pumpkin cheesecake with a pecan praline sauce, that has nothing not to like about it. Cream cheese and sour cream, a buttery cookie crust, and a brown sugar and bourbon-tinged sauce loaded with crunchy pecans. I’m in.

DIYers may raise an eyebrow at using canned pumpkin. I’ve got a few reasons for using it. (And as many of you perhaps know, it’s not made from pumpkin, but a variety of squash similar to butternut squash.) One, is that when writing a recipe, it’s easy to get consistent, similar results when we’re all using the same ingredient. And two, it’s a heckuva lot easier, which is appreciated around the holidays when all of us have enough on our plates, and in our ovens, and it’s  fewer dishes to wash to boot.

If you want to go the other route, you can also make your own cream cheese and Graham crackers, grow your own pecans, churn up your own butter, and make your own cake pan. If you do go that route, let me know when your cheesecake is done ; )

In the meantime, I’m standing over my stove, stirring warm, just-toasted pecans into my praline sauce before lacing it with a dash of bourbon.

The praline sauce is decidedly on the sweet side. But that didn’t stop me (like, at all…) from dipping my spoon into it over and over and over again. Be sure to toast the pecans before using them. My pet-peeve in restaurants is when they don’t toast nuts. Toasting any nut usually improves it by at least 99%, if not more, so if you’re not consistently toasting your nuts before using them on salads, sauces, and in ice creams, start doing it now. It’s not too late.

But I can’t imagine this cheesecake being served without it. Although I could imagine eating the sauce without the cheesecake. And if you’re anything like me, you might find yourself spooning it over ice cream, ladling it over pumpkin pie (without the marshmallow topping), or even spooning it right into your mouth, like I do.

Print

Pumpkin Cheesecake with Pecan Praline Sauce

If using canned pumpkin, make sure that you don't use canned pumpkin pie 'filling' (which is sweetened and spiced); use canned pumpkin that is 100% pumpkin puree. If you want to make sugar pumpkin puree yourself, you can split a sugar pumpkin (or butternut squash) in half and scrape out the seeds. Butter the cut side of the pumpkin and bake cut side down on a parchment-lined baking sheet in a 375ºF/190ºC oven until very tender, about 35 to 45 minutes. When cool enough to handle, scoop out the flesh and puree in a blender or food processor, or pass it through a food mill. If you want to balance the sweetness of the sauce, you could add a scant teaspoon of apple cider vinegar or lemon juice to it, or to taste. Conversely, adding more liquor will take the edge off as well. Outside of the U.S., I often use speculoos cookies in place of the Graham crackers for the crust. If you go that route, you might want to reduce the butter in the crust by about 20% since speculoos cookies tend to be more buttery than Graham crackers. I use a glass-bottom springform pan for cheesecakes, which makes serving them much easier.
Servings 12 servings

Ingredients

For the crust

  • 1 1/2 cups (180g) Graham cracker crumbs
  • 4 tablespoons (60g) melted butter
  • 2 tablespoons sugar
  • 1/4 teaspoon ground cinnamon

For the pumpkin cheesecake filling

  • Three 8-ounce (680g) packages cream cheese at room temperature
  • 1 1/4 cups (250g) sugar
  • grated zest one lemon preferably unsprayed
  • 4 large eggs at room temperature
  • One 15-ounce (425g) canned pumpkin puree
  • 1/2 cup (125g) sour cream or whole-milk plain yogurt
  • 1 tablespoon cornstarch or 2 tablespoons flour
  • 1 teaspoon vanilla extract
  • 1 teaspoon ground cinnamon
  • 3/4 teaspoon dried ground ginger
  • 1/4 teaspoon ground nutmeg
  • 1/4 teaspoon ground cloves
  • pinch of salt

Pecan praline sauce

  • 3/4 cup (105g) packed light or dark brown sugar
  • 1/2 cup (125ml) heavy cream
  • 6 tablespoons (85g) unsalted butter
  • 1/4 cup (60ml) maple syrup
  • 1/2 teaspoon kosher or sea salt
  • 1/4 cup (60ml) bourbon
  • 1 1/2 cups (160g) pecans toasted and coarsely chopped
  • 1/2 teaspoon vanilla extract

Instructions

  • To make the crust, in a medium bowl, mix the Graham cracker crumbs together with the melted butter, sugar, and cinnamon until the crumbs are thoroughly moistened. Butter a 9-inch (23cm) springform pan then press the crumbs evenly across the bottom of the pan. Refrigerate until ready to bake.
  • Preheat the oven to 350ºF (180ºC). Bake the crust until it feels set in the center, 10 to 12 minutes. Let cool on a wire rack. Turn the oven down to 325ºF (165ºC).
  • To make the filling, in the bowl of stand mixer fitted with the paddle attachment (or by hand, in a large bowl), beat together the cream cheese, sugar, and lemon zest, until smooth. Add the eggs one at a time, stopping the mixer between each addition to scrape down the sides of the mixing bowl, then add the pumpkin puree, sour cream, cornstarch or flour, and vanilla extract, along with the spices and salt.
  • Line the outside bottom of the springform pan with foil so it reaches all the way up to the top of the outside of the pan. If you have to use several pieces, I recommend triple-wrapping it to prevent leaking or water getting in the cake pan. (Better yet, use extra-wide foil, so you only need one sheet.) Scrape the mixture into the prepared springform pan and smooth the top. Place the cheesecake in a larger pan, such as a roasting pan, then add very warm water to the larger pan until it reaches halfway up the outside of the cake pan.
  • Bake the cheesecake in the oven until the center looks just slightly set, but not wet and sloshy in the center when you jiggle the pan. I start checking the cheesecake at the 50 minute mark, as it usually takes about 50 minutes to 1 hour, but may take up to 1 hour and 15 minutes. Remove the cake from the oven, then remove the cake from the water bath and let cool completely on a wire rack. Refrigerate for at least 4 hours before serving.
  • Make the pecan praline sauce by heating the brown sugar, cream, butter, maple syrup and salt in a medium saucepan over medium-high heat, until it comes to a boil, stirring frequently. Let boil for 1 minute without stirring. Remove from heat and add the bourbon, pecans, and vanilla.

Notes

Serving: Run a sharp knife around the outside of the cheesecake to release it from the springform pan, then remove the sides of the pan. Dip the knife in warm water, wipe it dry, and use it to cut clean slices from the cheesecake. Serve with a ladleful of warm sauce poured over it. If the sauce gets too thick upon standing, you can thin it with milk or water.
Storage: The baked or unbaked crust can be made up to three days ahead and stored at room temperature (if baked), or refrigerated (unbaked). It can also be frozen either baked or unbaked for 2-3 months. The baked cheesecake will keep for up to 4 days in the refrigerator.

Related Recipes and Links

Dulce de leche cheesecake

Ingredients for American Baking in Paris

Pumpkin Ice Cream

Cheesecake

Maple Pumpkin Flan

Homemade Graham Crackers (Smitten Kitchen)

Homemade bourbon (Bourbon of the Day)

Homemade salt (Ruhlman)

Cranberry Sauce with Candied Oranges

By: David
16 November 2024 at 21:55

Cranberry Sauce recipe-6

It’s easy to forget about Thanksgiving in Paris. There are no bags of stuffing mix clogging the aisles in the supermarkets. If you asked a clerk where is the canned pumpkin, they would look at you like you were fou (crazy). And if you open the newspaper, you won’t come across any sales on whole turkeys. In fact, it’s quite the opposite; a friend saw a 5 kilo turkey, an 11 pound bird, at the market the other day for €68kg, or €340 ($424).

(Although I think if you spent over four hundred dollars on a turkey, you wouldn’t forget it for a long, long time.)

Cranberry Sauce with Candied Oranges

I suggested that the turkey vendor perhaps forgot a comma because whole turkeys are, indeed, available in Paris, and they actually excellent since most are fermier, not the plump whoppers you see in the states. The only thing you have to be careful about is that one turkey might not be enough if you’re feeding a large crowd, say, a group of over six people.

Savvy Americans know to order a whole turkey in advance from their butcher and – get this: You can ask them to cook it for you. Yes, since the butchers usually have spits with roasting chickens on them, it’s usually not a problem for them to slide a turkey on there. That’s especially nice because most people in Paris just have one oven and it’s hard to tie it up for the entire day with just a bird roasting in it when you’ve got so many other things to bake and cook off.

Cranberry Sauce with Candied Oranges

The reason I am sharing this recipe today, rather than days ago when everyone was in a tizzy posting recipes, shopping and preparing their menus, is that I kind of forgot that it’s Thanksgiving. Actually, I didn’t quite forget, but wasn’t swept up in the frenzy because this week, and today, are just like any other week or day in Paris.

People go to work and school, banks and stores are open, and no one is setting their alarms for le vendredi noir (Black Friday), although that’s starting to happen in France ever since the government loosened their restrictions on allowing sales more than the government mandated twice-yearly ones, as they did before the economy took a dip. (Tomorrow, I suspect at least one vendor selling an expensive turkey in Paris is going to have to offer a serious mark-down if he wants to sell that bird.)

Cranberry Sauce with Candied Oranges

So we’re celebrating tomorrow night with some friends who are making dinner. I’m pitching in and doing some baking, as well as bringing a nice bottle of Sauternes. I also happened to have a few cans of cranberry sauce that I had brought back from the states, that I was planning to bring, just for fun.

I sent my hostess a photo and she wrote back right away, threatening to blackmail me by making my canned contraband photo public. I beat her to the punch, posting it on Instagram. But when I noticed that of the four ingredients in the can, two were industrial sweeteners, I decided to take matters into my own hands.

Cranberry Sauce with Candied Oranges

Fortunately I had a stash of fresh cranberries in my freezer, since if a turkey was €68 a pound, I’d have to dig deeper into my pockets if I was going to have to buy fresh cranberries in Paris on Thanksgiving Day.

Cranberry Sauce with Candied Oranges

I candied some organic orange slices (which were normally priced), simmered up a syrup with the sharpness of cider vinegar and a hit of dark rum, then added my precious canneberges, cooking them ’til they popped. I stirred in the candied oranges, then packed it up, ready to go – getting a recipe in just under the wire.

Happy Thanksgiving!

Print

Cranberry Sauce with Candied Oranges

Note that the orange slices may fall apart as they get close to being done. Not to worry; they’re just going to be chopped up later. If you want, you can substitute 3/4 cup (180ml) orange juice for the water that you cook the cranberries in. I use dark rum, but whiskey, bourbon, or an orange-flavored liqueur, such as Grand Marnier or Cointreau, would work nicely in its place. You can double or triple the recipe if you wish.

Ingredients

  • 1 large naval orange preferably unsprayed, or another variety, with seeds removed
  • 3/4 cup (180ml) water, plus 3/4 cup (180ml) water
  • 1/2 cup (100g) granulated sugar
  • 1/2 cup, packed (90g) light brown sugar
  • 2 tablespoons dark rum
  • 1 stick cinnamon
  • 1 1/2 tablespoons cider vinegar
  • 1/8 teaspoon ground allspice
  • 1 cup (110g) fresh or frozen cranberries

Instructions

  • Lop off the two ends of the orange. With a sharp, serrated knife, cut the orange into 1/3-inch (1cm) slices.
  • In a medium-sized nonreactive saucepan, cover the orange slices with cold water. Bring to a boil, reduce heat, and cook at a low boil for 10 minutes. Drain. Return the oranges to the saucepan. Cover with water again, bring to a boil, and cook for another 10 minutes. Drain and rinse with cold water.
  • Return the orange slices to the saucepan, add 3/4 cup of water and granulated sugar. Bring to a boil then reduce the heat to a low boil and cook until the liquid is reduced to a thick syrup. During cooking, turn the oranges a few times in the reducing syrup so that they candy evenly.
  • As the liquid cooks down, close to when there is very little in the saucepan, monitor them closely turning them frequently to avoid burning them. Remove from heat once most of the liquid is evaporated. Tilt the oranges into a colander and let cool.
  • In the same saucepan, add the other 3/4 cup water, brown sugar, rum, cinnamon stick, vinegar, and allspice. Bring to a boil, add the cranberries, then reduce the heat slightly and cook until the cranberries pop and just start to fall apart. Chop the candied oranges into little pieces about the size of peas and add the candied oranges to the cranberries. Cook for about a minute, then remove from heat.

Notes

Serving: Pluck out the cinnamon stick and serve the sauce warm or at room temperature.
Storage: The sauce can be made up to one week in advance and refrigerated. Bring to room temperature before serving.

Related Recipes

Cranberry Sauce with Red Wine and Figs

Chocolate Pecan Pie

Mom’s Roast Turkey (Simply Recipes)

1-Bowl Cranberry Orange Scones (Vegan + GF)

12 November 2024 at 10:00
1-Bowl Cranberry Orange Scones (Vegan + GF)

Cranberry + orange: a dynamic duo! This duo has made delicious muffins, crisp, and cranberry sauce, and now a new cranberry + orange favorite joins the Minimalist Baker family: scones! 

These EASY, 1-bowl scones are fluffy, citrusy, lightly sweetened, generously studded with fresh cranberries, and undetectably vegan + gluten-free. Perfect for holiday breakfasts, brunches, and beyond! Let us show you how it’s done!

These fluffy, tender, gluten-free scones get their perfect texture from a mix of almond flour, oat flour, and potato starch.

1-Bowl Cranberry Orange Scones (Vegan + GF) from Minimalist Baker →

Easy Gluten-Free Cornbread (1 Bowl!)

5 November 2024 at 10:00
Easy Gluten-Free Cornbread (1 Bowl!)

It’s no secret we love cornbread and have shared recipes for it before (exhibits A and B). And we wouldn’t be posting another version if it wasn’t worth it. So trust us…it’s worth it! This FLUFFY, moist gluten-free cornbread is naturally sweetened with honey, SO flavorful, and seriously EASY to make. 

Just 1 bowl and 8 ingredients stand between you and the best gluten-free cornbread.

Easy Gluten-Free Cornbread (1 Bowl!) from Minimalist Baker →

Fluffy Pumpkin Oat Cookies (1 Bowl!)

8 October 2024 at 10:00
Fluffy Pumpkin Oat Cookies (1 Bowl!)

Looking for a cookie filled with fall flavor? This is it! Fluffy, cinnamon-spiced, pecan-studded pumpkin oat cookies made in 1 bowl in 30 minutes

These vegan + gluten-free treats are easy, delicious, and extra irresistible when topped with pumpkin spice frosting. Preheat your oven…it’s cookie time!

These 1-BOWL fluffy fall dreams start with melted (vegan) butter, brown sugar, pumpkin purée, and vanilla extract.

Fluffy Pumpkin Oat Cookies (1 Bowl!) from Minimalist Baker →

Vegan Pumpkin Spice Buttercream Frosting

1 October 2024 at 10:00
Vegan Pumpkin Spice Buttercream Frosting

Frosting lovers, rejoice! We have the perfect pairing for your favorite pumpkin bread, cookies, spice cake, and more: Pumpkin spice buttercream frosting! It’s decadent, sweet, buttery (but vegan + dairy-free!), and perfectly pumpkin-spiced

This fluffy fall dream is just 1 bowl, 5 minutes, and 4 ingredients away. Grab your favorite pumpkin treat and let’s get to frosting!

Vegan Pumpkin Spice Buttercream Frosting from Minimalist Baker →

❌