❌

Normal view

James Beard’s Amazing Persimmon Bread Recipe

By: David
2 November 2026 at 08:38

Like most Americans, even French people aren’t so familiar with persimmons. They may see them at the market, look at their curiously, but don’t stop to buy any. Or if they do, they take them home, bite into an unripe one, make a face, and toss them out.

One of my friends living north of San Francisco in Sonoma County had an enormous persimmon tree. Each fall, the leaves would drift off the tree, leaving bright orange globes of fruit dangling off the sparse branches. The beautiful, gnarled wood was quite a contrast to the smooth, brilliantly-colored orbs of fruit. (The wood of the persimmon tree is not just beautiful but it’s prized by makers of many of the finest golf clubs in the world and is considered superior to most others woods or man-made materials.)

The most common persimmon you’re likely to find is the Hachiya, a slightly elongated fruit that tapers to a point. They’re incredibly tannic and astringent when not ripe and need to be squishy-soft and feel like a full water-balloon before using. Once ripe, the sweet jelly-like pulp can be spooned out and pureed through a blender, food processor, or food mill, although some folks like to eat it as is or frozen. The pulp freezes beautifully, and in fact, I’ll often freeze some for late-winter use. To ripen Hachiya persimmons, simply let them sit on your countertop until very soft. If they don’t riped at the same time, you can store the puree in the refrigerator until the others have ripened. You can hasten the process by putting persimmons in a well-sealed container; adding an apple, which gives off a lot of ethylene gas, which will speed things up.

The other common persimmon is the Fuyu, which is squatter than the Hachiya and matte-orange. Unlike the Hachiya, the Fuyu is meant to be eaten hard and is delightfully crunchy. I peel them, then mix pieces into an autumnal fruit salad along with dates, slices of Comice pears, pomegranate seeds and yes…even some bits of prunes.

Finding recipes for using persimmons can be difficult. I invented a recipe for a quick Persimmon Cake for my book Ready For Dessert, which I make often for Thanksgiving. And I also like James Beard’s Persimmon Bread, a nifty recipe from his classic book on breadmaking, Beard on Bread, published decades ago.

I was fortunate to meet James Beard several times when he came to dinner at Chez Panisse. In the years after he passed away, we’d get all sorts of luminaries coming through our kitchen, people like James Beard, Jane Grigson, and Richard Olney, who were really wonderful cooks and writers.

The most charming thing about this simple Persimmon Bread recipe is that Beard gives bakers an inexact amount of an ingredient: sugar. So go ahead just this one time to improvise a little. Although I recommend using the higher amount of sugar, feel free to use whichever quantity you’d like…after all, you have permission from the granddaddy of all cooks, James Beard himself.

Print

Persimmon Bread

Adapted from Beard on Bread by James Beard
Using the higher amount of sugar will produce a moister and, of course, sweeter bread. I often use bourbon, as I like the flavor, but cognac, rum or brandy work well, instead. if you only want to make one loaf, cut the recipe in half. If you make two, this bread freezer beautifully.
Course Bread
Cuisine American
Keyword bread, Persimmon, raisins, walnuts
Servings 12 servings

Ingredients

  • 3 1/2 cups (420g) sifted flour
  • 1 1/2 teaspoons salt
  • 2 teaspoons baking soda
  • 1 teaspoon ground nutmeg
  • 2 to 2 1/2 cups (400-500g) sugar
  • 1 cup (8oz, 225g) melted unsalted butter cooled to room temperature
  • 4 large eggs at room temperature, lightly beaten
  • 2/3 cup (160ml) Cognac or bourbon whiskey (see headnote)
  • 2 cups (500ml) persimmon puree (from about 4 squishy-soft Hachiya persimmons)
  • 2 cups (200g) walnuts or pecans toasted and chopped
  • 2 cups (270g) raisins or diced dried fruits (such as apricots, cranberries, or dates)

Instructions

  • Butter 2 loaf pans. Line the bottoms with a piece of parchment paper or dust the pans with a little flour and tap out any excess.
  • Preheat oven to 350ºF (180ºC).
  • Whisk the flour, salt, baking soda, nutmeg and sugar together in a large mixing bowl.
  • Make a well in the center of the dry ingredients then stir in the butter, eggs, liquor, and persimmon puree. Avoid overmixing the batter, but if there are some lumps, you can whisk it a few times briskly to smooth it out. Fold in the nuts and raisins.
  • Bake 1 hour, or until toothpick inserted into the center comes out clean.
Notes

Storage: Will keep for about a week, if well-wrapped, at room temperature. The Persimmon Bread can be frozen, too.

    Lamb Tagine recipe

    By: David
    18 October 2026 at 15:50

    One of the first lessons I learned, right after I moved to Paris, was to never, ever be on time for a dinner party. When i got my first invitation to a dinner party, my hosts told me, “Come at 8pm…which in Paris, means to come at 8:20 or 8:30pm.”

    Subsequently, when I have guests for dinner, I expect them to be at least 20 minutes late, although there’s much debate on how late you’re actually supposed to be. But if you’re on time, or early, your host likely won’t not be ready and you’ll probably catch them by surprise.

    It’s a tricky balance when you’ve inviting people for dinner, since you want make sure when everyone’s at the table, dinner will be ready and perfectly cooked. If your friends show up very late, and you’ve made something like pork roast, which can take a while to bake, but will dry out if overcooked, you’re sunk.

    So one technique I rely on is braising. Braising is cooking something long and slow, which softens cuts of meat and poultry, and infuses whatever you’re cooking with flavor. In the case of a tagine, a North African dish that benefits from braising, your cooking the meat in a broth of onions, aromatics, and spices, which all come together after a stint in the over to make a perfect one-pot meal, that’s can be kept warm in the oven until everyone is at the table.

    In Paris, with so many Arabic and North African butchers around, it’s easy to find cuts of meat that lend themselves to slow-braising, and tagines are quite popular in France. When I wrote my book, My Paris Kitchen, someone wrote to me, wondering why I had non-French recipes in my book. Just like people in other countries, such as Americans who make Mexican and Asian foods at home, or Dutch people who eat rijsttafel, an Indonesian meal composed of many side dishes, French people regularly eat a variety of foods from other cultures, especially in Paris, which is a melting pot, where you can enjoy couscous in Belleville, dosas in the Indian quarter, and Vietnamese noodles in the thirteenth arrondissement. But really, you can get all those foods in just about every corner of the city.

    Tagines are simple to make, and once you’ve made one, you’ll wonder what took you so long to make one? You’re basically just browning the meat in a Dutch oven or large pot, then sautéing an onion with spices and seasonings, adding a few spoonfuls of tomato paste or a can of tomatoes, some stock or water, then braising it in the over for a few hours.

    This is my basic recipe that I make often. It works great with a lamb shoulder, which you can have your butcher cut into pieces for you. If you can only get a whole lamb shoulder, you can skip the sautéing step and just braise the lamb shoulder whole. If you can get lamb shanks, this recipe works well with four of them.

    I like to serve it with pearl couscous, which you can see above. It’s basically pasta pearls, and goes by several different names. Regular couscous is also an option, as is rice-shaped pasta, known as orzo

    Print

    Lamb Tagine

    You can substitute a cut up chicken for the lamb. If using chicken, reduce the oven time to 1 to 1½ hours. I also like to add prunes, raisins or dried apricots or cranberries to the tagine, during the last 20 minutes of cooking.
    You can vary the spices depending on what you have or can get. The saffron is optional since that can be more difficult (and expensive) to obtain, but I like the flavor of it in a tagine. Sometimes I use tomato paste in my tagines, and other times I add a can of crushed tomatoes.
    I put a jar of harissa, North African hot sauce, on the table, for guests who like a little spice with their tagine. (And hosts like me, who like it too!) A favorite brand of harissa in the U.S. is made by NY Shuk.
    Course Main Course
    Cuisine Mediterranean
    Keyword tagine
    Servings 6 servings

    Ingredients

    • 1 lamb shoulder cut into 4 pieces
    • 1 1/2 teaspoons kosher or sea salt plus more, to taste
    • 1 medium onion minced
    • 2 1/2 cups (600ml) chicken stock or water
    • 1 teaspoon ground ginger
    • 1 teaspoon ground cumin
    • 1 teaspoon ground turmeric
    • 2 teaspoons paprika
    • 1 teaspoon ground cinnamon
    • freshly-ground black pepper
    • 1 small bunch fresh cilantro tied with a string, plus a few sprigs for garnish
    • a pinch of saffron threads (optional)
    • 2 tablespoons tomato paste or one 14 ounce (400g) can crushed tomatoes
    • Harissa for serving

    Instructions

    • Massage the pieces of lamb shoulder with the salt.
    • Heat a few tablespoons of oil in a Dutch oven over medium-high heat, and sear the lamb pieces very well, turning them only after they’re nicely browned (this step adds flavor to the tagine.) As you cook the lamb pieces, don’t crowd them in. If your Dutch oven isn’t big enough to cook them all in a single layer at the same time, brown the lamb pieces in batches.
    • Preheat the oven to 350ºF (175ºC). Once the lamb is browned, remove the pieces from the pot and set them on a plate. (If there is a lot of fat in the pan, you can remove some of it, but leave a film of it in the bottom of the pan.)
      Add the chopped onion to the pot and some of the stock (or water), then scrape the bottom of the pan with a flat wooden spatula to release the flavorful browned bits. Add the spices, the rest of the water, the bunch of cilantro, the saffron, if using, and the tomato paste or crushed tomatoes. Give everything a quick stir to mix everything together.
    • Cover the pot and bake in the oven for 2 1/2 to 3 hours, turning the lamb over in the liquid a few times during baking. The liquid should just be simmering gently. If it’s boiling, turn down the heat. Add more liquid if necessary while it's cooking so the meat is half submerged in liquid. When the meat starts to fall off the bone, that’s when it’s ready. Taste the liquid and add more salt if desired.
    • Pull the meat off the bones. Spoon the meat and some juices into bowls over a bed of couscous or pearl couscous (pasta). Garnish with a sprigs of fresh cilantro.

    Notes

    To serve, remove the cilantro and discard. Squeeze some lemon juice into the liquid and add more salt, if desired. Serve with rice or bulghur, along with juices from the tagine. At the table, make sure you have a tube of harissa handy, the fiery Moroccan hot sauce.


    Moelleux of Summer Fruits

    By: David
    12 September 2026 at 16:32

    This may or may not happen to you, but sometimes when I’m a guest in someone’s home, where everyone pitches in to make dinner, all eyes (or just the host’s eyes) fall on me to make dessert. Gulp. I happy to pitch in with the cooking or bringing along a few baked goodies for the weekend, but I’m not always prepared to bake on the spot.

    If you’re lucky, there may be a scale, a cake pan, a sharp knife, and hopefully sugar, butter, eggs, and flour. If you’re really lucky, there might be a whisk and a spatula, too. But if you’ve ever tried to peel a dozen apples with a steak knife because it’s the only one that’s even close to sharp, or eyeball 1 cup/140g) of flour, you know what I’m talking about. I once did a post on Things I Bring When I’m a Guest for the Weekend, which raised the ire of some, but I require a minimum of a knife, a spatula, a bowl, and a cake pan if I’m going to bake something, like a cake.

    You’re likely familiar with the Moelleux au chocolat, the soft warm individual melting cakes that everybody loves. (If you have the kind of friends that have six to eight ramekins, well, that’s great.) I recently saw French food writer and journalist François-Régis Gaudy (his book, Let’s Eat France, translated into English, is a lot of fun and pretty amazing) make a Moelleux à la abricot on his Instagram page, which didn’t require a mixer or any special equipment. Not even a whisk!

    His Apricot Cake was a very casual affair, baked in a rectangular mold on a sheet of parchment paper, and came out of the oven rather free-form, looking exactly like something that would come out of a French home cook’s kitchen, when baking dessert for friends. I’m fine with that but didn’t know if you were, so I thought I’d tinker with it and make it in a cake pan, which is easier to slice. I also fiddled around with the ingredients, as well as putting the brown granulated sugar on top (rather than underneath), to give the moelleux a nice sheen.

    I used a springform cake pan but you can use any similar-sized vessel; an 8-, 9- or 10-square or round cake pan would work, or even a baking dish. The baking time will vary but if your experience with using a variety of ovens in other people’s homes is anything like mine, you’ll find that each one is different, and what one says is 350ºF/180ºC will be different than another whose dial says 350ºF/180ºC. I don’t travel with an oven thermometer but may add that to things I bring when I’m staying with people.

    Tip: If you’re staying in someone’s place for the weekend, you can mix the dry ingredients in a container or zip-top bag then put the dessert together when you get there.

    I made one cake with apricots first, which was sensational, but knowing fresh apricots are harder to come by elsewhere, I made another one with plums, which came out great as well. It would work with other summer fruits and berries but I really like the tanginess of apricots or plums against the moist cake layer, so stuck with those two. A handful of berries wouldn’t hurt either, but I do recommend keeping it simple.

    Print

    Moelleux aux fruits d'ete

    Inspired by a recipe from French food writer and journalist François-Régis Gaudry
    The ground almonds are really delicious in the dessert, but if you can't get ground almonds (sometimes called almond meal or almond flour), you can use 1 1/4 cups (175g) of all-purpose flour in place of the mix.
    The picture in the post of the batter shows 3 eggs being added, and I took that photo when I first tested the recipe, which I did a few more times after that. The final recipe that I came up with, below, uses 2 eggs.
    Course Dessert
    Servings 8 servings

    Ingredients

    • 1 1/2 pounds (680g) apricots or plums (or another summer fruit, see headnote)
    • 3/4 cup, plus 2 tablespoons (100g) almond flour
    • 1/2 cup (65g) all-purpose flour
    • 1 1/2 teaspoons baking powder preferably aluminum-free
    • 1/4 teaspoon salt
    • 1 cup plus 2 tablespoons (230g) granulated sugar
    • 5 ounces (140g) unsalted butter at room temperature
    • 2 large eggs at room temperature
    • 1 teaspoon vanilla extract (or 1/2 teaspoon almond extract)
    • 1 1/2 tablespoons coarse granulated brown sugar such as tubinado sugar (or granulated white sugar)

    Instructions

    • Halve the fruit and remove the pits. Slice the fruit into 3/4- to 1-inch (2-3cm) wedges. Set aside. Preheat the oven to 350ºF (180ºC.) Grease a 9-inch (23cm) springform pan very well with butter or non-stick spray. (If you don't have a springform pan, you can use another cake pan but it may be harder to get the cake out so you may want to also line the bottom with parchment paper.)
    • In a medium mixing bowl, stir together the almond flour, all-purpose flour, baking powder, salt, and sugar. (My preferred tool to use for this step is a silicone spatula.) Add the soft butter and mix it in with the spatula until it's broken up into little pieces, roughly the size of kernels of corn. Stir in the eggs and vanilla extract, until it's almost smooth. It's fine if there are small pieces of butter visible.
    • Scrape the batter into the prepared pan and smooth the top. Arrange the wedges of fruit on their sides in concentric circles over the batter, snugly placing the wedges against each other, pressing them gently into the batter as you go. Avoid putting them right up against the sides of the pan. It's best to leave some room for the batter to rise between the fruit and the pan, to avoid juices from the fruit adhering to the sides of the pan as the moelleux bakes. (It's unavoidable - and natural - if using juicy fruits, like plums, to have juice run out. But placing the slices not right up against the sides of the pan will help you get the cake out of the pan later.)
    • Sprinkle the coarse sugar over the top and bake until the center just feels set; a toothpick inserted into the center should come out free of cake crumbs stuck to it, about 1 hour. Remove from the oven and set on a cooling rack. If any fruit juices have bubbled up and stuck to the sides of the pan, run a knife around the outside of the cake, which will help it release later.

    Notes

    Notes: If you want to make this gluten-free, I'd go with the almond flour rendition, and use a gluten-free flour substitute in place of the wheat flour. If you want to reduce the sugar in the recipe, you could cut it by 6 tablespoons/75g and skip the sugar on top, although I wouldn't.

    Cherry Jam

    By: David
    31 July 2026 at 11:01

    One of the first “recipes” on this blog was No-Recipe Cherry Jam, posted in 2005, which wasn’t quite a recipe. Nevertheless, a lot of people successfully used those guidelines to make cherry jam over the last fifteen years. The basis for it was how I’ve been making jam forever, using 3 parts sugar to 4 parts fruit puree. The standard ratio is to use equal parts sugar to fruit puree but I like to use less.

    I often make cherry jam with sweet cherries, which are what one usually finds at the market. But if you can find sour cherries, those are wonderful in the mix, but when fresh, they have a short shelf life so should be used, pronto.

    So feel free to mix things up, cherry-wise!

    Unlike other recipes, making jam can require a bit of using your instincts, rather than relying on set times and temperatures. Checking the jam texture on a chilled plate is the best way to tell you when it’s done. (As an example, jam usually sets between 218-220ºF,103-104ºC, but this one set a few degrees higher.) Because cherries are low in pectin, this one often “sets” a few degrees higher, although don’t expect cherry jam to be as stiff as other jams that you might be used to, or buy. It’ll be a bit runny, which is just how it should be.

    One tool I do recommend is a cherry pitter. Not everyone has one, and they do fall into the “single use” category, but come cherry season, mine gets a good workout. I wrote more about why you should get a cherry pitter here.

    The biggest question I get about jam recipes is people asking about reducing the amount of sugar in them. Sugar in jam does a couple of things. One, it helps the mixture jell, along with any natural pectin in the fruit. And two, it preserves it. If you use less, the jam will be runnier and won’t last as long.

    Europeans tend to like their jams runnier than their American counterparts, so in the morning, you can have a European experience when you spoon some of this jam on your morning toast, as we do.

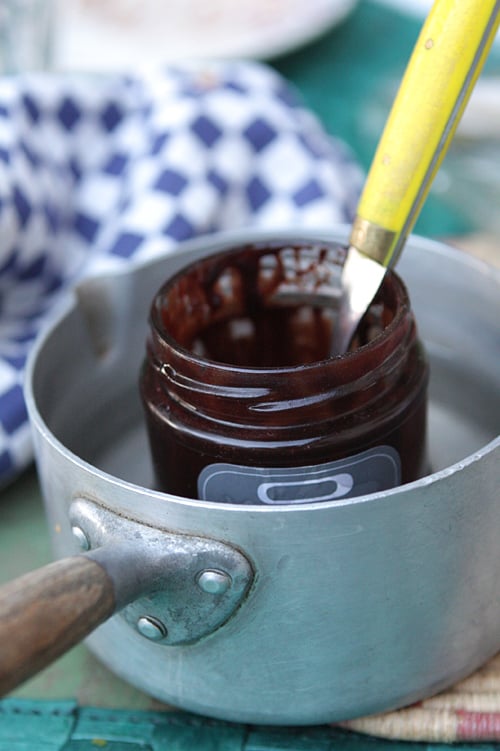
    Unlike other jams that wrinkle when you do the wrinkle test (putting a spoonful of jam on a frozen plate, returning the plate to the freezer and when the jam wrinkles with you nudge it, it’s done), this one will be more like thickened syrup. It’s done when it’s thick and sticky and holds its shape for a few moments after you drag a spoon through it (below.) The cherries will be shiny and glossy, like beautiful ruby-colored jewels.

    Print

    Cherry Jam

    If you only have 1 pound (450g) of cherries, feel free to cut the recipe in half. The liqueur is optional but heightens the flavors of the jam. Use only enough so it complements the fruit – you don't want to overwhelm it. As mentioned, this jam will be a bit on the runny side when "set." Sour cherries will produce a softer-set jam than sweet cherries.
    Course Breakfast
    Cuisine American
    Keyword cherries, cherry, jam

    Ingredients

    • 2 pounds (900g) sweet or sour cherries or a mix
    • 2 1/2 cups (500g) sugar
    • freshly squeezed juice of one medium lemon plus additional juice if desired
    • 1-2 drops of almond extract or 1-2 teaspoons of kirsch or another liqueur, such as amaretto or vodka

    Instructions

    • Remove the stems and pit the cherries. Put them in a large non-reactive pot. If using only sweet cherries, add 2-3 tablespoons of water to the pot. (Sour cherries will exude enough liquid on their own so no need to add additional water.) Put a small plate or saucer in the freezer.
    • Cover the pot and cook over medium heat, stirring occasionally, until the cherries are wilted and cooked through, about 10 minutes.
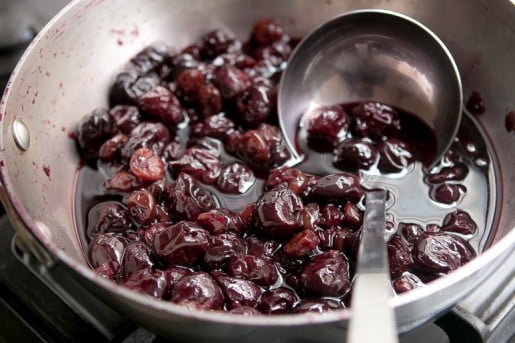
    • Remove the lid and stir in the sugar and lemon juice. Increase the heat to medium-high and cook, stirring frequently until the mixture thickens. It's hard to say how long it will take, but when the mixture resembles the sixth picture in the post, the one in the pot with the bubbles, turn off the heat and test the jam by putting a small spoonful on the frozen dish. Return the dish to the freezer for a few minutes until the jam on it is cool. Run a spoon through it and if the liquid is very thick and leaves a clear patch, as shown in the photo in the post, it's done. If not, return the plate to the freezer and continue to cook the jam, testing it at various intervals, until it's done. (If you want to use a thermometer to check the jam, it should be ready somewhere between 220º and 225ºF, 104º-107ºC.)
    • When ready, turn off the heat and stir in the almond extract or liqueur (or both, if you wish). If desired, you could add an extra squeeze of lemon juice to balance the sweetness. Ladle into clean jars.

    Notes

    Storage: This jam will last several weeks in the refrigerator. If you wish to can it, you can find instructions here.
     

    Strawberry Jam

    By: David
    17 June 2026 at 08:22

    Strawberry Jam recipe

    I was recently gifted an overload of strawberries: I bought four baskets from a vendor at the market, whose booth I shop at often, and he threw in two extra baskets for free, the equivalent of a carte de fidelité (loyalty card) in Paris. So I’ve spent the past few days washing, hulling, cutting and cooking my unexpected bounty.

    I’ve been making a number of things with the gorgeous strawberries. But I also realized that while I have a Strawberry-Rhubarb Jam recipe on the site, I didn’t have a strawberry jam. So here it is.

    Strawberry Jam recipe

    Although I’m giving you a recipe for the amount of strawberries that I used, you can use the same proportions if you have just a basket…or a bushel. You’ll just need to do a slight amount of math. Only the cooking time will change, so keep an eye on things.

    Jam-making is not something you walk away from and you need to rely more on look and feel, rather than exact times. Another thing about jam-making is that fruit and berry jams are always better made in small batches; the shorter the cooking time, the better the flavor. So if you have more than 2-pounds (900g) of strawberries, consider making jam in a couple of batches rather than one big one.

    Frozen zabaglione recipe

    Print

    Strawberry Jam

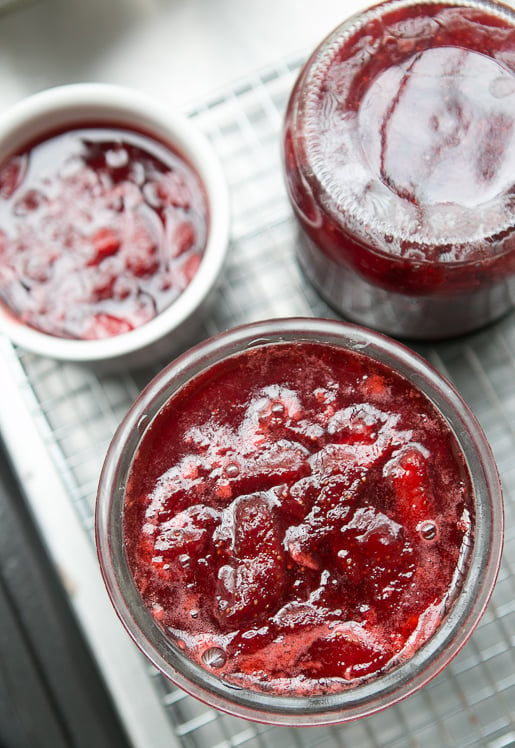
    Many traditional recipes use an equal amount of sugar to fruit, by weight, but I find it’s okay to decrease it to these proportions. Sugar is both a thickener and a preservation agent. If you reduce it too much more, your jam may not thicken and won’t keep for a long time. (Which is okay if you want thinner jam, you keep it in the refrigerator, and eat it relatively quickly.) This recipe can be scaled up or down, depending on how many strawberries you have. But if you want to make a lot more, best to make it in a couple of batches. To prepare the jars, pour boiling water into them, as well as into the lids. Let them sit 5-10 minutes, then carefully pour out the hot water and set them upside down on a cooling rack until ready to fill. Since I keep my jams in the refrigerator, I don’t put them up them in a traditional sense. I usually just overturn the jars and let them cool, which provides a reasonable seal, then refrigerate them. I find my jams keep well this way for up to one year. Check the National Center for Home Food Preservation website for instructions on how to can fruit jams. Note: Last season strawberries tend to have less natural pectin than ones that arrive earlier. So your jam may be less jelled. One strategy is the finely grate a green apple into the strawberries before cooking them, which adds pectin. (There are guidelines here for using liquid and powdered pectin.) I don’t mind the slightly runnier jam and it’s terrific on yogurt or served with fresh goat cheese for dessert.

    Ingredients

    • 2 pounds (900g) strawberries
    • 1 1/4 pounds (2 2/3 cups, 580g) sugar
    • one lemon organic or unsprayed
    • optional: kirsch (or eau-de-vie, or crème de cassis)

    Instructions

    • Wash and hull the strawberries and cut them into quarters. If some are larger or smaller, just make sure the pieces all about the same size.
    • 2. Toss them in a large pot, such as a Dutch oven casserole made of a nonreactive material, with the sugar. Cut the lemon in half, squeeze the juice into the pot, and add the lemon halves to the berries. Stir well, cover, and let sit a couple of hours (up to 8 hours) at room temperature, stirring one or two times while they marinate.
    • Put a small plate in the freezer. Turn the heat on under the strawberries to medium-high and cook the strawberries, stirring occasionally, as they reduce and the juices thicken. If a lot of foam rises to the surface, skim it away. When the syrup is the consistency of warm maple syrup – it will take about 10 to 15 minutes or so, depending on the pot and berries, turn off the heat and put a spoonful of the jam on the frozen plate and return the plate to the freezer. Check it in a few minutes; if it wrinkles when you nudge it, it’s done. If not, return the plate to the freezer and cook the jam a little more, testing it again. It may take a few times before you get it to the right consistency.
    • When the strawberry jam is done, remove the lemon and stir in a few drops of kirsch, if using, then ladle the jam into the prepared jars.

    Related Recipes and Links

    Apricot Jam

    No-Recipe Cherry Jam

    Pickled Strawberries

    Easy Jam Tart

    Eggplant Jam

    Baking Ingredients and Substitutions

    Seville Orange Marmalade

    By: David
    11 March 2026 at 09:02

    This time of year brings Seville oranges to the markets in Paris. For the past few years, I kept wondering why they were so hard to find since it’s perhaps my favorite of all jams and jellies to make, and eat. But lately, they’ve been everywhere.  And I found myself busy making a lot of marmalade, which was easier since I came up with a brand-new, revolutionary technique which I couldn’t wait to share.

    Since Seville oranges are rife with seeds, which makes slicing them difficult since you have to keep moving the seeds around with your slippery fingers, while trying to cut the oranges, then finding more, and fishing around deeper inside to extract more, plucking them out, etc… Each Seville orange has perhaps twenty to thirty inside.

    So I thought, what if I was to squeeze the juice and seeds out first, strain them, then pour the juice back in? The seeds are precious commodities in jam-making, and get saved and used since they’re so high in pectin.

    They’re wrapped in a sack and cooked with the marmalade giving the marmalade gets a suave, jellied texture. And this simple method, featured in my book Ready for Dessert, makes the whole process much easier.

    You might be interested to know that Seville Orange Marmalade was created because of an error. Apparently, an Englishwoman in 1700, the wife of a grocer, was stuck with some sour oranges that were bought cheaply from a boat that was carrying them from Seville.

    Since there was a storm, they wanted to get rid of their stock or oranges quickly, so the grocer bought them. But they were inedibly sour so his wife decided to try making jam from them, and viola!…Seville Orange Marmalade was invented.

    Print

    Seville Orange Marmalade

    Adapted from Ready for Dessert (Ten Speed)
    In my book, I advise letting the cooked oranges and the seeds rest overnight. That's an optional step. If you want to go ahead and finish the marmalade the same day you start it, you can.
    Course Breakfast
    Keyword confiture, jam, marmalade, orange

    Ingredients

    • 6 Seville oranges (see Note)
    • 1 navel orange
    • 10 cups (2.5L) water
    • pinch of salt
    • 8 cups (1.6 kg) sugar
    • 1 tablespoon Scotch (optional)

    Instructions

    • Wash oranges and wipe them dry. Cut each Seville orange in half, crosswise around the equator. Set a non-reactive mesh strainer over a bowl and squeeze the orange halves to remove the seeds, assisting with your fingers to remove any stubborn ones tucked deep within.
    • Tie the seeds up in cheesecloth or muslin very securely.
    • Cut each rind into 3 pieces and use a sharp chef’s knife to cut the rinds into slices or cubes as thin as possible. Each piece shouldn’t be too large (no more than a centimeter, or 1/3-inch in length.) Cut the navel orange into similar-sized pieces.
    • In a large (10-12 quart/liter) stockpot, add the orange slices, seed pouch, water, and salt, as well as the juice from the Seville oranges from step #1. Bring to a boil, then reduce to a simmer, and cook until the peels are translucent, about 20 to 30 minutes. (At this point, sometimes I’ll remove it from the heat after cooking them and let the mixture stand overnight, to help the seeds release any additional pectin. But it's not imperative.)
    • Stir the sugar into the mixture and bring the mixture to a full boil again, then reduce heat to a gentle boil. Stir occasionally while cooking to make sure it does not burn on the bottom. Midway during cooking, remove the seed pouch and discard.
    • Continue cooking until it has reached the jelling point, about 218ºF degrees (103ºC), if using a candy thermometer. I cook this slightly less than other jams and marmalades because the high amount of pectin helps the marmalade set up more stiffly. To test the marmalade, turn off the heat and put a small amount on a plate that has been chilled in the freezer and briefly return it to the freezer. Check it in a few minutes; it should be slightly jelled and will wrinkle just a bit when you slide your finger through it. If not, continue to cook until it is.
    • Remove from heat, then stir in the Scotch (if using), and ladle the mixture into clean jars. Sometimes I bury a piece of vanilla bean in each jar. (Which is a great way to recycle previously-used or dried-out vanilla beans.)

    Notes

    I don’t process my jams, since I store them in the refrigerator. But if you wish to preserve them by canning, you can read more about the process here.
    Note: Sour or Seville oranges are called in French oranges amères and are available mid-winter in many other countries around the world as well.

    Orange-Glazed Polenta Cake

    By: David
    9 January 2026 at 16:28

    Orange-glazed polenta cake

    Apparently I’m not the only one who loves polenta cake. The Italians like it so much that it’s called Amor Polenta. Which means “Polenta Love.”

    Well, at least that’s what I thought it meant, because amour in French means “love.” And I assumed that it was the same in Italian. (Another reason for finally getting on that life-long ambition to live in Italy and learn Italian.) But for now, checking in an Italian dictionary, I found out that “amor” means “sake.” (As in, for the purpose of.) So I’m not sure how it got its name, but this cake makes a pretty good argument for the sake of whisking polenta into a cake.

    Orange-glazed polenta cake

    I’m one of those people who is completely crazy for anything with cornmeal, from corn bread to even a kind of kooky polenta ice cream that I’m sure no one else has ever made, because I used a completely obscure polenta that very, very few people can get their hands on. But I felt compelled to make it, for the sake of using up a little bag of that polenta that I had.

    Orange-glazed polenta cake

    Fortunately, polenta is available just about anywhere. I like to buy stone-ground polenta, which has a crunchier flavor. But you could use instant polenta for this cake, normally something I avoid. But I found myself with a bag of it and was looking for ways to use it up. And here’s where the rest of it landed.

    Like many Italian cakes, which are unlike American cakes, this is not a buttery bomb of richness. True, there is butter and a few eggs in there. But the great flavor comes from ground almonds, which tend to make the cake much moister the following day as the nut oils soak the crumb, which is one of those baking terms (unlike amor) that pretty much seems to be what it is talking about. The polenta adds a bit of a savory quality to desserts, which draws me to use it a lot when baking.

    Orange-glazed polenta cake

    This cake is a great snacking cake and I tend to walk around my apartment several times during the day, somehow landing frequently near the cake, where a serrated knife just happens to be stationed alongside. Ready and waiting to lop a slice off.

    Orange-glazed polenta cake

    In addition to a collection of polentas, I found myself with a collection of eaux-de-vie on hand. Some were gifts, others were picked up on my travels. A few are anise-based, which pair nicely with polenta, and chocolate. I have a ginger one that is great when summer fruits are in season, like peaches, nectarines, and apricots. And the long bottle in the front right, the eau-de-vie of lees that I got in Switzerland, after I found out how good raisins in lie (eau-de-vie made from leftover grape yeast, and other stuff that falls to the bottom of wine vats post fermentation) was, after gorging on cauldrons of fondue.

    As astute readers can see from the fill line of the bottle, that project never came to fruition. (I’m too busy trying organize my polentas and eaux-de-vie. And plotting a way to live in both Italy, and France.) But I did add a few shots of orange liqueur (not shown), which gave it a little boost of flavor. Not enough to be perceptible. But like that bag of instant polenta I’ve had for a few months, I was always conscious that it was there. You can use any kind of liqueur that you want – maraschino, limoncello, absinthe, kirsch, or even anise liqueur.

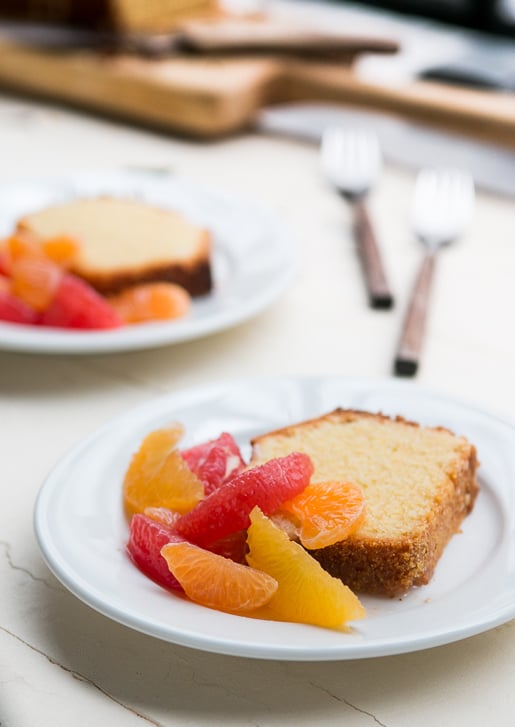
    As much as I like this as a snacking cake, it can be dressed up with a fruit compote. I sectioned some tangerines, navel oranges, and pink grapefruits, drizzled a little honey over them, and served them alongside the cake. I had planned to spoon some warm sabayon over the cake and fruit, but decided that I had too many other things to do. Namely, get cracking on using some of those bottles of liqueur that I’ve been hoarding.

    Polenta cake recipe

    Print

    Orange-Glazed Polenta Cake

    For this cake, using fine-ground polenta or instant polenta will result in the smoothest texture, although whatever is available will work. I’ve made it with coarse polenta too, and enjoy the crunch. Almond flour is available at specialty stores, Trader Joe’s, and online. If you can’t find it, grind 7 1/2 ounces (215 grams) sliced blanched almonds in a food processor with the flour until the almonds are pulverized. Although cakes like this don’t always need adornment, I did glaze it with a dribbly orange glaze that firms up and gives the top a citrus-scented fruity crunch. For those wanting to skip the liqueur in the cake, you can leave it out and increase the almond extract to 1 1/4 teaspoon. For the glaze, you replace the liqueur with orange juice.

    Ingredients

    For the cake

    • 8 ounces (225g) unsalted butter cubed, at room temperature
    • scant 1 cup (180g) sugar
    • zest of 1 lemon
    • 3 large eggs at room temperature
    • 2 tablespoons liqueur or eau-de-vie such as orange liqueur (Grand Marnier or Cointreau), kirsch or grappa
    • 3/4 teaspoon pure almond extract
    • 3/4 cup (125g) finely ground polenta plus additional for preparing the pan
    • 2 cups (215g) almond flour
    • 6 tablespoons (55g) all-purpose flour
    • 1 1/2 teaspoons baking powder preferably aluminium-free
    • 1/2 teaspoon salt

    For the glaze

    • 1 1/4 cups (170g) powdered sugar
    • 1 tablespoon orange juice
    • 4 teaspoons orange liqueur (such as Grand Marnier or Cointreau)

    Instructions

    • Butter a 9-inch (23cm) loaf pan. Dust the inside with polenta, and tap out any excess. (Note: The pan I used has a nonstick finish. If you want to make sure the cake comes out nicely you may want to cut a rectangle of parchment paper and fit it into the bottom of the pan after you prepare it, especially if using an unfinished loaf pan.) Preheat the oven to 350ºF (180ºC).
    • In the bowl of a stand mixer fitted with the paddle attachment, beat the butter, sugar and lemon zest at medium-high speed, until it’s light and fluffy, about 3 minutes. (You can also make this in a large bowl, beating the butter and sugar by hand.)
    • Add the eggs one at a time, stopping the mixer after each addition to scrape down the sides of the bowl. Mix in the liqueur and almond extract.
    • In a medium bowl, whisk together the polenta, ground almonds, flour, baking powder, and salt, until there are no lumps. Gradually mix the dry ingredients into the creamed butter mixture, just until well-combined. Do not overmix.
    • Scrape the batter into the pan, smooth the top, and bake the cake until it is golden brown on top and a toothpick inserted into the center comes out almost clean, perhaps with just a few crumbs attached, 45 to 50 minutes. Let cool on a rack for about 30 minutes, then run a knife along the outside of the cake to loosen it from the pan and tip the cake onto the rack. Let the cake cool completely before icing.
    • To glaze the cake, mix the powdered sugar with the orange juice and orange liqueur until the glaze is thick, but still runny – not too watery, but as thick as a milkshake. If necessary, add a bit more sugar if it’s too thin, or add a bit more liquid if it’s too thick. You can try smoothing a bit over the cake to see if it’s the right consistency for drizzling and dripping down the sides before glazing the entire cake.
    • Spoon the glaze over the cake, encouraging the glaze to run down the sides by nudging it towards the edges with the back of the spoon or a metal spatula.

    Notes

    Serving: When the glaze has firmed up, serve slices of the cake with a favorite fruit compote, such as fresh citrus segments, caramelized pineapple, poached pears, or sliced and sugared peach slices (peeled) or nectarines.
    Storage: The cake will keep for up to five days, if well wrapped, at room temperature. The cake will be noticeably moister the day after baking due to the oil in the nuts. It can be frozen for up to two months.

    Related Recipes and Posts

    Baking Ingredients and Substitutions

    Cornbread with Harissa Butter

    Polenta Crisp Topping

    Simple Polenta

    Cornmeal Cookies

    Cornmeal Biscotti

    Maple Pecan Sticky Buns

    By: David
    16 October 2025 at 14:16

    Maple Pecan Sticky Buns

    I’ve never been a huge fan of sticky buns because I find many of them teeth-screamingly sweet. That said, these dial down the sweetness in favor of flavor, courtesy of two of my favorite things: pecans and maple syrup. And having the two swaddled in a butterscotch-like caramel seems to make each one taste even better than they do on their own.

    Maple Pecan Sticky Buns

    I was intrigued by a new baking book, The New Sugar & Spice by Samantha Seneviratne, whose subtitle promises recipes for “bolder baking,” which immediately caught my interest. I don’t need to wow me with innovation – tweaking classics is often good enough. The wheel can only be reinvented so many times and no need to repair something that doesn’t need fixing.

    Maple Pecan Sticky Buns

    It’s unfortunate that I am hooked on both, and like other expats, maple syrup and pecans are two things that we tend to hoard. Sirop d’érable (maple syrup) is available in Paris, the best bottles are sold at natural food stores, and pecans are around, although I often find them not quite at their freshest by the time they’ve hit the store shelves. So I lug those back with me. Fortunately, on occasion, I’m treated to bags by visiting friends and guests. Thank goodness I now have an American-sized freezer.

    Maple Pecan Sticky Buns

    Well…to be honest, I used to hide them in the freezer, but since I’m a compulsive nibbler, I was getting tired of teething on frozen pecans. So I gave up and started keeping them in a drawer, which means easier access to these precious beauties.

    Maple Pecan Sticky Buns

    Sticky buns are very easy to make. You start with a simple yeasted dough, softened with milk. Once it rises, you strew the rolled out dough with a mixture of brown sugar and cinnamon. Then comes the fun part: Rolling them up!

    The doughy roll then gets sliced into spiraled wheels. Watching them rise in the pan – then rise even further in the oven, is one of the great joys in life. Eating them, of course, is the best part. But if you’ve got kids (or even a middle-aged man, like me), this is a really fun project for a weekend or during a holiday break.

    Maple Pecan Sticky Buns

    While I was making these, I posted a live video on Snapchat, which is a fun way to share short videos that I’ve been playing around with. The downside is that I got so involved with shooting and sharing that I neglected to chop the pecans before using them, as you can see in the pictures. On Snapchat, posts and videos disappear after twenty-four hours – so when it’s gone, it’s gone! But you can follow me on Snapchat for other tips, future videos and a soupçon of occasional goofiness at davidlebovitz.

    Maple Pecan Sticky Buns

    As much as I’m freaked out by new technologies, the old ones tend to vex people, too. Folks get freaked out by candy thermometers, but if you use one, you can get your caramel precisely to where it should be. I “went rogue” and didn’t use one, and my sticky buns got a touch too dark, which I liked for the “on the edge” flavor, but resulted in a sticky bun glaze that was less-runny that what some might be used to. So if you have one, you should put that candy thermometer to use when making these sticky buns.

    Maple Pecan Sticky Buns

    The result of my morning of baking was a tray full of sticky buns that were great for a mid-morning snack but not bad for bringing to a meeting later that evening, which I did. The next day, people raved about them. I’ve got a few other “bold” recipes bookmarked from Samantha’s gorgeous book. And I’m going to make sure my stock of pecans doesn’t run too low, because I’ll be making these again in the near future.

    Maple Pecan Sticky Buns

    Print

    Maple Pecan Sticky Buns

    Adapted from The New Sugar & Spice by Samantha Seneviratne
    The original recipe calls for baking eight spirals in a 9-inch (23cm) round pan, but I wanted to get nine smaller ones, so used an 8-inch (20cm) square pan and cut the rolled up dough into nine disks. You can do either. Note: Do not use a springform pan for this recipe. Because of the maple caramel, the pan may leak. Even if you wrap it well with foil, caramel may seep out and you don’t want the lovely maple-accented glaze on foil. You want it on your sticky buns.The original recipe also called for a mix of walnuts and pecans, and I opted for all pecans since they’re one of life’s great luxuries to me. But you can swap out any nuts as you wish. There was also 1/2 cup (80g) of raisins added to the caramel along with the pecans, which I omitted as well, although you’re welcome to add them, or another dried fruit, like cranberries or sour cherries.You’ll also note the recipe calls for bread flour. Its higher protein content means that you’ll have better gluten formation and sturdier bread, or buns, as in this case. Most well-stocked supermarkets carry it or you can buy it
    . You can replicate it by replacing 1 1/2 teaspoons of all-purpose flour with 1 1/2 teaspoons of vital wheat gluten, per cup, or 140g, of all-purpose flour. (In France, I use T65 organic flour and add vital wheat gluten, which is available in natural food stores.)
    Course Snack

    Ingredients

    For the dough

    • 6 tablespoons unsalted butter cubed
    • 2/3 cups (160ml) whole or lowfat milk
    • 3 tablespoons granulated sugar
    • 1 3/4 teaspoon active dry yeast
    • 1 large egg
    • 2 1/2 cups (320g) bread flour
    • 1/2 teaspoon kosher or sea salt

    For the topping

    • 6 tablespoons (3 ounces, 85g) unsalted butter
    • 1/4 cup (45g) dark brown sugar
    • 1/4 cup (60ml) maple syrup (dark amber)
    • 1/2 teaspoon kosher or sea salt
    • 1 cup (140g) pecans lightly toasted and coarsely chopped

    For the filling

    • 1/4 cup (45g) dark brown sugar
    • 2 tablespoons ground cinnamon
    • 1/2 teaspoon kosher or sea salt
    • 3 tablespoons (1 1/2 ounces, 42g) butter salted or unsalted, at room temperature

    Instructions

    • To make the dough, warm the butter, milk and sugar in a small saucepan. Pour into the bowl of a stand mixer and let stand until slightly tepid. (You can make this without a stand mixer. If so, pour the milk mixture into a medium bowl.) Sprinkle the yeast over the milk, stir gently, and let sit in a warm place until it starts to bubble, about 10 to 15 minutes.
    • Mix in the egg, flour, and salt, and knead with the paddle or dough hook at low-to-medium speed until smooth and elastic, about 5 minutes. (If kneading by hand, it may take a bit longer.) Knead the dough a few times with your hand until it’s a smooth ball, place it back in the bowl and cover the bowl with a kitchen towel. Let rise in a warm place until doubled, about 1 to 1 ½ hours. Time can vary, and it may take longer, or less time.
    • While the dough is rising, make the topping. Lightly butter a 9-inch (23cm) round or 8-inch (20cm) square cake pan. Heat the butter, brown sugar, maple syrup and salt in a small saucepan fitted with a candy thermometer and cook over medium heat until the mixture comes to a boil. When it gets foamy, after a minute or so, when a few of the bubbles start to get larger, remove from heat. (Samantha notes in her book that if using a thermometer, the temperature should read 212ºF (100ºC).
    • Pour the maple caramel into the prepared cake pan and strew the pecans over the caramel. Set aside.
    • To make the filling, mix the brown sugar, cinnamon and salt in a small bowl. Set aside.
    • When the dough has risen, knead the dough a couple of times on a lightly floured countertop and roll it into a 10-inch (25cm) square. Spread the softened butter over the dough and sprinkle evenly with the filling mixture. Roll up the dough as tightly as possible and using a serrated knife, cut the dough into 8 or 9 slices. If using a square pan, cut into 9. If using a round pan, cut into 8. Place them in the pan with the cut side up. Cover loosely with plastic wrap or a clean, lint-free kitchen towel, and let rise until almost doubled, about 1 hour.
    • Ten minutes before you’re ready to bake the sticky buns, preheat the oven to 375ºF (190ºC). Place the pan of sticky buns on a baking sheet lined with foil (to catch any overflow drips or spill) and bake until the center roll is lightly browned on top and it doesn’t feel soft when you press it with your finger, 25 to 30 minutes.
    • Remove the rolls from the oven. Let cool for 5 minutes then run a knife around the outside (if possible, as the buns may have overtaken the rims), then tip the sticky buns out onto a cooling rack or serving platter.

    Notes

    Serving and storage: Sticky buns are always best served warm, and the day they are made but are fine the next day. If you wish, you can keep them well-wrapped for a few days, rewarming them in a low oven, wrapped in foil until heated through. They can be frozen for up to two months.

    Related Posts

    Ingredients for American Baking in Paris

    Ingredient Ingredients and Substitutions

    Vegan Sticky Buns (Minimalist Baker)

    Gluten-Free Sticky Buns (Faithfully Gluten-Free)

    Chouquettes: French Cream Puff Recipe

    By: David
    17 February 2025 at 17:01
    chouquettes - French cream puffs recipe-5

    Dinner in Paris generally starts at 8 pm, especially in restaurants, and I get ravenously hungry between lunch and dinner.

    chouquettes - French cream puffs dough

    Parisians do dine rather late – often not until 9:30 pm or later, and that’s an awfully long stretch. So French people visit their local pâtisserie for an afternoon snack, known as le goûter, although nowadays Parisians often call it le snack.

    chouquettes - French cream puffs

    Le snack is often nothing more than a buttery financier or a tender madeleine. At home, French children at home are often given a split piece of baguette with a bar of dark chocolate tucked inside to keep them happy until dinner.

    But my snack of choice is invariably les chouquettes: Cream puffs covered with crunchy nuggets of sugar, then baked until golden-brown. The eggy, pillowy puffs are piled uneventfully behind the counter and sold in crisp little paper sacks, each one holding about 100 grams, or about 10. I found that engaging the counter person in a few words of niceties will often mean that before the ends of the bag are twisted shut, an extra puff will be tossed in as a little gift for l’américain.

    chouquettes - French cream puffs dough

    Nothing is easier to make than chouquettes and you can bake them right with ingredients you likely already have on hand. The only thing you’ll need to find is pearl sugar, which gives the puffs their signature crunch. Some tell me you can buy it at Ikea stores, or you can find it at King Arthur or on Amazon. If you have sugar cubes, you can crush those up into rough chunks and use those, although they’re not quite the same. And if you’re like me, and like chocolate, you could press some chocolate chips into a few of the puffs before baking.

    This is one of my favorite of all French snacks and I can polish away a whole bag, or tray, in no time. These are best made and eaten right away, or later the same day – if they last that long!

    chouquettes - French cream puffs

    Print

    Chouquettes

    From The Sweet Life in Paris
    Shaping the mounds of dough is easiest to do with a pastry bag, although you can use two spoons or a spring-loaded ice cream scoop.
    Pearl sugar is available in the U.S .from King Arthur and at G. Detou in Paris, and is also available from French companies such as Daddy (called perles de sucre) and Vahiné (sucre chouquettes). You can approximate pearl sugar by crushing sugar cubes in a sturdy zip-top freezer bag with a rolling pin or hammer.
    Course Dessert
    Cuisine French
    Servings 6 servings

    Ingredients

    • 1 cup (250ml) water
    • 1/2 teaspoon salt
    • 2 teaspoons sugar
    • 6 tablespoons (90g) unsalted butter cut into small chunks
    • 1 cup (140g) flour
    • 4 large eggs at room temperature
    • Glaze: 1 egg yolk mixed with 1 teaspoon milk
    • Pearl sugar

    Instructions

    • Preheat the oven to 425 degrees (220 C.) Line a baking sheet with parchment paper or a silicone baking mat. (Depending on the size of your baking sheets, it may take two.)
    • Heat the water, salt, sugar, and butter in a small saucepan, stirring, until the butter is melted. Remove from heat and dump all the flour in at once. Put the pan back on the heat and stir rapidly until the mixture is smooth and pulls away from the sides of the pan.
    • Allow dough to cool for two minutes, then briskly beat in the eggs, one at a time, until smooth and shiny.
    • Using two spoons, scoop up a mound of dough with one spoon roughly the size of an unshelled walnut, and scrape it off with the other spoon onto the baking sheet. You can also use a pastry bag fitted with a plain 1/2-inch tip and pipe them.
    • Place the mounds evenly-spaced apart on the baking sheet(s). Brush the top of each mound with some of the egg glaze then press the pearl sugar over the top and sides of each mound. Use a lot. Once the puffs expand rise, you’ll appreciate the extra effort (and sugar.)
    • Bake the cream puffs until puffed and well-browned, about 25 to 30 minutes. If they get too dark midway through baking, lower the heat of the oven to 375ºF (190ºC) and continue baking. (If you want to make them crispier, you can poke a hole in the side with a knife after you take them out of the oven to let the steam escape.)

    Notes

    Storage: The cream puffs are best eaten the same day they’re made. Once cooled, they can be frozen in a zip-top freezer bag for up to one month. Defrost at room temperature, then warm briefly on a baking sheet in a moderate oven, until crisp.

    Kumquat Marmalade

    By: David
    19 January 2025 at 15:41

    kumquat marmalade recipe

    I’ve been on a marmalade bender lately. Well, it’s actually been for the last few weeks. Winter, of course, is marmalade season and the markets in Paris are heaped with citrus: Corsican clementines, pretty yellow bergamots, hefty pink grapefruits from Florida (although some infer appellations from elsewhere – namely, the Louvre), leafy lemons from Nice, and lots and lots of oranges.

    Kumquat marmalade

    The stands are so piled up that it’s not uncommon to be walking down the aisle and have an orange roll off of the piles and land on your foot. (Which is why it is a good idea to wash any fruit before you use it.) This means I’ve got so many jars of marmalade, that when my friend Luisa stopped by and saw the jars piled on top of a shelf in my bedroom, she said “I’ve doing the same thing ” at her apartment in Berlin. Sometimes I think jam-making could be classified as an epidemic and if so, there’s ample evidence that I’m ready for an intervention.

    kumquat marmalade recipe

    While kumquats were once classified with their look-alike citrus brethren and sistern (admittedly, it can be hard to tell as it’s difficult to get a look under their navels), they are now placed in another genus category (Fortunella), even though they share many characteristics of citrus fruits.

    Kumquat marmalade

    One of those characteristics is that they are winter fruits. And another is that they are très bon pour la santé (good for your health), containing lots of vitamin C. And they also make you feel happier, since not only does their tangy-bitter flavor brighten up even the darkest of winter day, nothing makes me happier than to wake up in the morning and gaze at my shelf of marmalade first thing in the morning.

    Kumquat marmalade

    I was especially happy when I was doing my shopping at the outdoor market and came across a big bin of kumquats. I scooped up a nice-sized bag of them and brought them home, where they patiently waited in the refrigerator until I decided what to do with them.

    Originally I’d considered giving them a quick-candying and strewing them over poached prunes with a scoop of ice cream. But I ended up sticking my fingers into the bowl of prunes a few too many times during the week and ended up with a small puddle of cinnamon-spiced dark syrup pooled in the bottom of a container in my refrigerator, which I didn’t think would go with anything.

    Kumquat marmalade

    So I decided to get out my little serrated knife, slice up my Fortunella fruits, and make marmalade. I added a couple of lemons not just to bulk it up, but because I thought with the added sugar, the marmalade would benefit from some extra acidity.

    Kumquat marmalade

    I normally spoon my marmalades on morning toast, but after I made this batch, I had cleaned up the kitchen and was going to reward myself to a nice bowl of split pea soup for lunch with some Comté cheese and – like most good ideas (and a few of the bad ones) – it suddenly occurred to me that the tart marmalade might be nice with the nutty cheese I was cutting into batons.

    Kumquat marmalade

    And sure enough, it was. Fortunately I have three nice jars of marmalade to add to my collection. So far this year I’ve made Seville orange marmalade (eight jars) and four jars of mixed marmalade, using the bergamots and citron that were plucked off a tree in Sicily. After all that slicing, seeding, and simmering, the last pot of marmalade has been jarred and stored; they’ll last me through the winter. And if I am prudent, a number of spring and summer mornings as well.

    Kumquat marmalade

    Print

    Kumquat Marmalade

    Many of the little rings of kumquats will, unfortunately, come apart as you cook the marmalade. The reward, however, is gorgeous jars of tangy marmalade that you’ll be happy to spread on your morning toast or serve with a bit of cheese after dinner. I served mine with Comté, but a nice goat cheese or another nutty mountain cheese, like Gruyère, would pair nicely with it. It takes a bit of patience to slice and pluck out all the seeds from the kumquats, but you can get 2 to 3 jars of marmalade for your efforts. I use a small serrated knife to slice off the stem end, then start slicing the kumquats crosswise, until I get close to the center. Finally, I stick the tip of the knife into the area where the seeds are and slip them into a small bowl. Because the seeds are rather large, any that you miss you can usually find just by doing a little scanning of your pile of sliced kumquats. I use oval Nagami kumquats, which are more puckery than the round Meiwi kumquats, which you sometimes come across. Do try to get organic or unsprayed fruit from your local market or natural food store. The kirsch is optional, but it does nicely round out the flavor of the marmalade. You can substitute another liquor, such as gin, Grand Marnier or Cointreau, light rum, or a dash of brandy. Or it can be omitted, if you wish.

    Ingredients

    • 2 lemons stemmed, halved lengthwise, seeded, and very thinly sliced
    • 1 pound (450g) kumquats stemmed, seeded, and sliced
    • Reserve the seeds from the lemon and kumquats
    • 5 1/2 cups (1.3L) water
    • 2 cups (400g) sugar
    • pinch of salt
    • Optional: 1/2 teaspoon kirsch or other liquor

    Instructions

    • Put the lemon slices in a large non-reactive pot. Cover with cold water and bring to a boil. Reduce the heat and simmer until the lemons are translucent, about 5 minutes. Drain. (Discard the water.)
    • Put the blanched lemons back in the pot. Tie the seeds from the lemons and kumquats securely in a piece of cheesecloth and add the seed sack to the pot along with the sliced kumquats and water. Bring to a boil; remove from heat, cover, and let stand 24 hours.
    • The next day, put a small plate in the freezer.
    • Add the sugar and salt to the pot, and cook the marmalade for 30 to 45 minutes over medium heat. Remove the bag of seeds and when it’s cool enough to handle, squeeze the seeds in the cheesecloth using your hands or place it in a ladle and press it with the back of a soup spoon (being careful not to break the fabric and release the seeds) over the jam pot to so the pectin goes directly into the marmalade mixture.
    • Continue cooking until it has reached the jelling point, about 220ºF (104ºC) degrees, if using a candy thermometer. To test the marmalade, turn off the heat and put a small amount on the plate that has been chilled in the freezer and briefly return it to the freezer. Check it in a few minutes; it should be slightly jelled and will wrinkle a bit when you slide your finger through it. If not, continue to cook until it wrinkles slightly on the chilled plate when you nudge it.
    • Remove from heat, then stir in the kirsch (if using), and ladle the mixture into clean jars.

    Notes

    Note: I store my jams and marmalades in a cool place, often the refrigerator if not planning to use them within a few weeks. if you wish to can or preserve them, you can check out these canning tips.

    Related Recipes

    Kumquat Marmalade (Recipe Girl)

    Kumquat Marmalade with Star Anise (Drizzle & Dip)

    Sunday Morning Kumquat Jam (Amateur Gourmet)

    Small Batch Kumquat Marmalade (Food in Jars)

    Maple Kumquat Marmalade (A Bloggable Feast)

    Salted Chocolate Chip Tahini Cookies

    By: David
    6 January 2025 at 15:48

    Whenever I mention “Chocolate Chip Cookies,” this recipe seems to come up in the conversation. I’ve been making chocolate chip cookies all of my life, and am always happy to add new ones to my repertoire. I’ve made them with various kinds of flours, different types (and sizes) of chocolate, some with nuts (or cocoa nibs), and others without. In some cases, the salt in the chocolate chip cookies may be in the butter, or sprinkled on top. Or there might be a double-dose of chocolate in them.

    But I haven’t done too much tinkering with the butter, because to me, that’s one thing that’s non-negotiable in chocolate chip cookies. But when I heard about tahini, my loyalty to butter was put into question.

    You (and I) can relax, because these chocolate chip cookies do use butter, but get an underlying richness from sesame paste, a common ingredient in Middle Eastern cooking that I always keep on hand. So although I thought I’d done everything possible that a man could do to a chocolate chip cookie, and then some, I was finally ready to tackle a batch of these chocolate chip cookies.

    The recipe is adapted from Modern Israeli Cooking by Danielle Oron, that also was in the New York Times. In addition to having everything on hand, they were easy to mix up, and the soft sesame paste made a dough that was hard not to snack on before the cookies went into the oven.

    I prefer to chop chocolate for chocolate chip cookies, rather than use conventional chocolate chips. I have nothing against chocolate chips, but most are made of what’s called baking-resistant chocolate, which is designed to hold their shape once baked. I like big, oozing chunks of chocolate in my chocolate chip cookies, and I don’t care so much what they look like, so much as how they taste.

    So I took a knife to a block of chocolate and made my own. Some makers are now producing what are called chocolate “chunks” which may or may not have similar qualities, but chopping a block of chocolate, while a bit messy, puts me in one of my happy places. And I’m happy to make my own chips, or chunks, I should say.

    These cookies were some of the best chocolate chip cookies that have ever come out of my oven, and I don’t say that lightly. The tahini gives them a gentle savory taste, with a faint musky flavor that pairs remarkably well with dark chocolate and a touch of salt, so don’t be afraid to use a very strongly flavored chocolate. I futzed with the original recipe a little, to make them chewier, and couldn’t resist adding even more chocolate. But can you blame me?

    Print

    Salted Chocolate Chip Tahini Cookies

    Adapted from Modern Israeli Cooking: 100 New Recipes for Traditional Classicsby Danielle Oron
    I used chopped chocolate, rather than chocolate chips, for these cookies since I wanted large chunks of oozing chocolate rather than little bits of chocolate here and there. (But feel free to use chips if you'd like.) Normally when I chop chocolate for cookies, I add any small bits and pieces on the cutting board along with the bigger chunks. But for these, I wanted distinct, more assertive pieces of chocolate, so I sorted through and just used large chunks, saving the smaller bits for another baking project. I baked these cookies in a larger size, then tried them in smaller portions, and give baking times for each. Whichever size you bake them in, since everyone's oven is different, it's important to use visual clues rather than rely on precise minutes and numbers to tell when they're done. Keep an eye on them during the final minutes of baking; the cookies are done when quite pale in the center and browned around the edges. Note that the dough is best when it rests in the refrigerator overnight. You could bake them sooner, if you just can't wait.
    Servings 18

    Ingredients

    • 8 tablespoons (115g, 4 ounces) unsalted butter at room temperature
    • 1/2 cup (120ml) tahini well stirred
    • 1/2 cup (100g) granulated sugar
    • 1/2 cup (90g) packed light brown sugar
    • 1 large egg at room temperature
    • 1 large egg yolk
    • 1 teaspoon vanilla extract
    • 1 cup plus 2 tablespoons (150g) flour
    • 3/4 teaspoon baking soda
    • 1 teaspoon kosher or sea salt
    • 2 cups (280g) bittersweet or semisweet chocolate chunks or chocolate chips
    • flaky sea salt such as Maldon or fleur de sel

    Instructions

    • In the bowl of a stand mixer, beat the butter, tahini, granulated sugar and brown sugar on medium speed for 2 to 3 minutes, until fluffy. (The dough can also be made in a large mixing bowl, stirred with a spatula.)
    • Stop the mixer and scrape down the sides. Add the egg, the yolk, and vanilla, and continue to mix for another minute, stopping the mixer to scrape down the sides of the bowl during mixing, to make sure the eggs are getting incorporated.
    • In a small bowl, whisk together the flour, baking soda, and kosher or sea salt. With the mixer on low speed, add the dry ingredients until just combined, then add the chocolate chips. Do not overmix. Cover the dough and refrigerate overnight.
    • Preheat the oven to 325ºF (160ºC). Line two baking sheets with parchment paper or silicone baking mats.
    • Form the cookies into rounds using an ice cream scoop, or your hands. For small cookies make each 1 1/2-inch (3,5cm), for larger cookies, make them 2-inches (5cm) round. Place them evenly spaced on the baking sheets, 3-inches (8cm) apart). Bake one sheet at a time, so you can keep an eye on them, in the middle rack of the oven.
    • Bake the cookies, turning the baking sheet in the oven midway during baking, until the cookies are golden brown around the edges but still pale in the center. For small cookies, about 12 minutes, for larger cookies, about 14 to 15 minutes. Remove from the oven, sprinkle cookies with a bit of flaky sea salt, and let the cookies cool on the baking sheet. Bake the remaining cookies the same way.

    Notes

    Storage: These cookies will keep for two or three days at room temperature, but are definitely better the same day they're baked. The unbaked dough can be refrigerated for up to one week, and frozen for up to two months.
    Notes: Nut and seeds butters, such as peanut and almond, have different oil content than tahini, and I don't think they could be swapped out. (If you do try it with another nut or seed butter, let us know how they come out in the comments.) For those looking for a chocolate chip cookie without tahini, check out these Salted Butter Chocolate Chip Cookies or my recipe for Chocolate Chip Cookies in Ready for Dessert.


    Related Posts and Recipes

    Salted Chocolate Chip Cookies

    Tahini and Almond Cookies

    Baking Ingredients and Substitutions

    How to Make Tahini

    Ingredients for American Baking in Paris

    Soom Tahini (Amazon)

    Gluten-free baking and Substitutions

    Pumpkin Cheesecake with Pecan Praline Sauce

    By: David
    16 November 2024 at 21:56

    It’s that time of year again. And that only means one thing: time to start thinking about the holiday baking. In Paris, bakery windows fill up with Bûches de Noël (Yule log cakes) and bourriches (wooden crates) of oysters are piled up at the markets. The chocolate shops are crammed with people, buying multiple boxes as gifts, and people splurge on caviar and Champagne, one of the few things that go on sale in France during the holidays.

    One thing you don’t see is the use of pumpkin in desserts. A tart or pie (or ice cream) made of squash might sound funny, especially to non-Americans, but helps to remember that pumpkins, and other squash, are technically fruit. One could also point out the classic Swiss Chard Tart from Provence (which is in a whole other category), and Melanzane al cioccolato, eggplant with chocolate sauce, which I like. (Which one could argue is good because it’s smothered in dark chocolate.) But I don’t think everything goes with chocolate: A friend tried the hot chocolate with oysters at a famed chocolate shop in Paris, and after her description, I wasn’t rushing over there to try a cup.

    To get that last image out of your mind, I present pumpkin cheesecake with a pecan praline sauce, that has nothing not to like about it. Cream cheese and sour cream, a buttery cookie crust, and a brown sugar and bourbon-tinged sauce loaded with crunchy pecans. I’m in.

    DIYers may raise an eyebrow at using canned pumpkin. I’ve got a few reasons for using it. (And as many of you perhaps know, it’s not made from pumpkin, but a variety of squash similar to butternut squash.) One, is that when writing a recipe, it’s easy to get consistent, similar results when we’re all using the same ingredient. And two, it’s a heckuva lot easier, which is appreciated around the holidays when all of us have enough on our plates, and in our ovens, and it’s  fewer dishes to wash to boot.

    If you want to go the other route, you can also make your own cream cheese and Graham crackers, grow your own pecans, churn up your own butter, and make your own cake pan. If you do go that route, let me know when your cheesecake is done ; )

    In the meantime, I’m standing over my stove, stirring warm, just-toasted pecans into my praline sauce before lacing it with a dash of bourbon.

    The praline sauce is decidedly on the sweet side. But that didn’t stop me (like, at all…) from dipping my spoon into it over and over and over again. Be sure to toast the pecans before using them. My pet-peeve in restaurants is when they don’t toast nuts. Toasting any nut usually improves it by at least 99%, if not more, so if you’re not consistently toasting your nuts before using them on salads, sauces, and in ice creams, start doing it now. It’s not too late.

    But I can’t imagine this cheesecake being served without it. Although I could imagine eating the sauce without the cheesecake. And if you’re anything like me, you might find yourself spooning it over ice cream, ladling it over pumpkin pie (without the marshmallow topping), or even spooning it right into your mouth, like I do.

    Print

    Pumpkin Cheesecake with Pecan Praline Sauce

    If using canned pumpkin, make sure that you don't use canned pumpkin pie 'filling' (which is sweetened and spiced); use canned pumpkin that is 100% pumpkin puree. If you want to make sugar pumpkin puree yourself, you can split a sugar pumpkin (or butternut squash) in half and scrape out the seeds. Butter the cut side of the pumpkin and bake cut side down on a parchment-lined baking sheet in a 375ºF/190ºC oven until very tender, about 35 to 45 minutes. When cool enough to handle, scoop out the flesh and puree in a blender or food processor, or pass it through a food mill. If you want to balance the sweetness of the sauce, you could add a scant teaspoon of apple cider vinegar or lemon juice to it, or to taste. Conversely, adding more liquor will take the edge off as well. Outside of the U.S., I often use speculoos cookies in place of the Graham crackers for the crust. If you go that route, you might want to reduce the butter in the crust by about 20% since speculoos cookies tend to be more buttery than Graham crackers. I use a glass-bottom springform pan for cheesecakes, which makes serving them much easier.
    Servings 12 servings

    Ingredients

    For the crust

    • 1 1/2 cups (180g) Graham cracker crumbs
    • 4 tablespoons (60g) melted butter
    • 2 tablespoons sugar
    • 1/4 teaspoon ground cinnamon

    For the pumpkin cheesecake filling

    • Three 8-ounce (680g) packages cream cheese at room temperature
    • 1 1/4 cups (250g) sugar
    • grated zest one lemon preferably unsprayed
    • 4 large eggs at room temperature
    • One 15-ounce (425g) canned pumpkin puree
    • 1/2 cup (125g) sour cream or whole-milk plain yogurt
    • 1 tablespoon cornstarch or 2 tablespoons flour
    • 1 teaspoon vanilla extract
    • 1 teaspoon ground cinnamon
    • 3/4 teaspoon dried ground ginger
    • 1/4 teaspoon ground nutmeg
    • 1/4 teaspoon ground cloves
    • pinch of salt

    Pecan praline sauce

    • 3/4 cup (105g) packed light or dark brown sugar
    • 1/2 cup (125ml) heavy cream
    • 6 tablespoons (85g) unsalted butter
    • 1/4 cup (60ml) maple syrup
    • 1/2 teaspoon kosher or sea salt
    • 1/4 cup (60ml) bourbon
    • 1 1/2 cups (160g) pecans toasted and coarsely chopped
    • 1/2 teaspoon vanilla extract

    Instructions

    • To make the crust, in a medium bowl, mix the Graham cracker crumbs together with the melted butter, sugar, and cinnamon until the crumbs are thoroughly moistened. Butter a 9-inch (23cm) springform pan then press the crumbs evenly across the bottom of the pan. Refrigerate until ready to bake.
    • Preheat the oven to 350ºF (180ºC). Bake the crust until it feels set in the center, 10 to 12 minutes. Let cool on a wire rack. Turn the oven down to 325ºF (165ºC).
    • To make the filling, in the bowl of stand mixer fitted with the paddle attachment (or by hand, in a large bowl), beat together the cream cheese, sugar, and lemon zest, until smooth. Add the eggs one at a time, stopping the mixer between each addition to scrape down the sides of the mixing bowl, then add the pumpkin puree, sour cream, cornstarch or flour, and vanilla extract, along with the spices and salt.
    • Line the outside bottom of the springform pan with foil so it reaches all the way up to the top of the outside of the pan. If you have to use several pieces, I recommend triple-wrapping it to prevent leaking or water getting in the cake pan. (Better yet, use extra-wide foil, so you only need one sheet.) Scrape the mixture into the prepared springform pan and smooth the top. Place the cheesecake in a larger pan, such as a roasting pan, then add very warm water to the larger pan until it reaches halfway up the outside of the cake pan.
    • Bake the cheesecake in the oven until the center looks just slightly set, but not wet and sloshy in the center when you jiggle the pan. I start checking the cheesecake at the 50 minute mark, as it usually takes about 50 minutes to 1 hour, but may take up to 1 hour and 15 minutes. Remove the cake from the oven, then remove the cake from the water bath and let cool completely on a wire rack. Refrigerate for at least 4 hours before serving.
    • Make the pecan praline sauce by heating the brown sugar, cream, butter, maple syrup and salt in a medium saucepan over medium-high heat, until it comes to a boil, stirring frequently. Let boil for 1 minute without stirring. Remove from heat and add the bourbon, pecans, and vanilla.

    Notes

    Serving: Run a sharp knife around the outside of the cheesecake to release it from the springform pan, then remove the sides of the pan. Dip the knife in warm water, wipe it dry, and use it to cut clean slices from the cheesecake. Serve with a ladleful of warm sauce poured over it. If the sauce gets too thick upon standing, you can thin it with milk or water.
    Storage: The baked or unbaked crust can be made up to three days ahead and stored at room temperature (if baked), or refrigerated (unbaked). It can also be frozen either baked or unbaked for 2-3 months. The baked cheesecake will keep for up to 4 days in the refrigerator.

    Related Recipes and Links

    Dulce de leche cheesecake

    Ingredients for American Baking in Paris

    Pumpkin Ice Cream

    Cheesecake

    Maple Pumpkin Flan

    Homemade Graham Crackers (Smitten Kitchen)

    Homemade bourbon (Bourbon of the Day)

    Homemade salt (Ruhlman)

    Cranberry Sauce with Candied Oranges

    By: David
    16 November 2024 at 21:55

    Cranberry Sauce recipe-6

    It’s easy to forget about Thanksgiving in Paris. There are no bags of stuffing mix clogging the aisles in the supermarkets. If you asked a clerk where is the canned pumpkin, they would look at you like you were fou (crazy). And if you open the newspaper, you won’t come across any sales on whole turkeys. In fact, it’s quite the opposite; a friend saw a 5 kilo turkey, an 11 pound bird, at the market the other day for €68kg, or €340 ($424).

    (Although I think if you spent over four hundred dollars on a turkey, you wouldn’t forget it for a long, long time.)

    Cranberry Sauce with Candied Oranges

    I suggested that the turkey vendor perhaps forgot a comma because whole turkeys are, indeed, available in Paris, and they actually excellent since most are fermier, not the plump whoppers you see in the states. The only thing you have to be careful about is that one turkey might not be enough if you’re feeding a large crowd, say, a group of over six people.

    Savvy Americans know to order a whole turkey in advance from their butcher and – get this: You can ask them to cook it for you. Yes, since the butchers usually have spits with roasting chickens on them, it’s usually not a problem for them to slide a turkey on there. That’s especially nice because most people in Paris just have one oven and it’s hard to tie it up for the entire day with just a bird roasting in it when you’ve got so many other things to bake and cook off.

    Cranberry Sauce with Candied Oranges

    The reason I am sharing this recipe today, rather than days ago when everyone was in a tizzy posting recipes, shopping and preparing their menus, is that I kind of forgot that it’s Thanksgiving. Actually, I didn’t quite forget, but wasn’t swept up in the frenzy because this week, and today, are just like any other week or day in Paris.

    People go to work and school, banks and stores are open, and no one is setting their alarms for le vendredi noir (Black Friday), although that’s starting to happen in France ever since the government loosened their restrictions on allowing sales more than the government mandated twice-yearly ones, as they did before the economy took a dip. (Tomorrow, I suspect at least one vendor selling an expensive turkey in Paris is going to have to offer a serious mark-down if he wants to sell that bird.)

    Cranberry Sauce with Candied Oranges

    So we’re celebrating tomorrow night with some friends who are making dinner. I’m pitching in and doing some baking, as well as bringing a nice bottle of Sauternes. I also happened to have a few cans of cranberry sauce that I had brought back from the states, that I was planning to bring, just for fun.

    I sent my hostess a photo and she wrote back right away, threatening to blackmail me by making my canned contraband photo public. I beat her to the punch, posting it on Instagram. But when I noticed that of the four ingredients in the can, two were industrial sweeteners, I decided to take matters into my own hands.

    Cranberry Sauce with Candied Oranges

    Fortunately I had a stash of fresh cranberries in my freezer, since if a turkey was €68 a pound, I’d have to dig deeper into my pockets if I was going to have to buy fresh cranberries in Paris on Thanksgiving Day.

    Cranberry Sauce with Candied Oranges

    I candied some organic orange slices (which were normally priced), simmered up a syrup with the sharpness of cider vinegar and a hit of dark rum, then added my precious canneberges, cooking them ’til they popped. I stirred in the candied oranges, then packed it up, ready to go – getting a recipe in just under the wire.

    Happy Thanksgiving!

    Print

    Cranberry Sauce with Candied Oranges

    Note that the orange slices may fall apart as they get close to being done. Not to worry; they’re just going to be chopped up later. If you want, you can substitute 3/4 cup (180ml) orange juice for the water that you cook the cranberries in. I use dark rum, but whiskey, bourbon, or an orange-flavored liqueur, such as Grand Marnier or Cointreau, would work nicely in its place. You can double or triple the recipe if you wish.

    Ingredients

    • 1 large naval orange preferably unsprayed, or another variety, with seeds removed
    • 3/4 cup (180ml) water, plus 3/4 cup (180ml) water
    • 1/2 cup (100g) granulated sugar
    • 1/2 cup, packed (90g) light brown sugar
    • 2 tablespoons dark rum
    • 1 stick cinnamon
    • 1 1/2 tablespoons cider vinegar
    • 1/8 teaspoon ground allspice
    • 1 cup (110g) fresh or frozen cranberries

    Instructions

    • Lop off the two ends of the orange. With a sharp, serrated knife, cut the orange into 1/3-inch (1cm) slices.
    • In a medium-sized nonreactive saucepan, cover the orange slices with cold water. Bring to a boil, reduce heat, and cook at a low boil for 10 minutes. Drain. Return the oranges to the saucepan. Cover with water again, bring to a boil, and cook for another 10 minutes. Drain and rinse with cold water.
    • Return the orange slices to the saucepan, add 3/4 cup of water and granulated sugar. Bring to a boil then reduce the heat to a low boil and cook until the liquid is reduced to a thick syrup. During cooking, turn the oranges a few times in the reducing syrup so that they candy evenly.
    • As the liquid cooks down, close to when there is very little in the saucepan, monitor them closely turning them frequently to avoid burning them. Remove from heat once most of the liquid is evaporated. Tilt the oranges into a colander and let cool.
    • In the same saucepan, add the other 3/4 cup water, brown sugar, rum, cinnamon stick, vinegar, and allspice. Bring to a boil, add the cranberries, then reduce the heat slightly and cook until the cranberries pop and just start to fall apart. Chop the candied oranges into little pieces about the size of peas and add the candied oranges to the cranberries. Cook for about a minute, then remove from heat.

    Notes

    Serving: Pluck out the cinnamon stick and serve the sauce warm or at room temperature.
    Storage: The sauce can be made up to one week in advance and refrigerated. Bring to room temperature before serving.

    Related Recipes

    Cranberry Sauce with Red Wine and Figs

    Chocolate Pecan Pie

    Mom’s Roast Turkey (Simply Recipes)

    French Apple Cake

    By: David
    11 November 2024 at 15:42

    It’s interesting how many views of Paris there are, which you notice if you follow the variety of voices that write about life in the City of Lights. (A mistake some writers make is to call it the City of Light, and ‘lights’ in actually plural.) I tend to find all the quirks and report on the sardonic side of things, which for some reason, always find their way into my life. But the main reason is that I live in Paris full time and don’t just get to sampe my way through the lovely pastry shops and meet chocolatiers, but like most Parisians, I also spend a fair amount of time wrestling with perplexing bureaucracy and other idioms of life in the City of Fight Light.

    For example, last week I went to the largest fabric store in Paris where I always buy étamine (cotton gauze), which I couldn’t locate so I asked a salesperson to direct me there. He was having a nice chat with his co-workers but was kind enough to take a moment to tell me “Non”, they didn’t carry it…and went back to his conversation. After I raised an eyebrow and asked a few more times, just be sure, he and all the others in the group shook their heads, confirming with absolute certainty that they definitely did not have that in stock.

    Because I was absolutely certain that they did, I went down one level and, of course, found a huge bolt of it right on top of the pile of other rolls of fabric. C’est comme ça…

    Having a French partner helps, and he also helps me in the kitchen, like when Romain arrived with a bag of apples from a friend’s farm in Burgundy. Some were dinged up a bit, as they weren’t from the supermarché, but French apples are delicious for baking, where bumps and bruises magically disappear.

    So to keep things in perspective (as best I can…) I like to read other voices from Paris, such as Dorie Greenspan, whose book, Around My French Table, is a hefty collection of her favorite recipes and stories about Paris. She lives on the opposite side of the city, in a different neighborhood. And where I am sometimes defeated by city life, as a “part-time Parisian,” as she often calls herself, she manages to see the good in everything.

    This is a very typique French recipe for home cooks, made with not a lot of ingredients, relying on no special techniques or hard-to-find equipment, and loved by all. The cake is easily mixed up in a bowl, scraped into a cake pan, and in less than the time it takes to run to the pâtisserie for a store-bought cake—or a seemingly simple length of fabric—you can have an authentic French cake…right from your own oven.

    When a journalist interviewed me for an article about her, she ended the interview with; “So David, what is it like to sit around Dorie’s French table?”

    I sat there for a few moments scratching my head to remember, then not sure of what to say, I finally replied, “I’ve not sat around Dorie’s French table.” Which was true. When she comes to Paris, we generally go out exploring. The idea of sitting indoors while Paris awaits just isn’t as interesting to me as sharing pastries on a park bench or hitting an outdoor market with her.

    If you want to sit at Dorie’s table, the line starts here. However while you wait, you can feast on her recipes, just as I’m doing.

    Print

    French Apple Cake

    Adapted from Around My French Table by Dorie Greenspan
    Dorie doesn’t specify any type of apple but instead advises that you should use a mix of them. I don’t know what kind mine were since Romain brought them to me. The rum is really a great flavor in this cake, but if you’re avoiding alcohol, you could double or triple the vanilla to compensate. I also like this recipe because you can make it with ingredients easily on hand. Being American, I was tempted to add a dusting of ground cinnamon to the apples, but then it wouldn’t be authentically French. Hence I often decide to add a dollop of crème fraîche alongside, but it's wonderful just as it is.
    The original recipe uses a springform pan but if you don't have one, you can use an 8-inch (20cm) cake pan, buttering it well and lining the bottom with a circle of parchment paper before adding the batter. I've also make it in a 9-inch (23cm) cake pan and it works well, although it won't be a high.
    Course Dessert
    Cuisine French
    Servings 8 cake

    Ingredients

    • 3/4 cup (110g) flour
    • 3/4 teaspoon baking powder
    • pinch of salt
    • 4 (about 2 pounds, 1kg) large apples a mix of varieties
    • 2 large eggs at room temperature
    • 3/4 cup (150g) sugar
    • 3 tablespoons dark rum
    • 1/2 teaspoon vanilla extract
    • 8 tablespoons (115g) butter salted or unsalted, melted and cooled to room temperature

    Instructions

    • Preheat the oven to 350ºF (180ºC) and adjust the oven rack to the center of the oven.
    • Heavily butter an 8-inch (20cm) springform pan and place it on a baking sheet.
    • In a small bowl, whisk together the flour, baking powder, and salt.
    • Peel and core the apples, then dice them into 1-inch (3cm) pieces.
    • In a large bowl, beat the eggs until foamy then whisk in the sugar, then rum and vanilla. Whisk in half of the flour mixture, then gently stir in half of the melted butter
    • Stir in the remaining flour mixture, then the rest of the butter.
    • Fold in the apple cubes until they’re well-coated with the batter and scrape them into the prepared cake pan and smooth the top a little with a spatula.
    • Bake the cake for 50 minute to 1 hour, or until a knife inserted into the center comes out clean. It may take less time, depending on the apples, so check the cake 5 or so minutes before the recommended baking time. Let the cake cool for 5 minutes, then run a knife around the edge to loosen the cake from the pan and carefully remove the sides of the cake pan, making sure no apples are stuck to it.
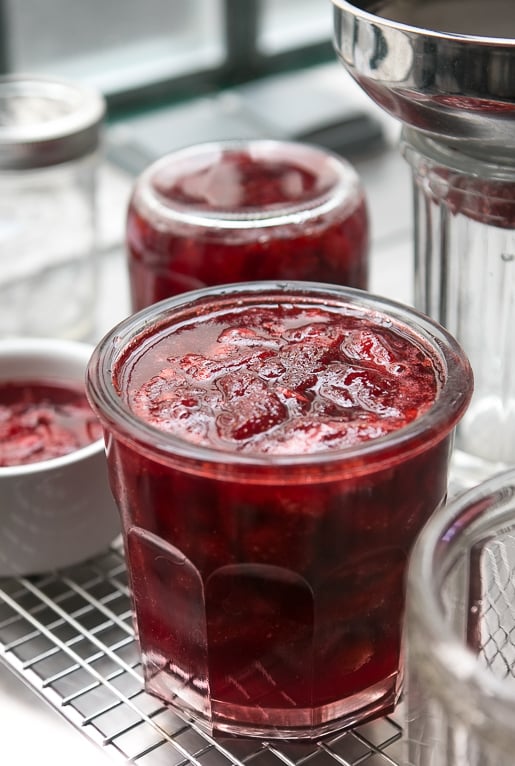
    Notes

    Serving: Serve wedges of the cake just by itself, or with crème fraîche or vanilla ice cream.
    Storage: The cake will keep for up to three days covered. Since the top is very moist, it’s best to store it under a cake dome or overturned bowl.

    Related Posts and Recipes

    Sauce Gribiche, Au Pif

    Tuesdays with Dorie

    WTF

    French Tart Dough

    American Baking Ingredients in Paris

    Apple Spice Cake

    L’enfer

    Apple Jelly

    Received — 5 June 2024 ⏭ David Lebovitz

    Cherry Compote

    By: David
    5 June 2024 at 18:14

    I think I have something wrong with me. I seem to be afflicted with a particular malady that forces me to buy way too many summer fruits when they’re in season. It gets particularly dire when faced with apricots and cherries, two fruits whose seasons are much shorter than the others. The first fresh apricots I saw were back in upstate New York, around the 1980s, and I’d never seen them before. Someone brought us a basket of the tender, squishy little orange fruits to the restaurant that I worked at, and I remember being completely taken off guard, as the only apricots I’d ever seen were the dried ones. And while I loved the crinkly dried specimens, those fresh beauties with a red blush were a whole other taste entirely.

    Fresh Cherry Compote recipe

    Then, when I moved to California, I discovered how abundant fresh apricots are (or can be), as they are in France. But no matter how abundant – or not – cherries are when the season is in full swing, I always consider them extra-special fruits and give a prominent place in my kitchen. At the beginning of the season, they’re incredibly expensive and rarely good. Then, as the season moves along, they start showing up in larger mounds at the market, and the prices get gentler, coaxing me to buy as many as I can heft.

    Fresh Cherry Compote recipe

    Fresh Cherry Compote recipe-3

    This week, I was helpless when faced with an overload of summer fruits at the market. And in addition to a giant bag of apricots, two bulging sacks of tomatoes, and eight white nectarines, I bought 2 kilos (about 4 1/2 pounds, give or take a few cherries) of fresh cherries — and from the looks of the other shoppers, it was more than any normal person would buy. (Although I think I made the vendor’s day.) But I couldn’t help it. They were Burlat cherries and I’d bought a small bag from the same vendor last week at the market, and there he was again, tempting me with more. Once I got home, I got my cherry pitter out, and pitted half of them, saving the others to eat fresh. (Except I almost polished off the fresh ones I was reserving as I was pitting these!)

    Fresh cherries are, of course, great fresh. But cooking them can deepen, and even improve their flavor, especially nice if you get home and find yourself with a bag of rather wan ones. Or ones that you might snag at the end of the market, when the vendors are trying to get rid of any extras that might not keep until the next market day.

    Fresh Cherry Compote recipe-4

    In addition to being the answer to what the heck you (or I) are going to do with all those cherries, this recipe also deftly answers that age-old question: Can I freeze that? And the answer is a big, resounding, “Heck, yeah!” Once the compote has cooled, it freezes perfectly in zip-top freezer bags or other containers that you prefer to use, and will last up to a year. (You can also freeze pitted fresh cherries on their own as well.)

    And let me tell you, it’s great to stumble upon a bag of cherry compote that may have moved to an unfavorable position in your freezer as summer shifted into fall – or winter, when they can become quickly forgotten. Once defrosted, and perhaps rewarmed, they’re terrific served with vanilla ice cream, plain yogurt, or alongside a cake, such as almond cake, gâteau de savoie, or angel food cake.

    Fresh Cherry Compote recipe-5

    I like to boost their flavor with a handful of dried sour cherries, added midway during cooking, so they plump up and absorb the cherry juices, which add another dimension of cherry flavor. A shot of kirsch also dials up the flavor nicely.

    Print

    Cherry Compote

    Be sure to use a larger pot that you think. For 2 pounds (1kg) of cherries, I used a 6-quart (6l) pan. Since the cherry juices will foam up as they cook, using a larger pot – and removing the lid from time-to-time – will keep your from having to clean up a sticky mess. I’ve didn’t use much sugar here, so you can add more to taste, if your cherries aren’t as sweet as mine were. If you can get sour cherries, feel free to add some in place of the sweet cherries. If so, you may need to increase the sugar a little, to taste as well.

    Ingredients

    • 2 pounds (1kg) fresh cherries
    • 1/4 cup (50g) sugar
    • cup (40g) optional: 1/3 dried sour cherries
    • 2 teaspoons kirsch (or another fruit-based liqueur, or eau-de-vie)
    • 1-2 drops pure almond extract

    Instructions

    • Stem and pit the cherries. Put them in a large, nonreactive pot or saucepan and stir in sugar. Turn the heat to medium, cover, and cook for 10 minutes, lifting the lid and stirring them frequently, to encourage juicing and to make sure the liquid the cherries exude doesn’t foam up and overflow.
    • After 10 minutes of cooking, add the sour cherries, if using, and cook for 5 to 10 more minutes, until the cherries are wilted and completely cooked through.
    • Remove from heat and stir in the kirsch and almond extract. Let cool before storing or serving. The juices will thicken as the compote sits.

    Notes

    Storage: The cherry compote can be stored in the refrigerator for up to 5 days. It can be frozen for up to one year.

    Related Recipes

    No-Recipe Cherry Jam

    Cherry Mess

    Quick-Candied Cherries

    Cherries in Red Wine Syrup

    Lemon Yogurt Cake with Apricot-Cherry Compote

    Coconut Chocolate Macaroon Recipe

    By: David
    20 April 2024 at 03:34

    Chocolate coconut macaroons

    Many people tell me this is one of their favorite recipes from my cookbook, Ready For Dessert. In addition to these fantastic Coconut-Dipped Chocolate Macaroons in it, you’ll find the much-loved recipe for Fresh Ginger Cake, which makes a fantastic dessert served with sliced, juicy peaches or flavorful strawberries and raspberries in the summer, or tangy lemon cream in the winter, as well as my other most frequently requested recipes.

    I’m often asked about the different between Parisian macarons and American-style macaroons, like these. Both are egg white-based, however the European version (which was invented in Italy) uses almonds whereas the American ones use coconut. There’s some dispute about how the American ones came to be made of coconut; one theory is that European immigrants who came to the United States couldn’t get almonds, or they were too expensive, so they used coconut.

    Another theory is that European companies wanted to ship their macarons over longer distances, so swapped out coconut for the spoilage-prone nuts. Others credit Franklin Baker, an American flour miller, who found the then-exotic shredded coconut more interesting (and less-expensive) to use than nuts. Either way, I like all kinds of macaroons…or macarons.

    Coconut macaroon recipe

    The French do make coconut cookies, which are called Congolais or Rochers à la noix de coco, usually shortened to Rochers coco, or coconut “rocks.” I’ve not seen them dipped in chocolate in any French bakery – but why not?

    Chocolate coconut macaroons

    I’ve tweaked this recipe over the years and tested them with flour alternatives, which I’ve noted in the headnote in the recipe, and they come out great. You can even skip swiping the bottoms in bittersweet chocolate if you wish. No matter how you make them, I hope they become one of your favorite cookies, too.

    Print

    Coconut and Chocolate Macaroons

    From Ready for Dessert
    I invariably make these cookies when I have extra egg whites on hand. The dough freezes beautifully if I don't plan to make the macaroons right away. These coconut macaroons can be made without the flour by substituting 2 1/2 tablespoons of cornstarch or potato starch for the flour. Readers have told me the recipe works well with 1/4 cup matzoh meal substituted in place of the flour.
    Course Dessert
    Cuisine American
    Keyword coconut, cookie, macarooon
    Servings 30 Cookies

    Ingredients

    • 4 large egg whites
    • 1 1/4 cups (250g) sugar
    • 1/4 teaspoon salt
    • 1 tablespoon honey
    • 2 1/2 cups (200g) unsweetened shredded coconut (see note)
    • 1/4 cup (35g) flour
    • 1/2 teaspoon vanilla extract or vanilla bean paste
    • 3 ounces (90g) bittersweet or semisweet chocolate chopped

    Instructions

    • In a large skillet or wide saucepan, mix together the egg whites, sugar, salt, and honey.
    • Over low heat on the stovetop, stir the egg whites and sugar together until the mixture is tepid, but not warm or hot. You don't want to cook them; just warmed slightly so they are looser.
    • Add the coconut, flour, and vanilla. Continue to stir the mixture over medium heat for a few minutes until it thickens to a cohesive mass. (It'll be like very thick oatmeal and the bottom will very slightly start to scorch.) Remove from heat. Transfer to a bowl to cool to room temperature.
    • When ready to bake, line a baking sheet with parchment paper or silicone baking mat and preheat the oven to 350º F (180ºC).
    • Form the dough into 1 1/2-inch (4cm) rounds in your hands, squeezing the dough to coax them into rough rounds (remember, the French call them "rocks," so they can be a uneven - for smoother rounds, dampen your hands), then place them evenly spaced on the baking sheet. Bake the macaroons until deep golden brown, about 18 to 20 minutes. Cool completely.
    • To dip the macaroons in chocolate, melt the chocolate in a clean, dry bowl set over a pan of simmering water (or in a microwave.) Line a baking sheet with plastic wrap or parchment paper. Dip the bottoms of each cookie in the chocolate and set the cookies on the baking sheet. Refrigerate 5-10 minutes, until the chocolate is set.

    Notes

    Unsweetened shredded coconut is available in most natural food shops or you can purchase it online. Flaked coconut is larger and I haven't tried these macaroons with the flakes but if that's all you have, I would pulse the flakes in a food processor a few times until they're finely shredded.
    Storage: The baked macaroons will keep for up to three or four days if stored in an airtight container. If dipped in chocolate, store the cookies in a cool place. The dough can be refrigerated for up to one week or frozen for at least two months.

    Far From the Tree: Apple-Pear Cocktail

    By: David
    19 December 2023 at 16:50

    The other day I was thinking of cocktails that were fall and winter-friendly. Calvados (apple brandy) of course is always in season, but I also had a bottle of spiced pear liqueur from St. George Spirits in California on hand that has a lovely pear flavor mingled with a bouquet of spices, that I’ve been meaning to incorporate into a cocktail.

    I had a hunch that it would be well-paired with French apple brandy, and that hunch proved correct in this Far From the Tree cocktail, a nod to the expression that “the apple doesn’t fall far from the tree” as the apple brandy – and the sparkling apple cider – fell into my kitchen, which are quite far from any trees. But happily, they all made it into my glass.

    (And I’m hoping that all made sense. I’ve been trying to translate some American expressions for my French partner, especially “They drank the Kool-Aid,” which I’ve decided just isn’t translatable.)

    The Spiced Pear Liqueur is made by St. George spirits, a distiller in my old stomping grounds of Alameda, California. I knew the founder, Jörg Rupf,  who started distilling European-style spirits in the San Francisco Bay Area in 1982. At the time, few knew what eau-de vie was.

    Jörg was a wealth of knowledge and I always learned something when I spent time with him, and was surprised when he told me one day that it took around 50 pounds (23kg) of Bartlett pears to make just one bottle of pear eau-de-vie, and he laughed that his biggest restaurant account sold only a half bottle of eau-de-vie every two months. He reveled in the bounty of excellent produce in California, making eau-de-vie from everything, including kiwifruit, apples, raspberries, pears, and even holly berries.

    One day while at the distillery he gave me a sip of apple brandy which he’d made but promptly forgot about, which was similar to Calvados, but without the terroir. (To be called “Calvados” the apple brandy has to be made in Normandy with only certain varieties of local apples, with a few pears added for their aroma, and must be aged in wooden barrels for at least two years.) His apple brandy had been sitting in a barrel for ten years and when he discovered it, it was delicious.

    Jörg eventually retired from distilling and sold the company, which is still going strong, and St. George Spirits under master distiller Lance Winters, continues to make excellent liqueurs that include gin and other distillations (they now call their eau-de vie “brandy”), absinthe, vodka (including a green chile one), shochu and Bruto Americano, a botanically-rich alternative to Campari that I particularly enjoy, with no artificial colorant, made with an expressive blend of local botanicals and other ingredients.

    But even if you’re not in Normandy, or Northern California, and far from an apple (or pear) tree, you can still enjoy these fall and winter flavors in a cocktail.

    Print

    Far From the Tree

    If you can't get the spiced pear liqueur, you could use a good-quality triple sec, orange liqueur (such as Grand Marnier) or another good fruit-based liqueur. Allspice Dram (homemade or store-bought) is another possible liqueur to use, which has spicy notes.
    Be sure to use a slightly larger coupe glass if you have it, since depending on the size of your ice cube, you want there to be enough room for the sparkling cider on top.
    Course Drinks
    Servings 0

    Ingredients

    • 2 ounces Calvados
    • 1/2 ounce sweet vermouth
    • 1/2 ounce St. George spiced pear liqueur
    • sparkling hard cider or sparkling wine

    Instructions

    • Add the Calvados, sweet vermouth, and pear liqueur to a cocktail mixing glass.
    • Fill the glass two-thirds full of ice and stir briskly until well-chilled, about 15 seconds. Strain into a chilled coupe glass. Add an ice cube and a splash of sparking cider.

    Pasta Bolognese

    By: David
    27 September 2023 at 10:25

    During the current lockdown in Paris, you can still get most things at the supermarket. True, there’s less of a selection as some items are more popular than others; butter, of course, is popular, and so is flour. Fortunately I always have a good stock of both on hand, lockdown or not, but I did neglect to replenish my chocolate supply. But the pasta and rice aisles have suffered the most damage, and the selection of what’s available has been sparse.

    Since I’m limiting my time going out, and food shopping, the other day I went to the frozen food store, Picard. Everyone in France loves Picard, although I’m usually happy to dice an onion and don’t need to buy frozen pre-diced onions, nor do I need to buy ice cream. (Theirs is rather good, but I’ve usually got several batches of my own in the freezer.) But I was craving pizza and they have a frozen one with arugula and speck that’s pas mal, as they say in French, which actually means “not bad.” However frozen pizza seems to be as popular as rice and pasta, so I had to get another kind that wasn’t so great (pas terrible.) But I did pick up a bag of those onions and some ground beef because I’ve also been craving Pasta Bolognese, and they were there, and so was I. So I caved.

    Continue Reading Pasta Bolognese...

    Salted Butter Chocolate Sauce

    By: David
    18 September 2023 at 14:19

    salted butter chocolate sauce recipe

    When it comes to baking and desserts, one doesn’t necessarily think of salt as a flavor. But more and more, I keep considering, and reconsidering, the role that salt plays in just about everything I bake. And because I keep both salted and unsalted butter on hand – I can’t imagine my morning toast without a little salted butter spread over the top – I’ll sometimes reach for the salted variety when tackling a baking project or making dessert.

    salted butter chocolate sauce

    I wasn’t the first person to put salt on dessert; people from various cultures have been sprinkling salt on fresh fruit for ages. And many pastry chefs, as well as some big chocolate companies, have gotten in on the “salt in chocolate” act as well.

    fleur de sel chocolate

    But I’ve gotten so used to sprinkling it on sweets that sometimes if I’m having my last course in a restaurant and I think the dessert needs a little perking up, you’ll find me looking around the table for a little bowl of flaky sea salt. Salt is so important to me that I’ll sometimes carry a little wooden box of fleur de sel, which when I’d bring out in restaurants, my co-diners would give me a look as if I was being pretentious. (Then – of course – they’d ask if they could have a pinch too.)

    Continue Reading Salted Butter Chocolate Sauce...

    ❌